FIXONIC
SellSavedMy Fixonic
Official iFixit API visual reference

iPhone 8 Plus Lightning Connector Assembly Replacement

If you've tried cleaning the lightning port to...

Apple iPhone 8 Plus Moderate 40 minutes - 2 hours Guide 111156
Open the authorised source
Licensed iFixit integration

This attributed iFixit guide is displayed through Fixonic's recorded commercial API permission. iFixit remains the independent source and author of the procedure.

Guide overview

Before you begin

If you've tried cleaning the lightning port to no avail, use this guide to replace the Lightning connector assembly in your iPhone 8 Plus, which can resolve many charging and connectivity issues.
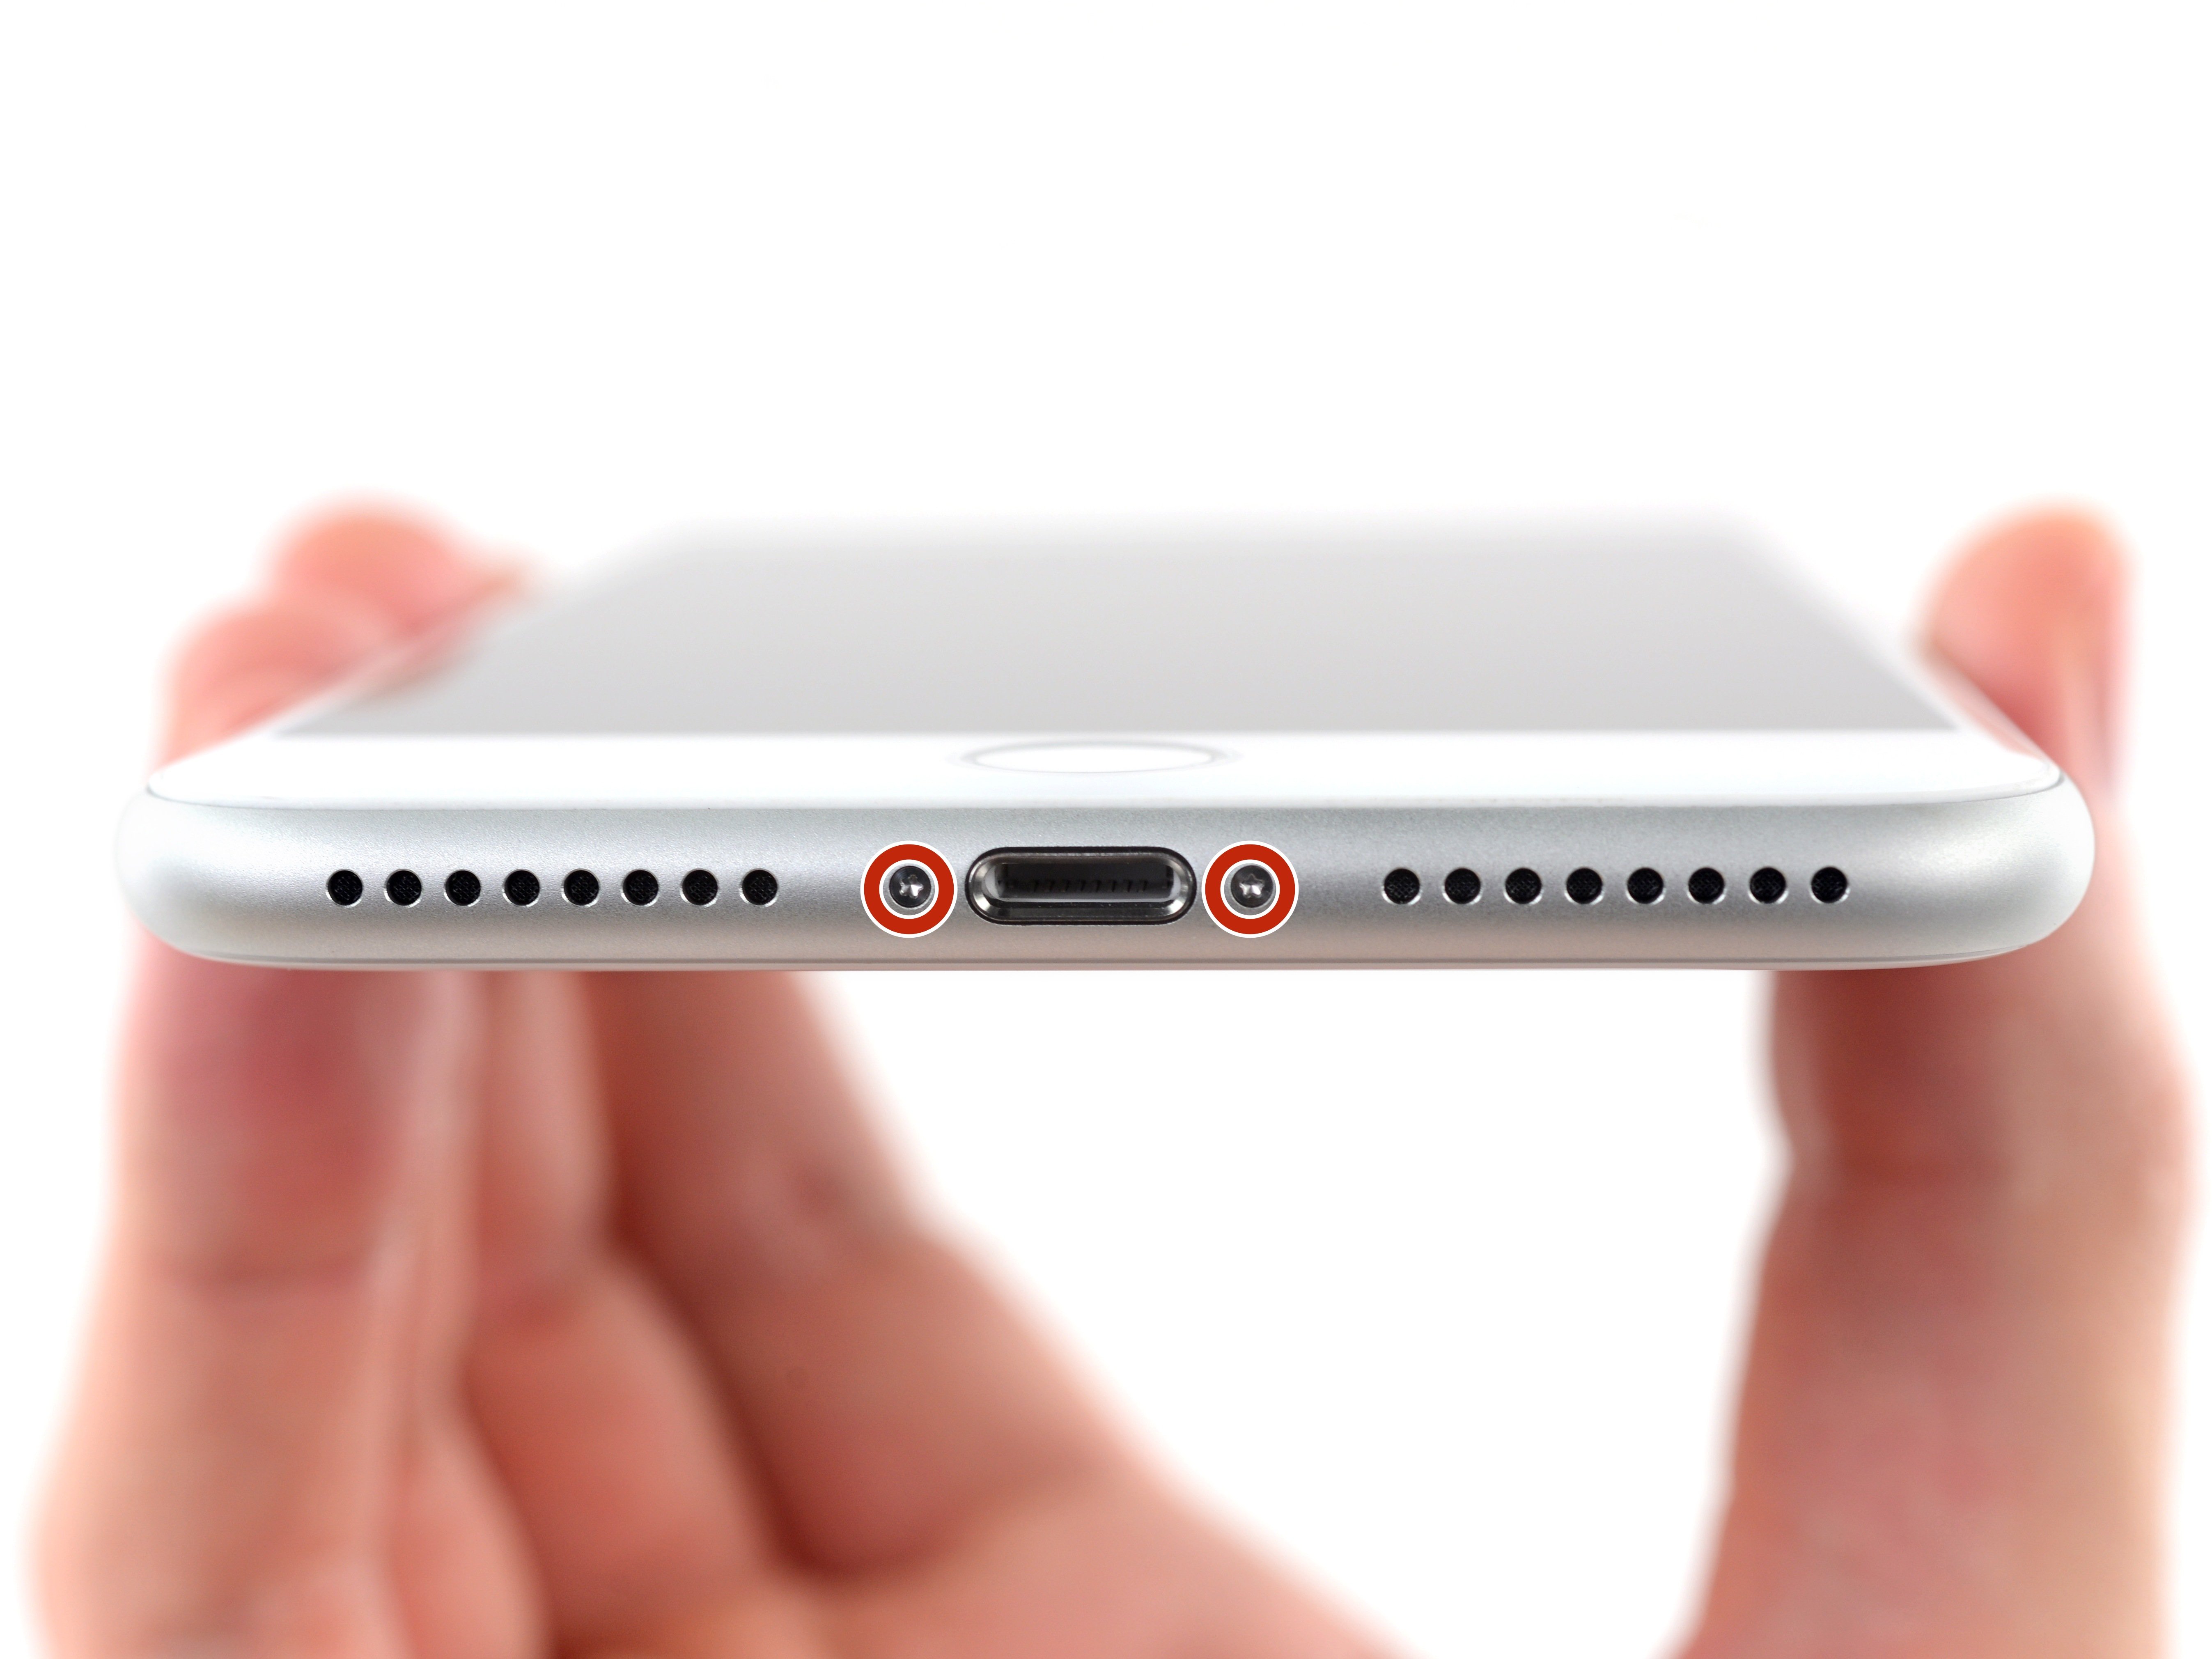
Step 1

Repair step

  • Before you begin, discharge your iPhone battery below 25%. A charged lithium-ion battery can catch fire and/or explode if accidentally punctured.
  • Power off your iPhone before beginning disassembly.
  • Remove the two 3.5 mm pentalobe screws from the bottom edge of the iPhone.
  • Opening the iPhone's display will compromise its waterproof seals. Have replacement seals ready before you proceed past this step, or take care to avoid liquid exposure if you reassemble your iPhone without replacing the seals.
Step 2

Mark your opening picks

  • If inserted too far, an opening pick can damage your device. Follow this step to mark your pick and prevent damage.
  • Measure 3 mm from the tip and mark the opening pick with a permanent marker.
  • You can also mark the other corners of the pick with different measurements.
  • Alternatively, tape a coin to a pick 3 mm from the tip.
Step 3

Tape over any cracks

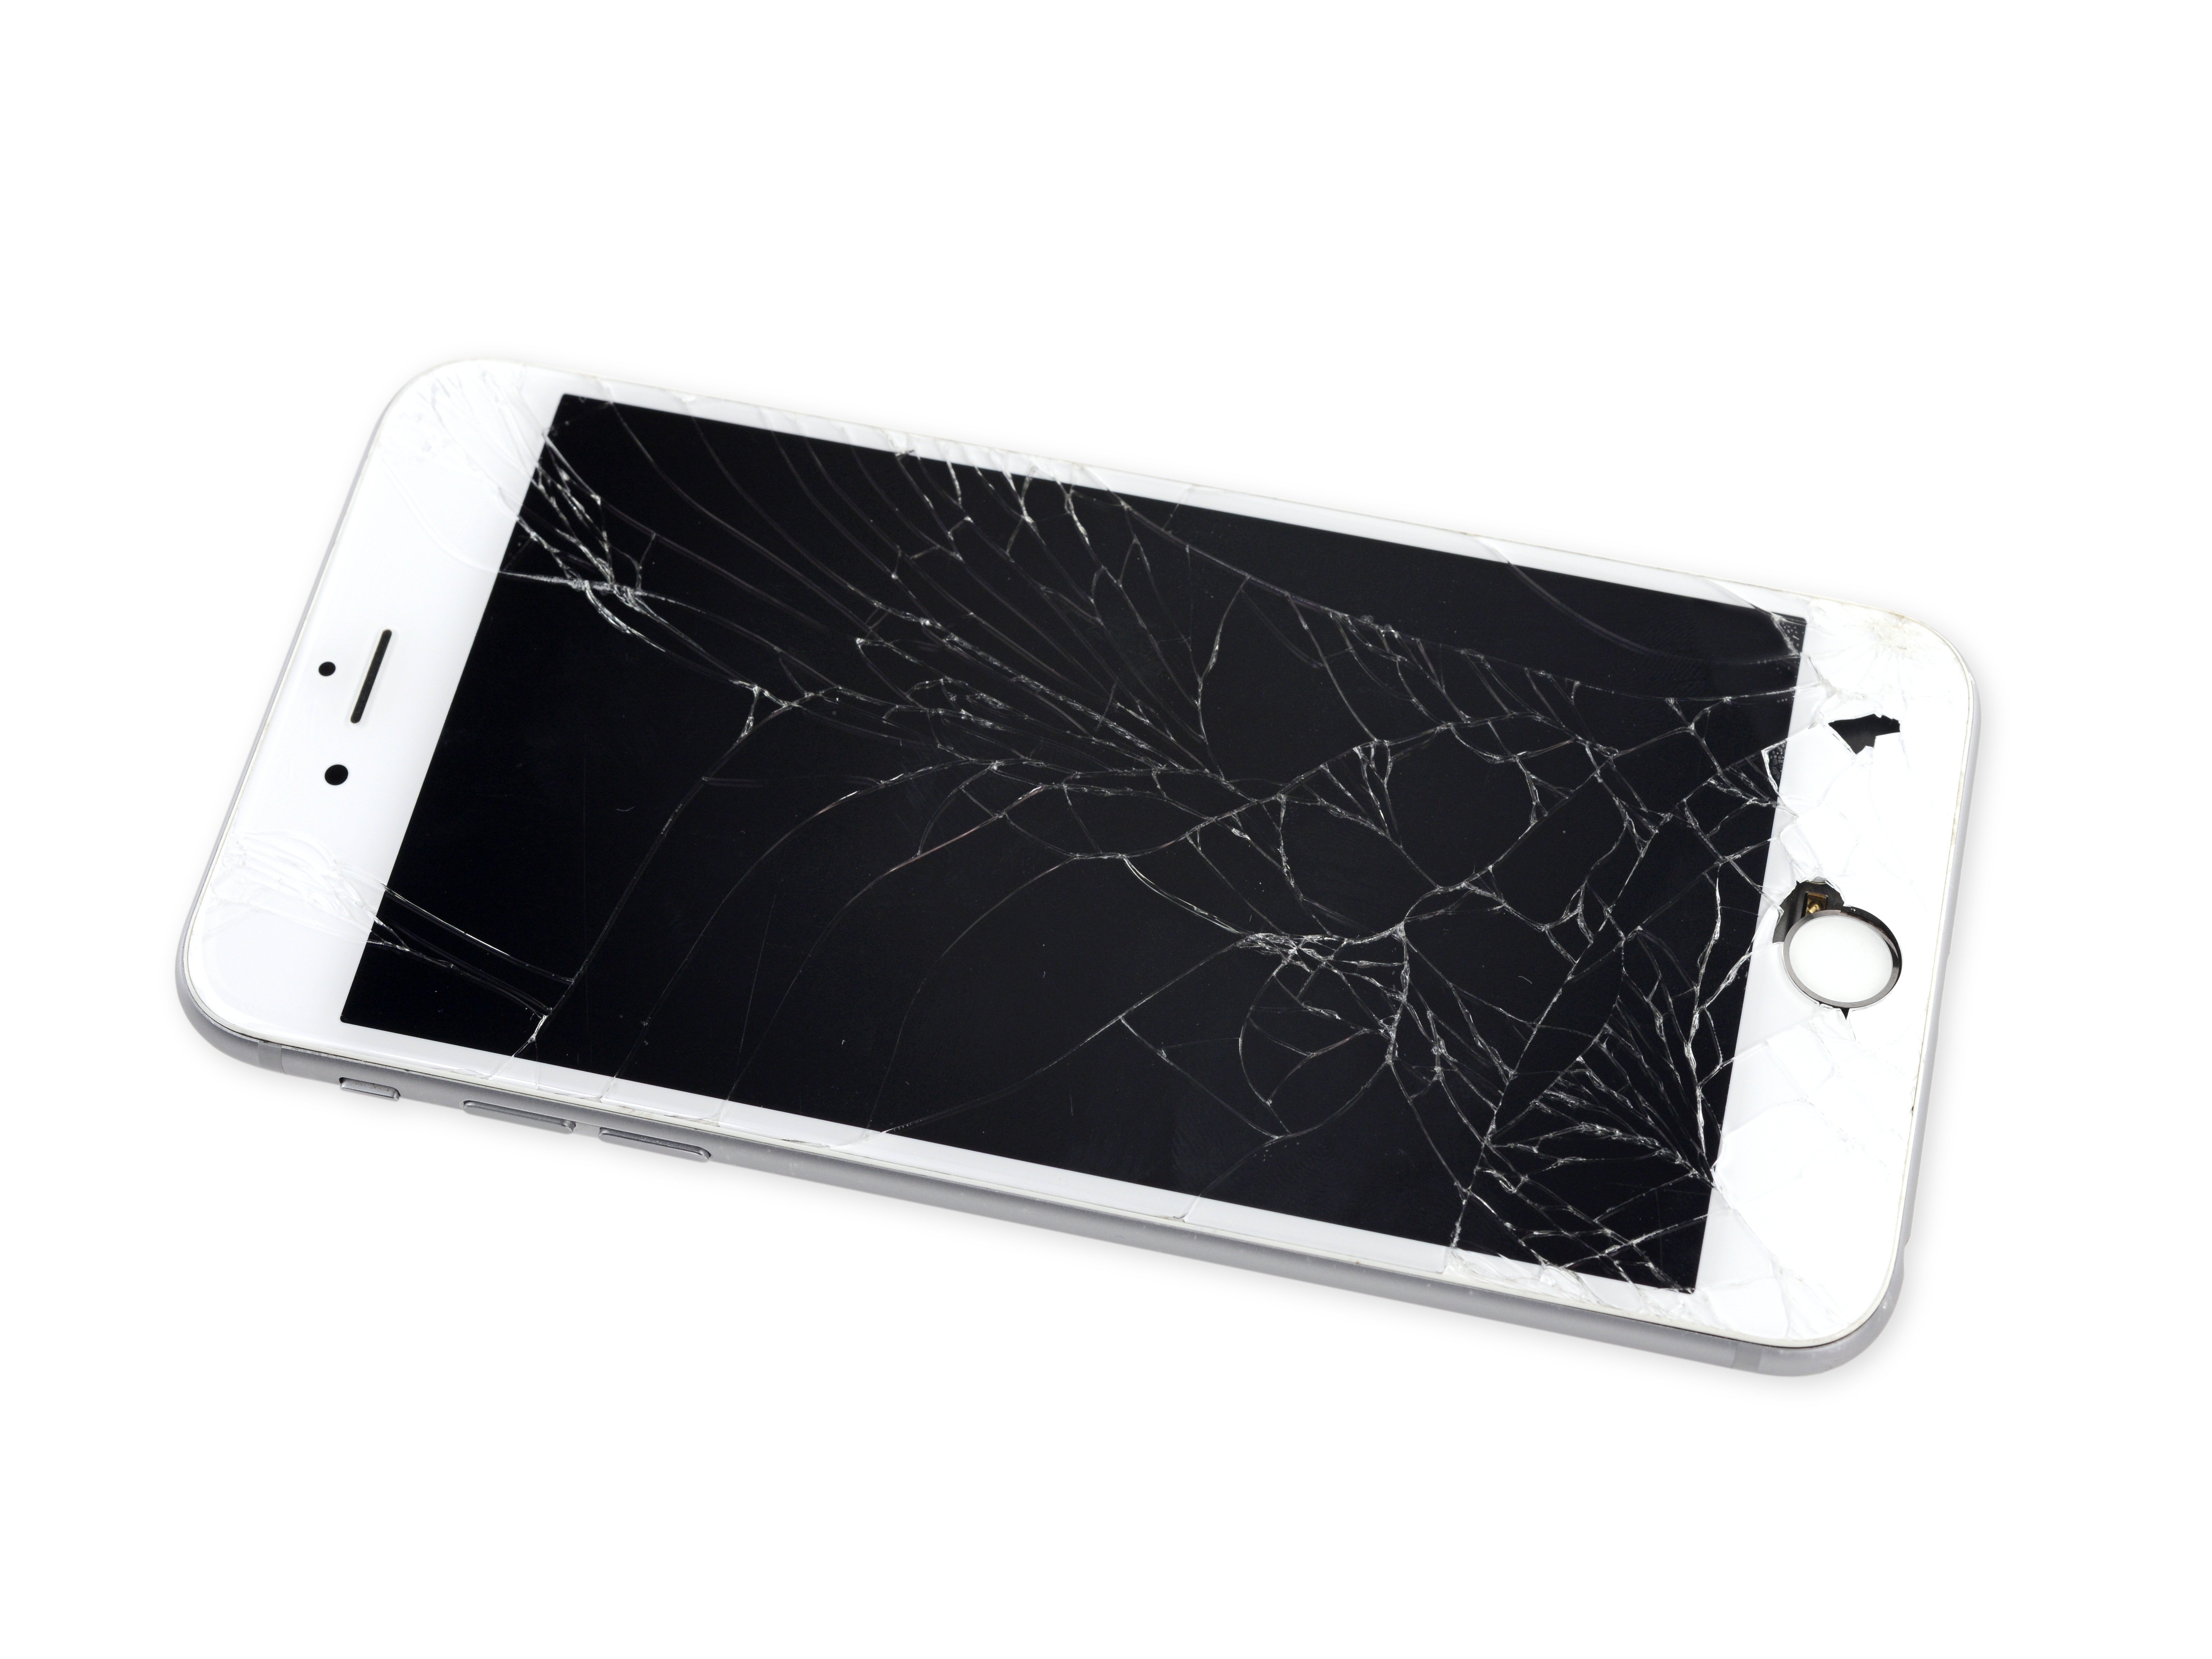
  • If your iPhone has a cracked screen, keep further breakage contained and prevent bodily harm during your repair by taping over the glass.
  • Lay overlapping strips of clear packing tape over the iPhone's screen until the whole face is covered.
  • Wear safety glasses to protect your eyes from any glass shaken free during the repair.
  • If you can't get the suction cup to stick in the next few steps, fold a strong piece of tape (such as duct tape) into a handle and lift the screen with that instead.
  • If all else fails, you can superglue the suction cup to the screen.
Step 4

Anti-Clamp instructions

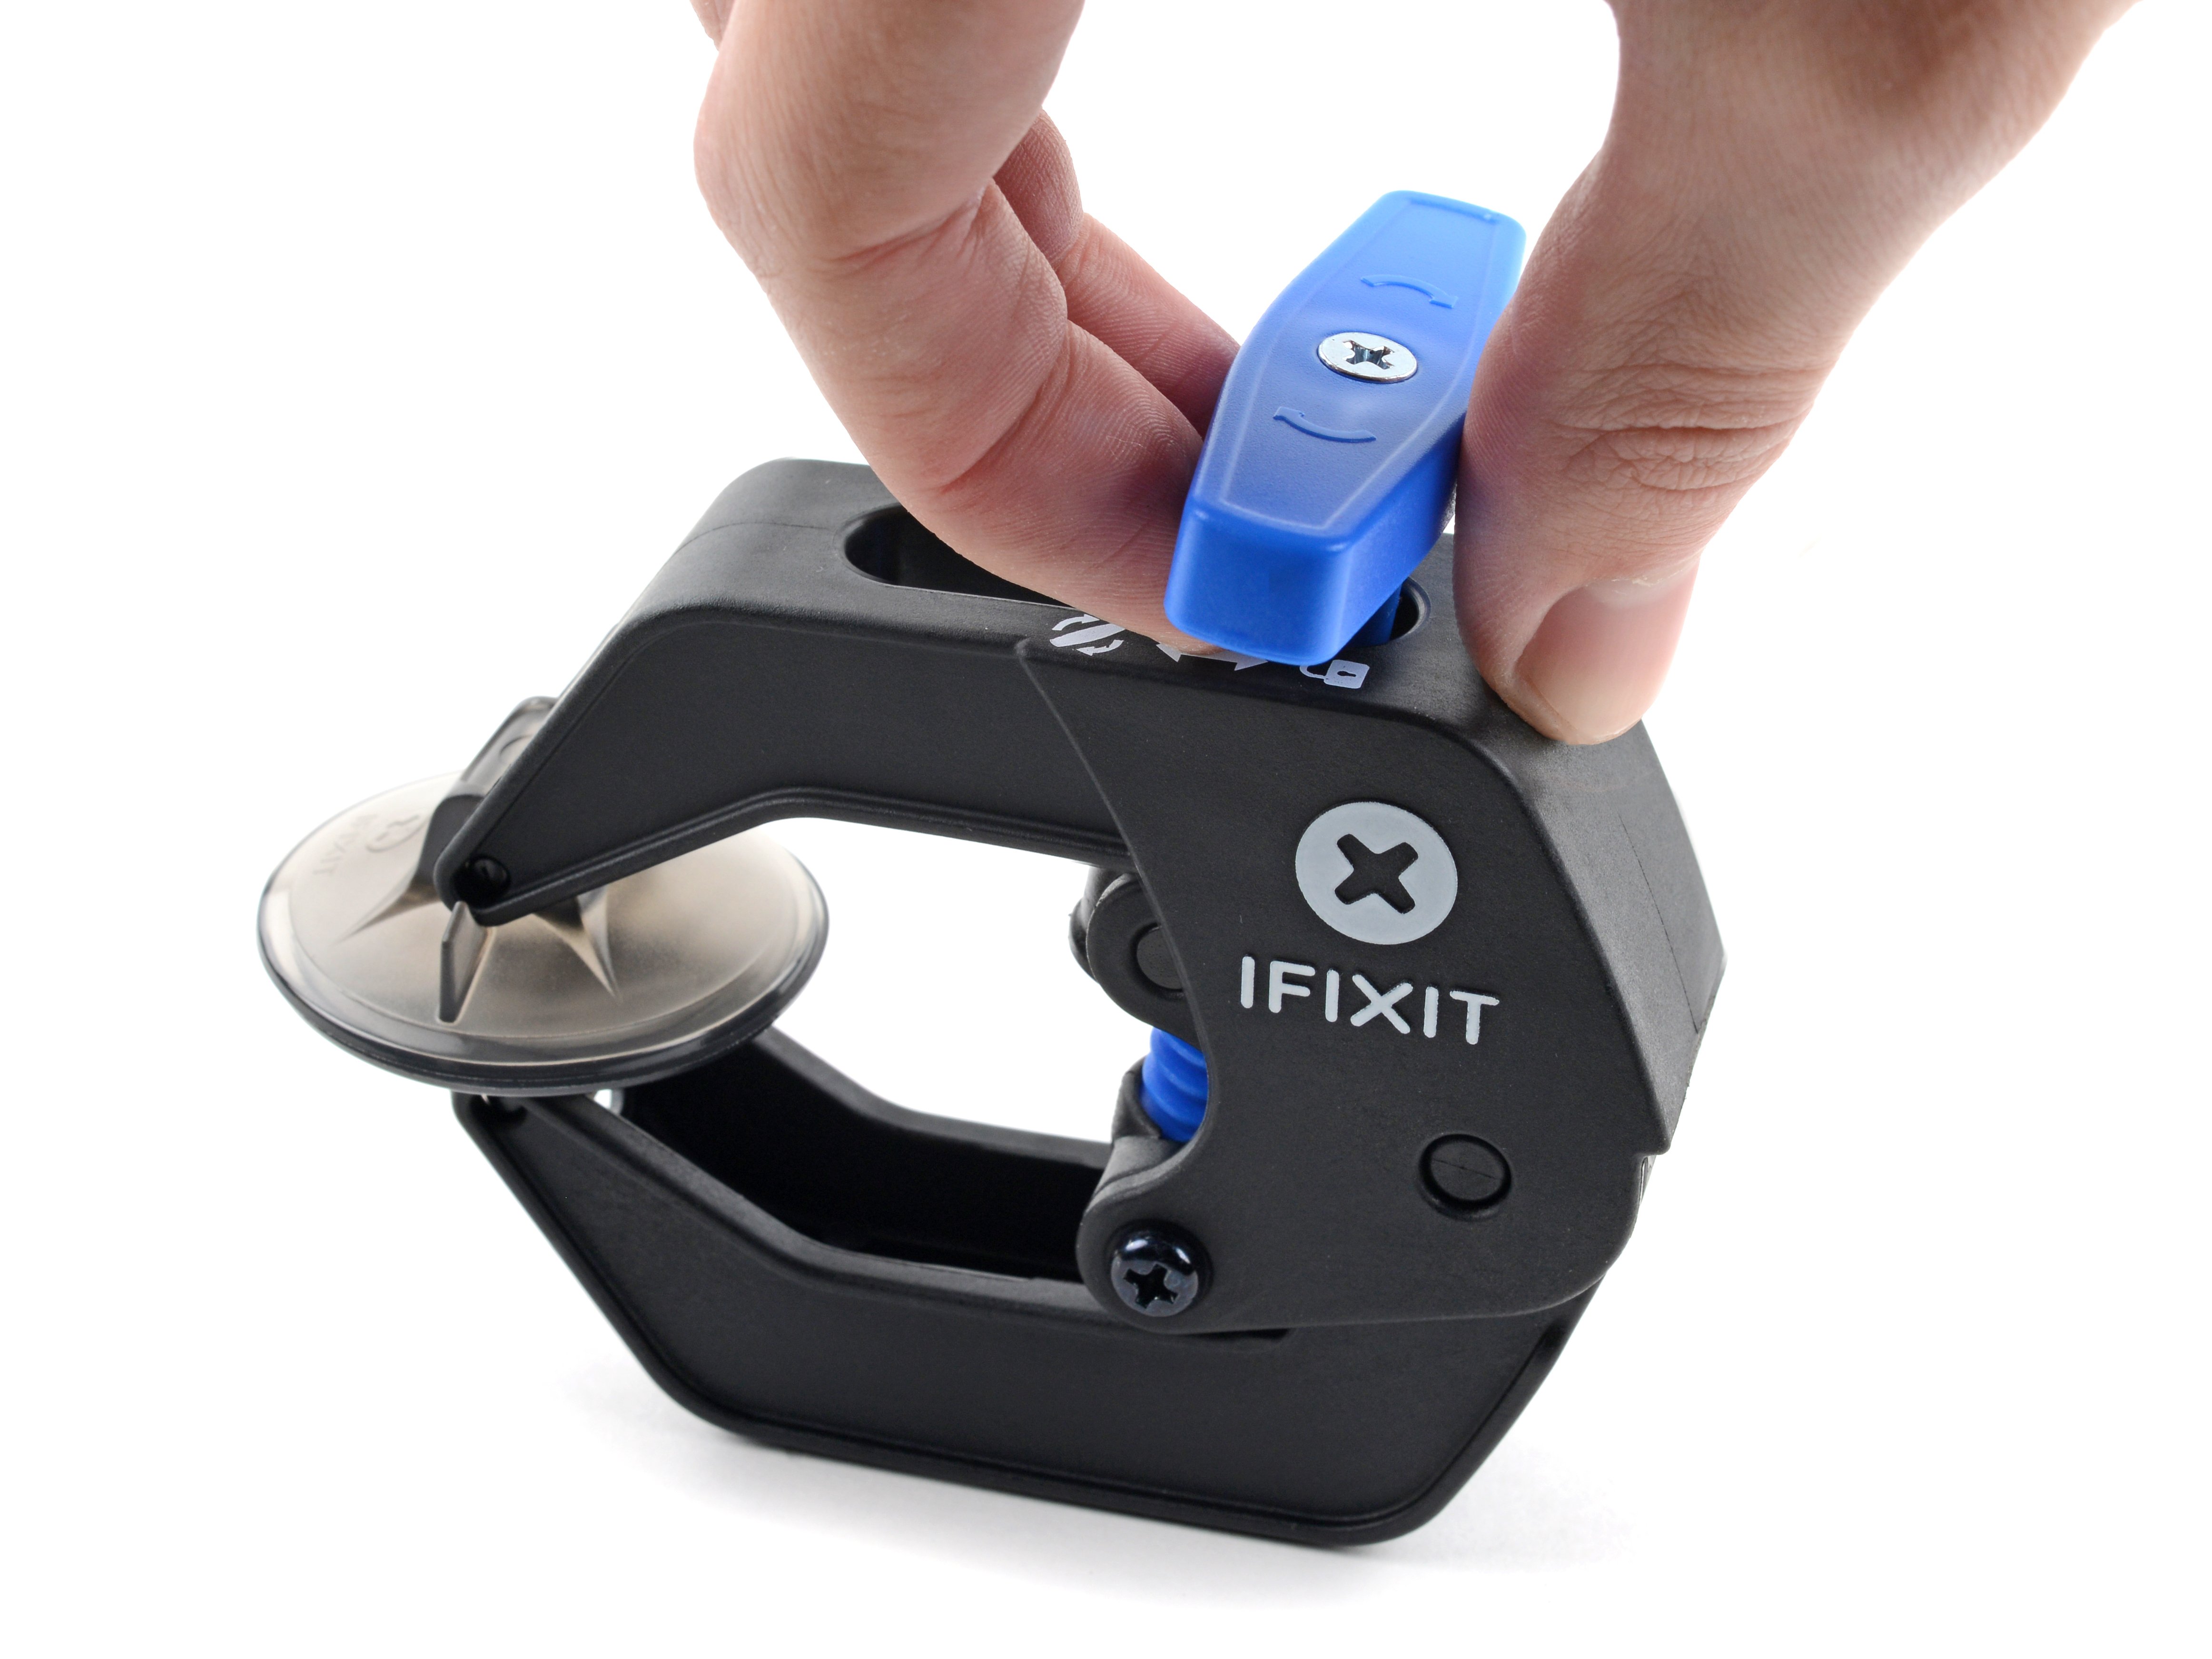
  • The next three steps demonstrate the Anti-Clamp, a tool we designed to make the opening procedure easier. If you aren't using the Anti-Clamp, skip down three steps for an alternate method.
  • For complete instructions on how to use the Anti-Clamp, check out this guide.
  • Pull the blue handle backwards to unlock the Anti-Clamp's arms.
  • Slide the arms over either the left or right edge of your iPhone.
  • Position the suction cups near the bottom edge of the iPhone just above the home button—one on the front, and one on the back.
  • Squeeze the cups together to apply suction to the desired area.
  • If you find that the surface of your iPhone is too slippery for the Anti-Clamp to hold onto, you can use tape to create a grippier surface.
Step 5

Repair step

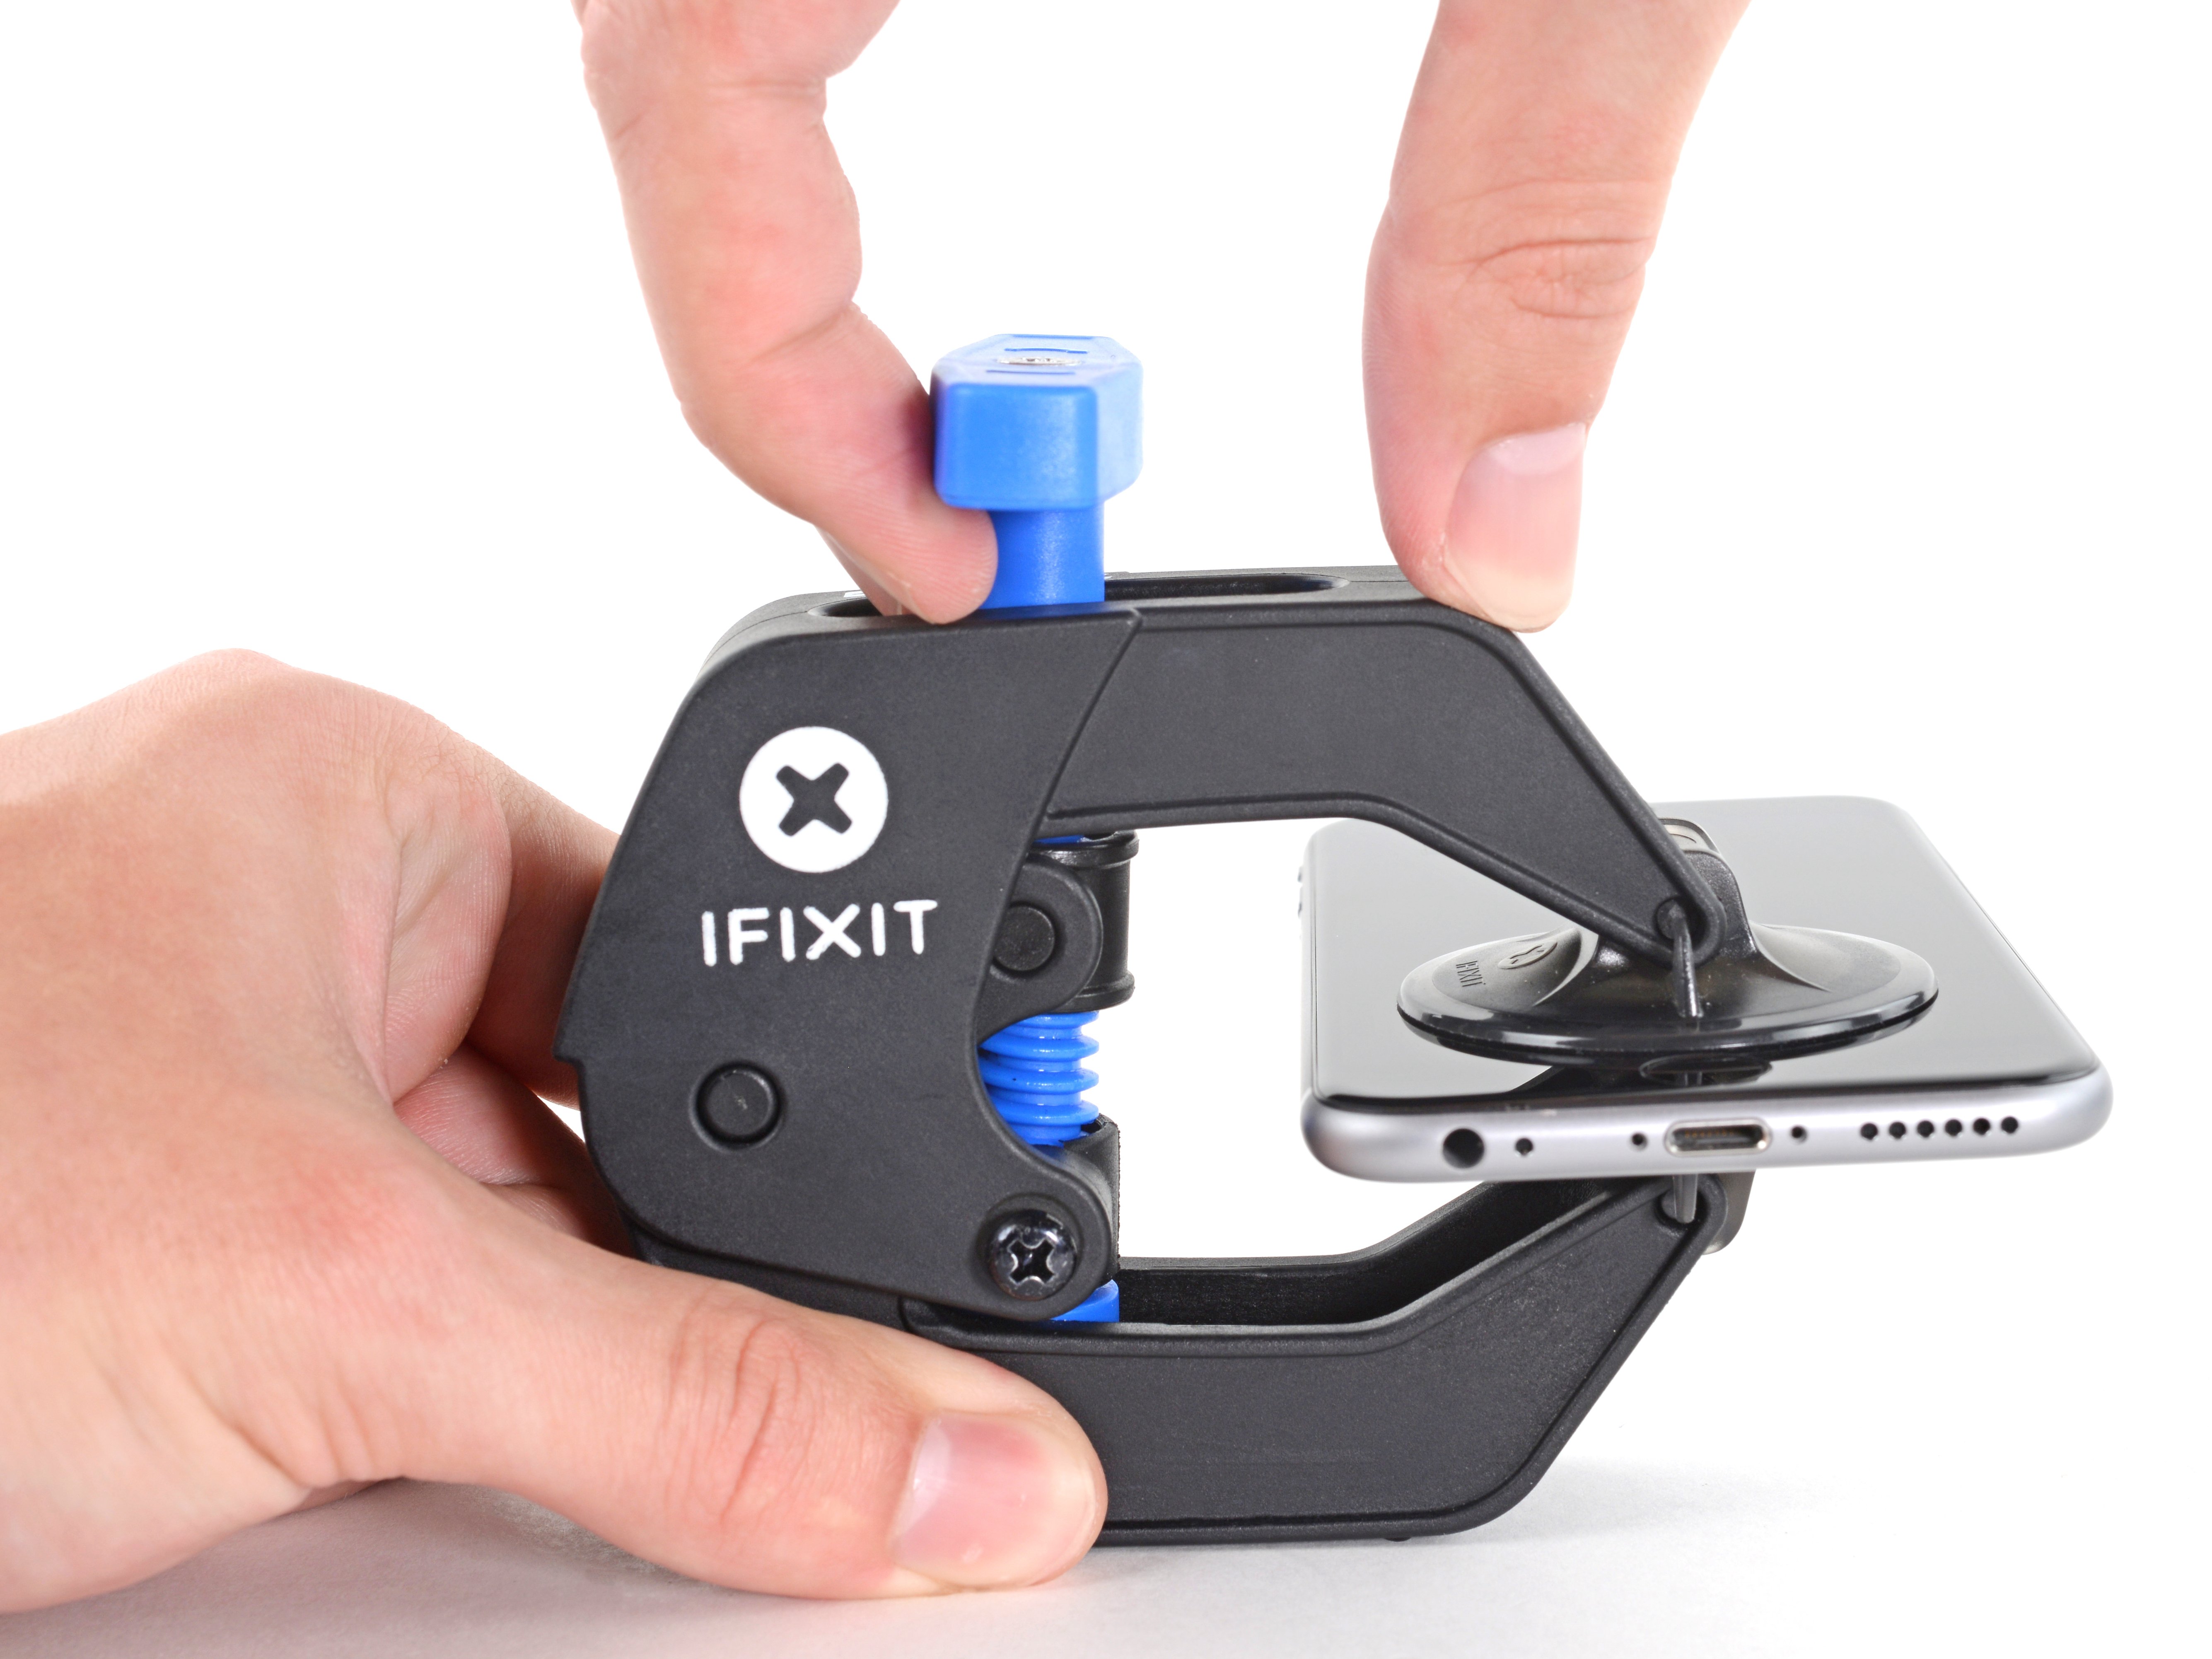
  • Pull the blue handle forwards to lock the arms.
  • Turn the handle clockwise 360 degrees or until the cups start to stretch.
  • Make sure the suction cups remain aligned with each other. If they begin to slip out of alignment, loosen the suction cups slightly and realign the arms.
Step 6

Repair step

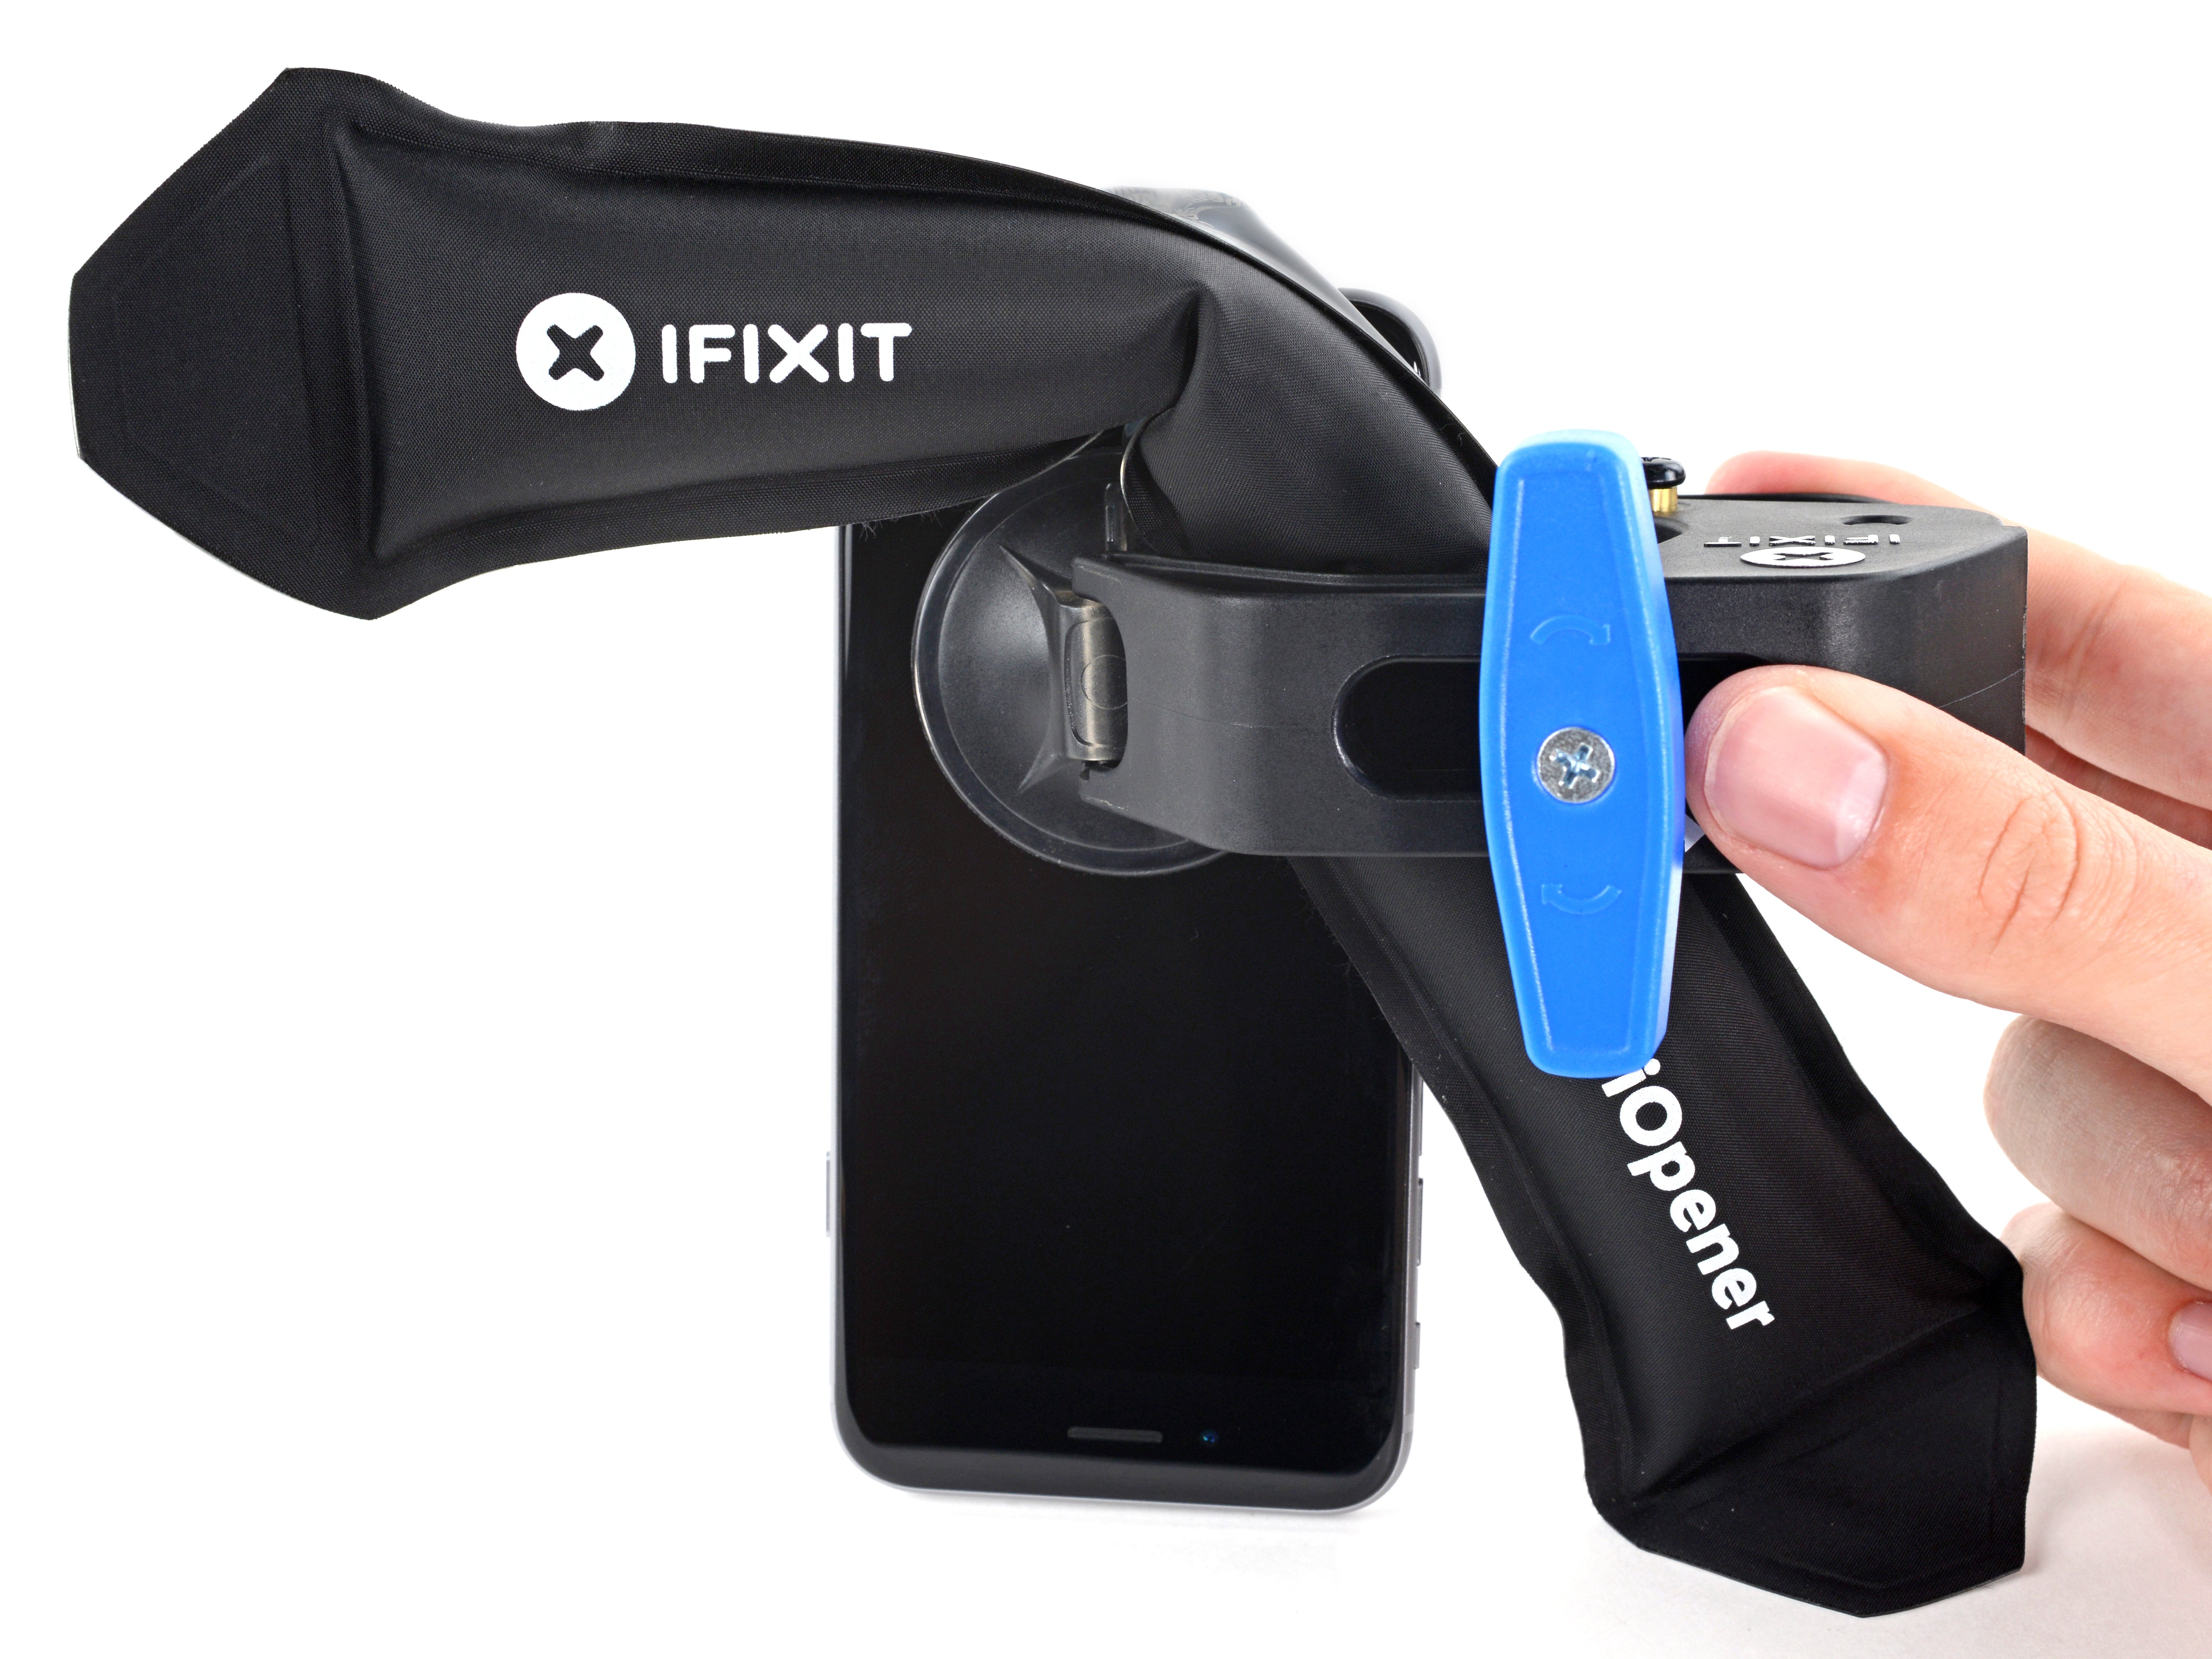
  • Heat an iOpener and thread it through the arms of the Anti-Clamp.
  • You can also use a hair dryer, heat gun, or hot plate—but extreme heat can damage the display and/or internal battery, so proceed with care.
  • Fold the iOpener so it lays on the bottom edge of the iPhone.
  • Wait one minute to give the adhesive a chance to release and present an opening gap.
  • Insert an opening pick under the screen when the Anti-Clamp creates a large enough gap.
  • If the Anti-Clamp doesn't create a sufficient gap, apply more heat to the area and rotate the handle a quarter turn.
  • Don't crank more than a quarter turn at a time, and wait one minute between turns. Let the Anti-Clamp and time do the work for you.
  • Skip the next three steps.
Step 7

Repair step

  • The next three steps show how to separate the screen using a suction cup.
  • Heating the lower edge of the iPhone will help soften the adhesive securing the display, making it easier to open.
  • Use a hairdryer or prepare an iOpener and apply it to the lower edge of the iPhone for about 90 seconds in order to soften up the adhesive underneath.
Step 8

Repair step

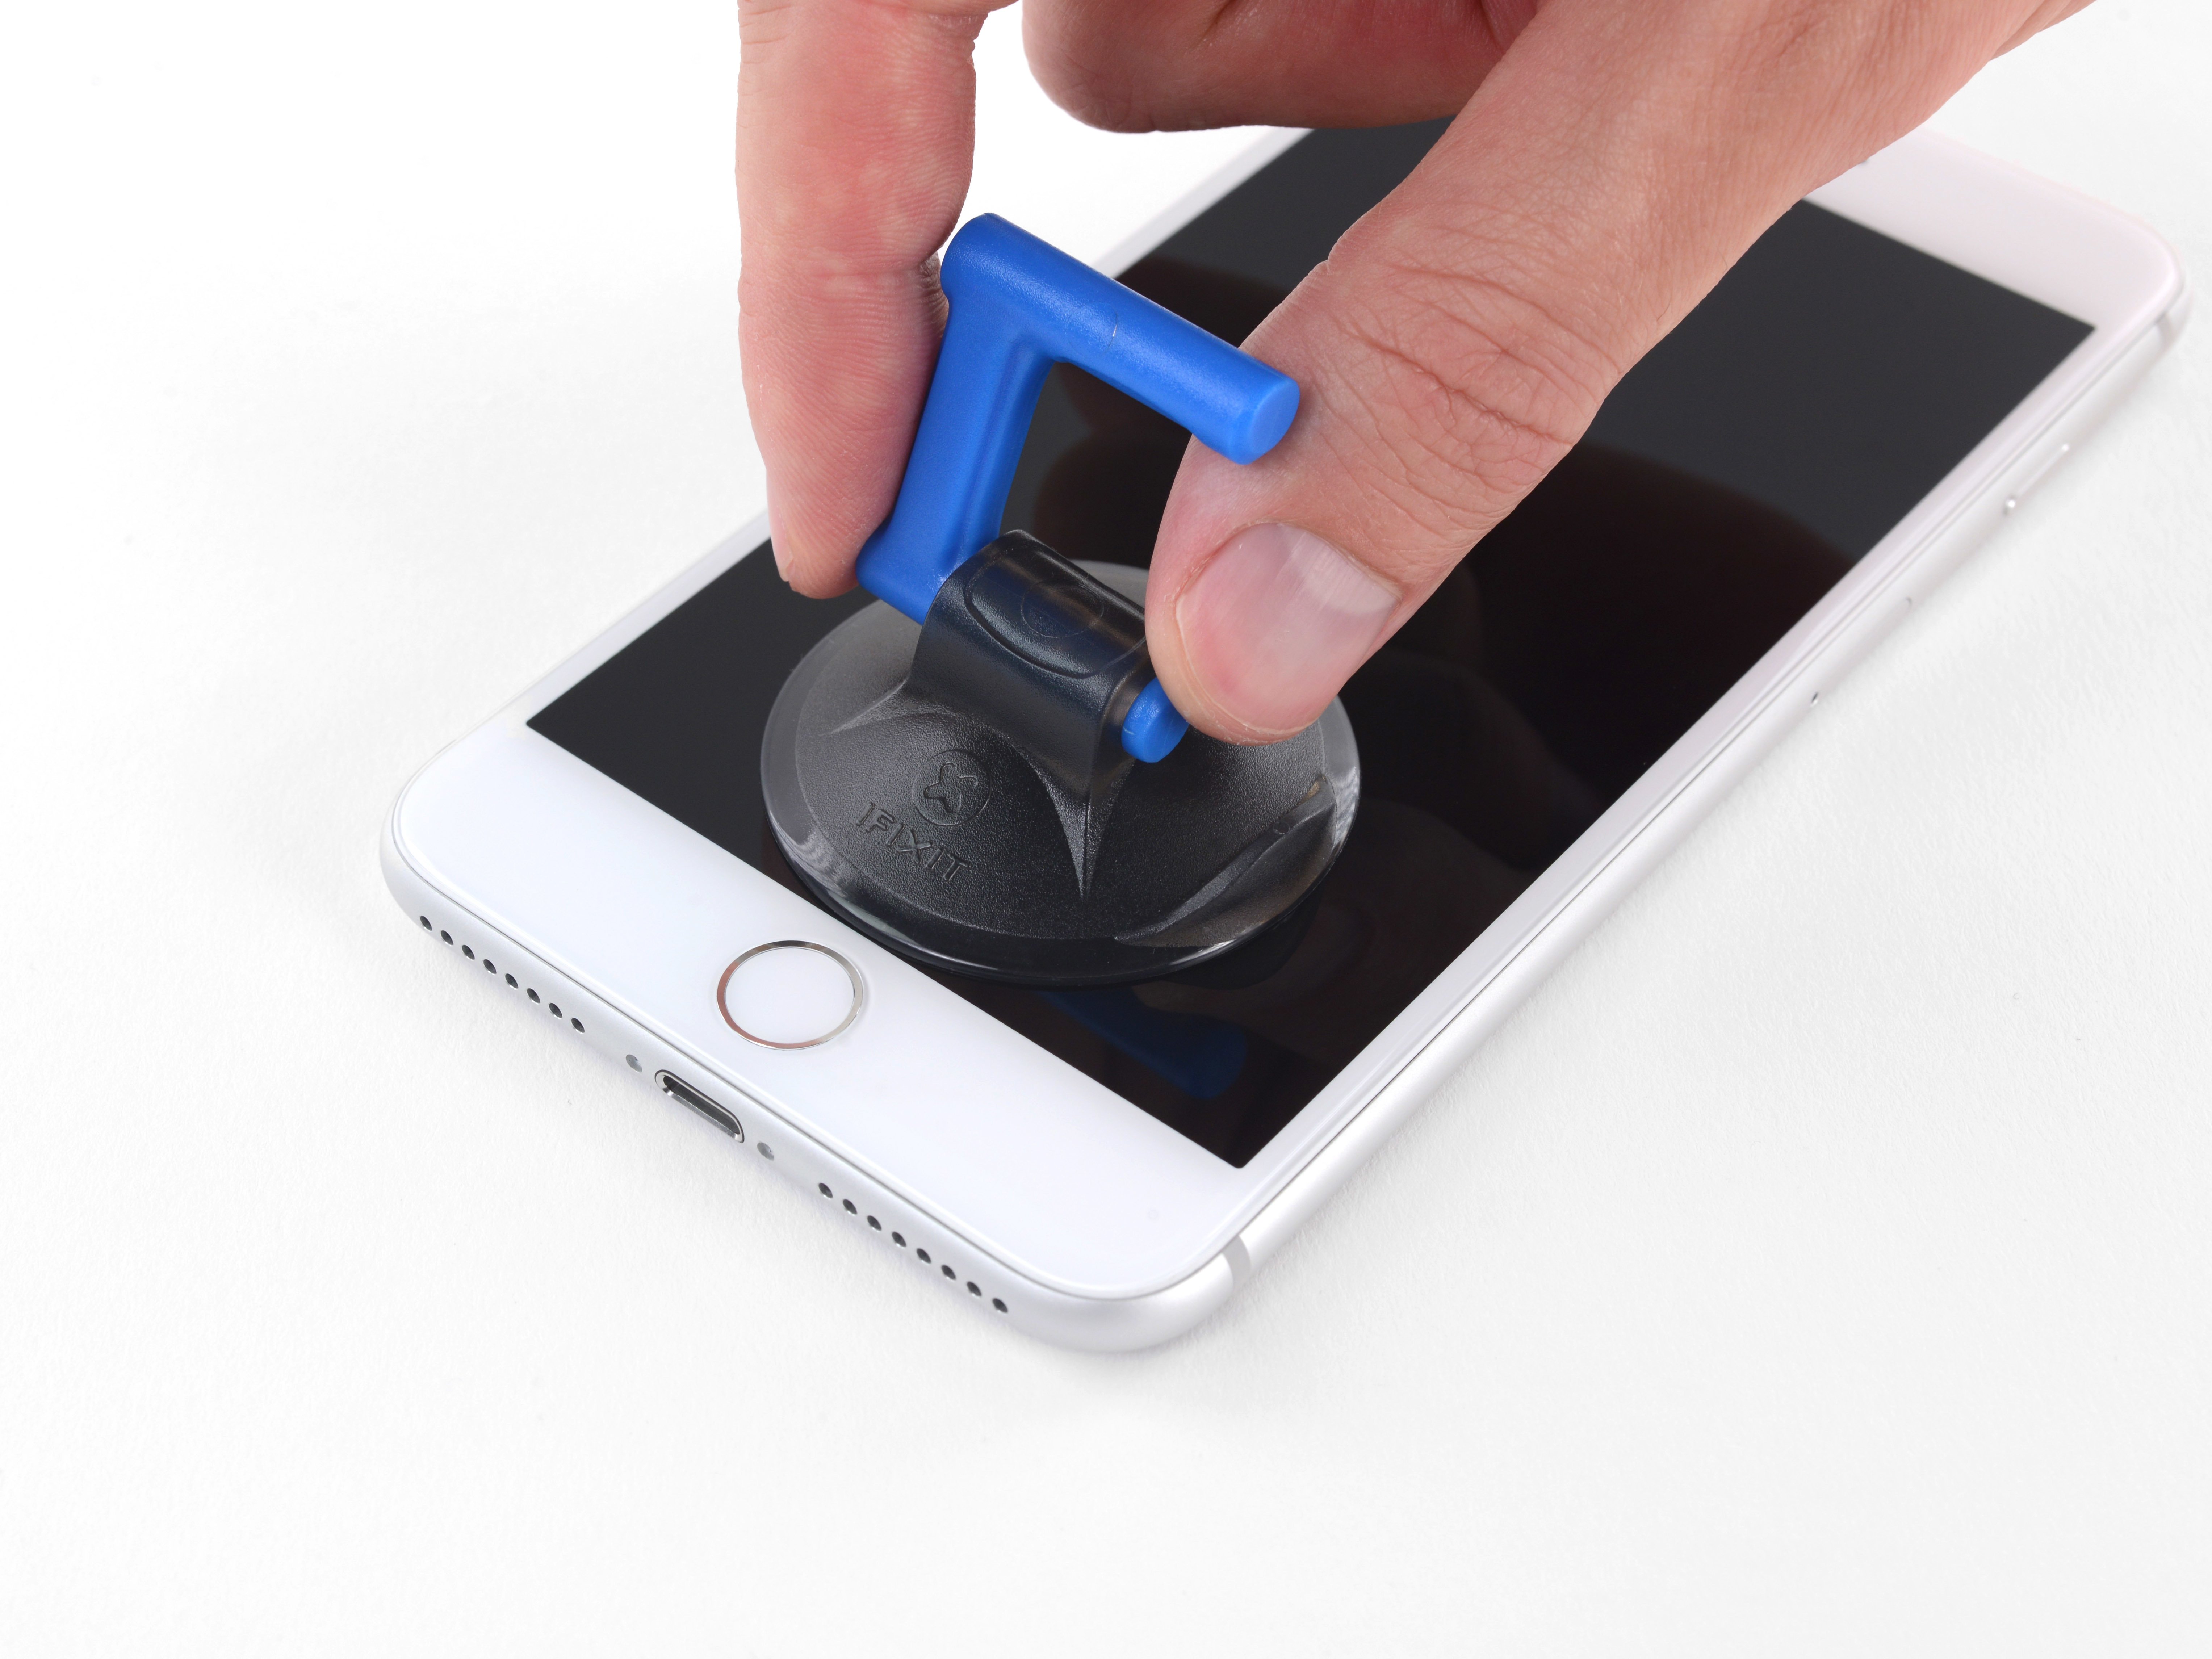
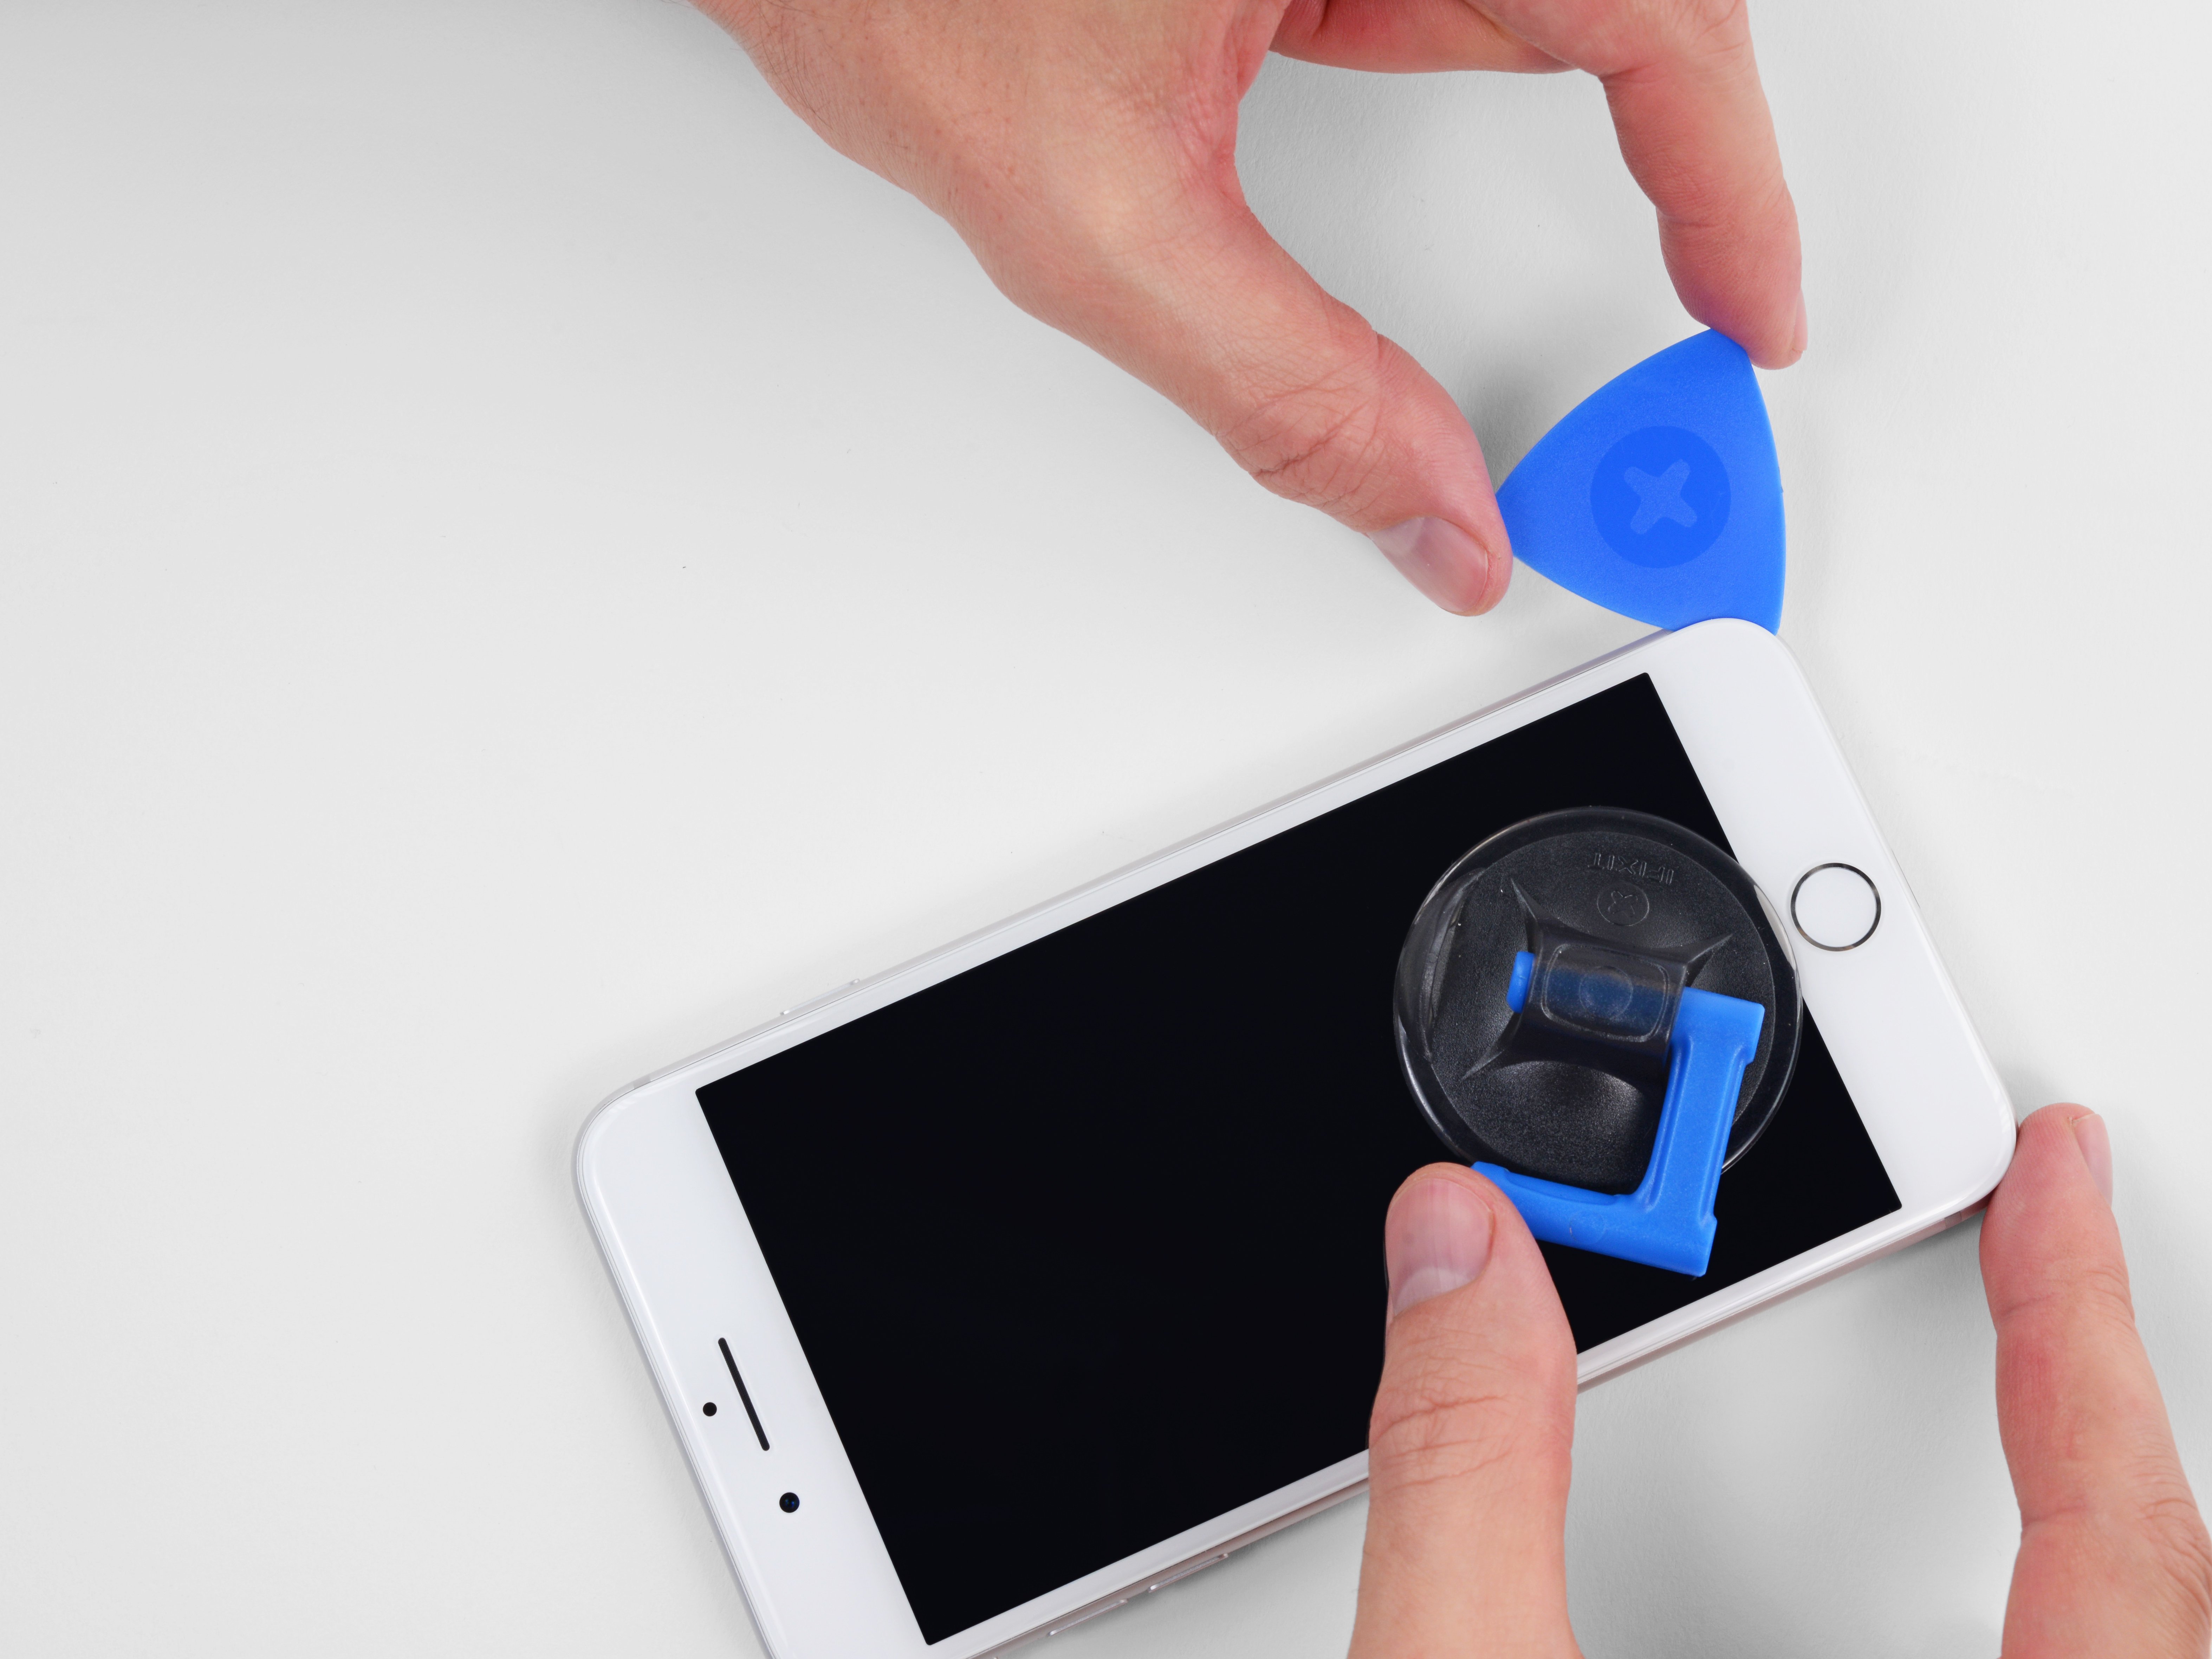
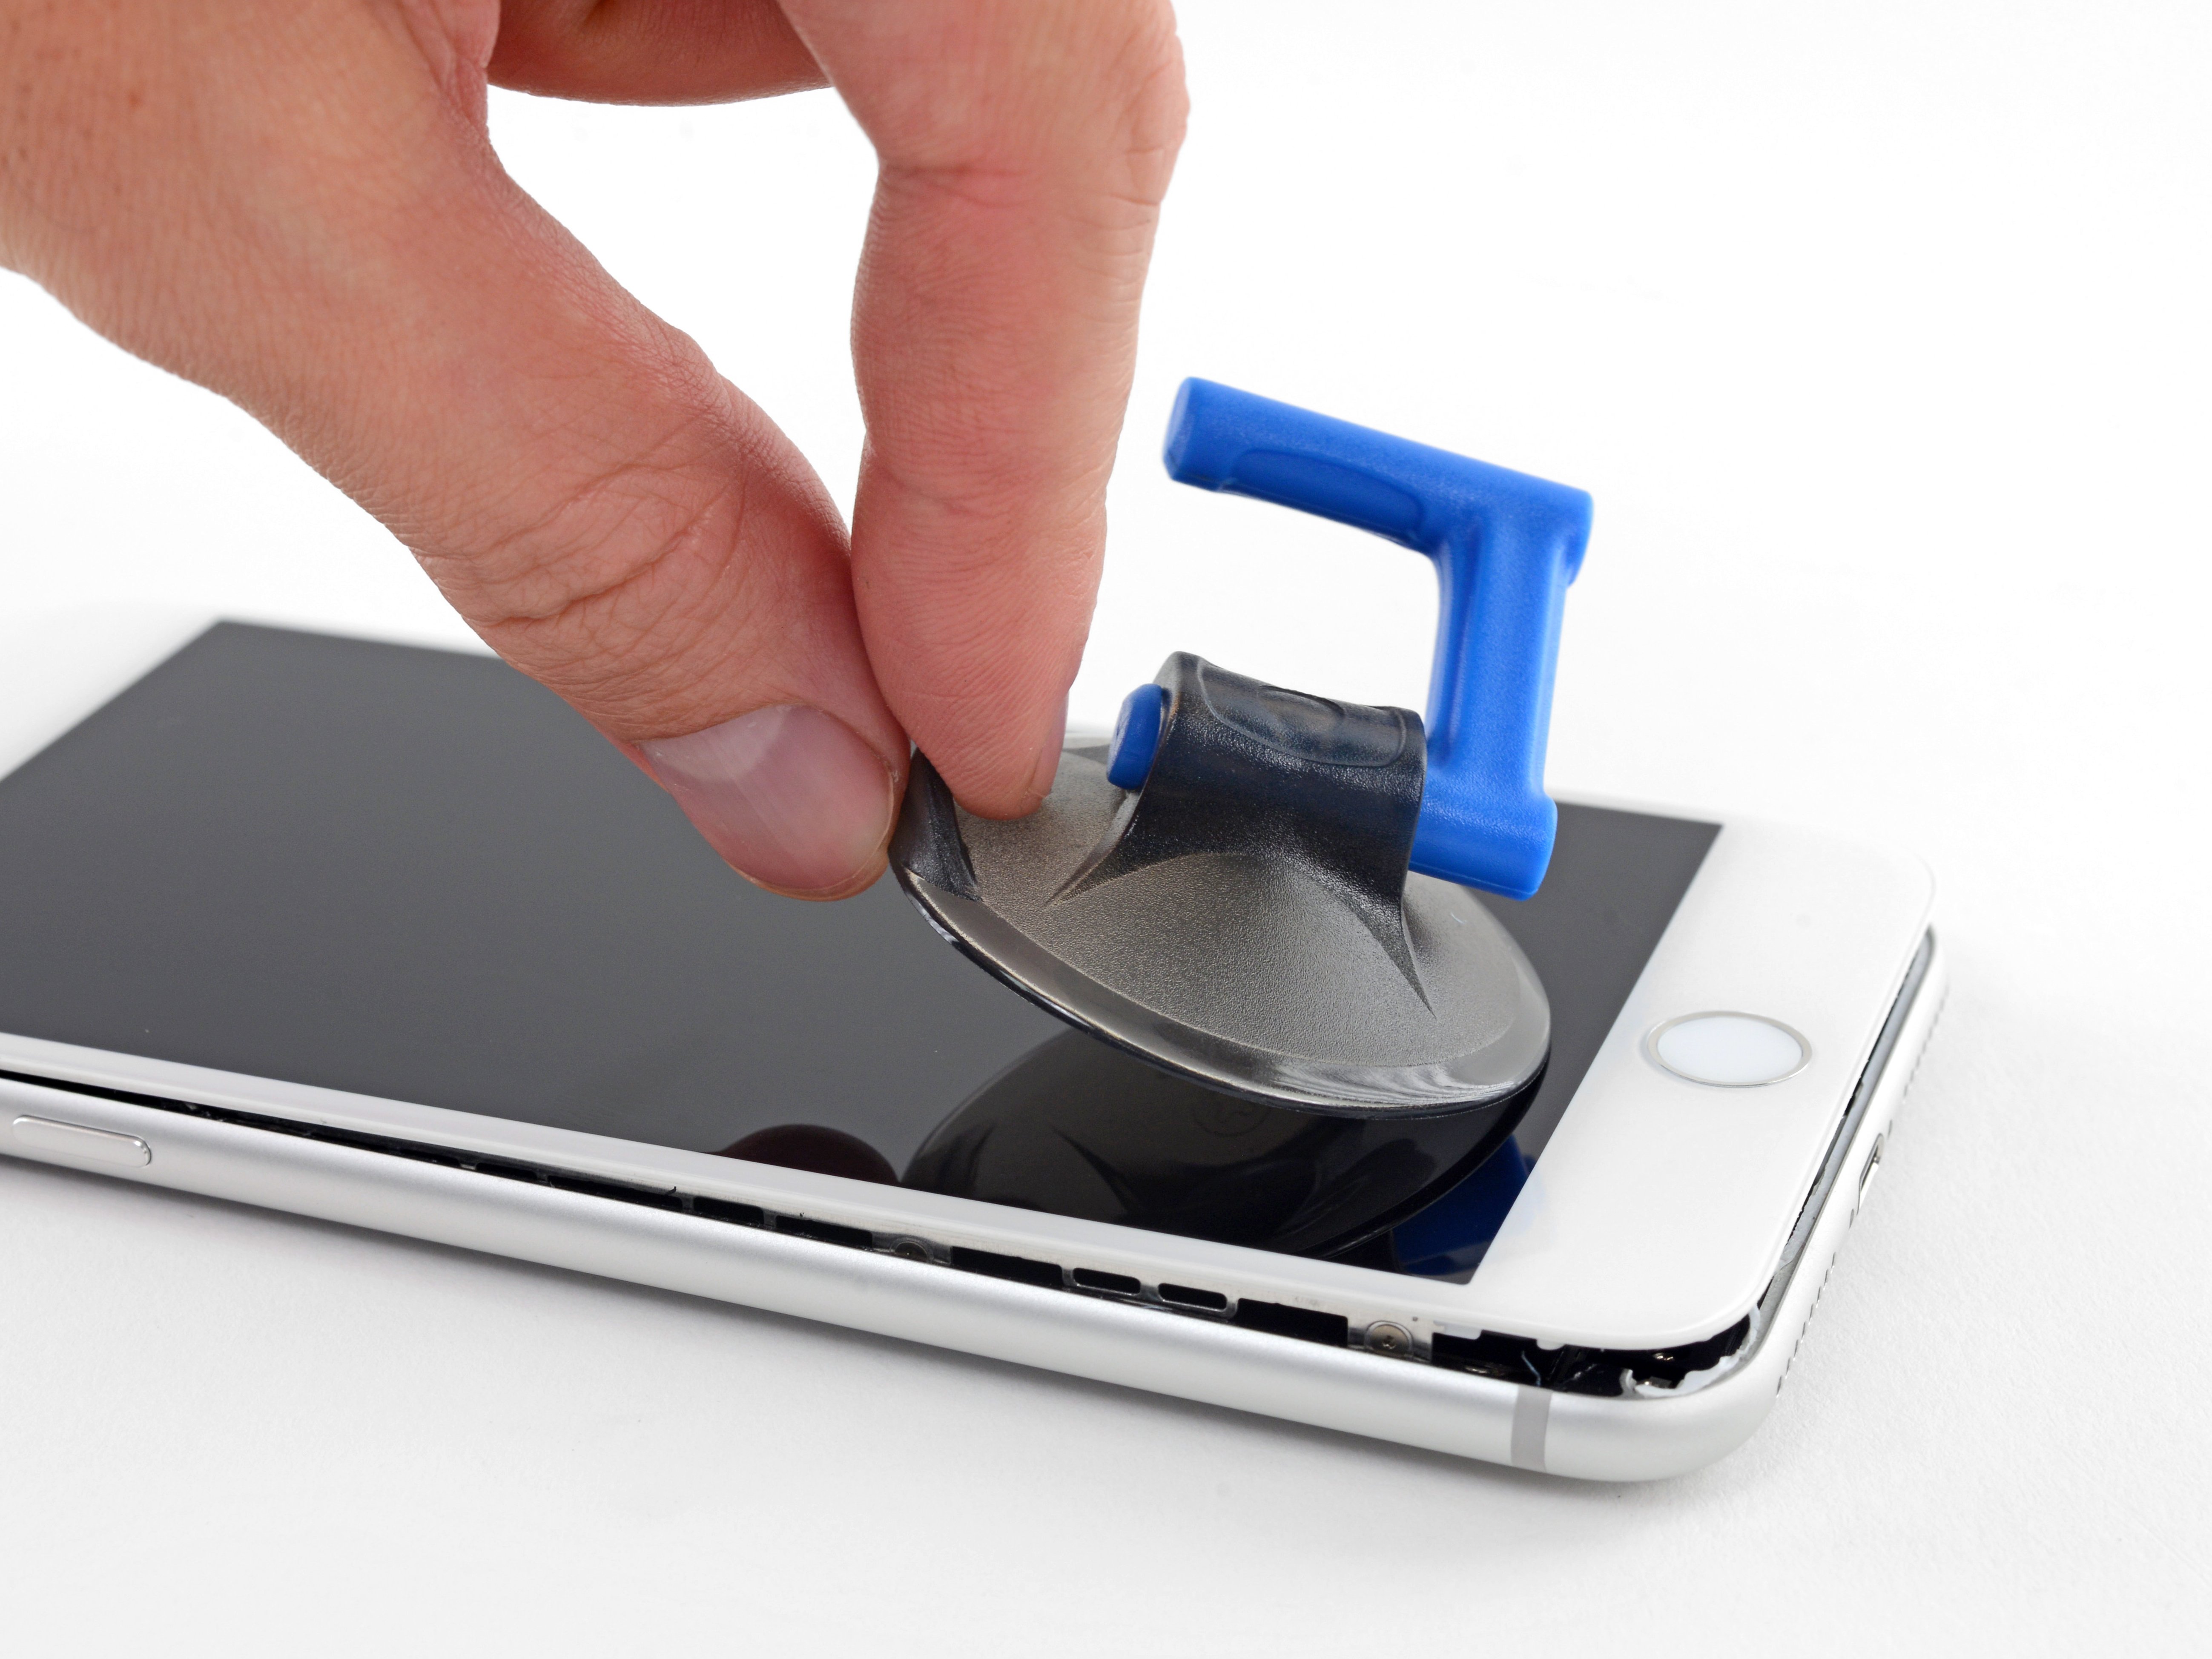
  • Apply a suction cup to the lower half of the front panel, just above the home button.
  • Be sure the suction cup does not overlap with the home button, as this will prevent a seal from forming between the suction cup and front glass.
Step 9

Repair step

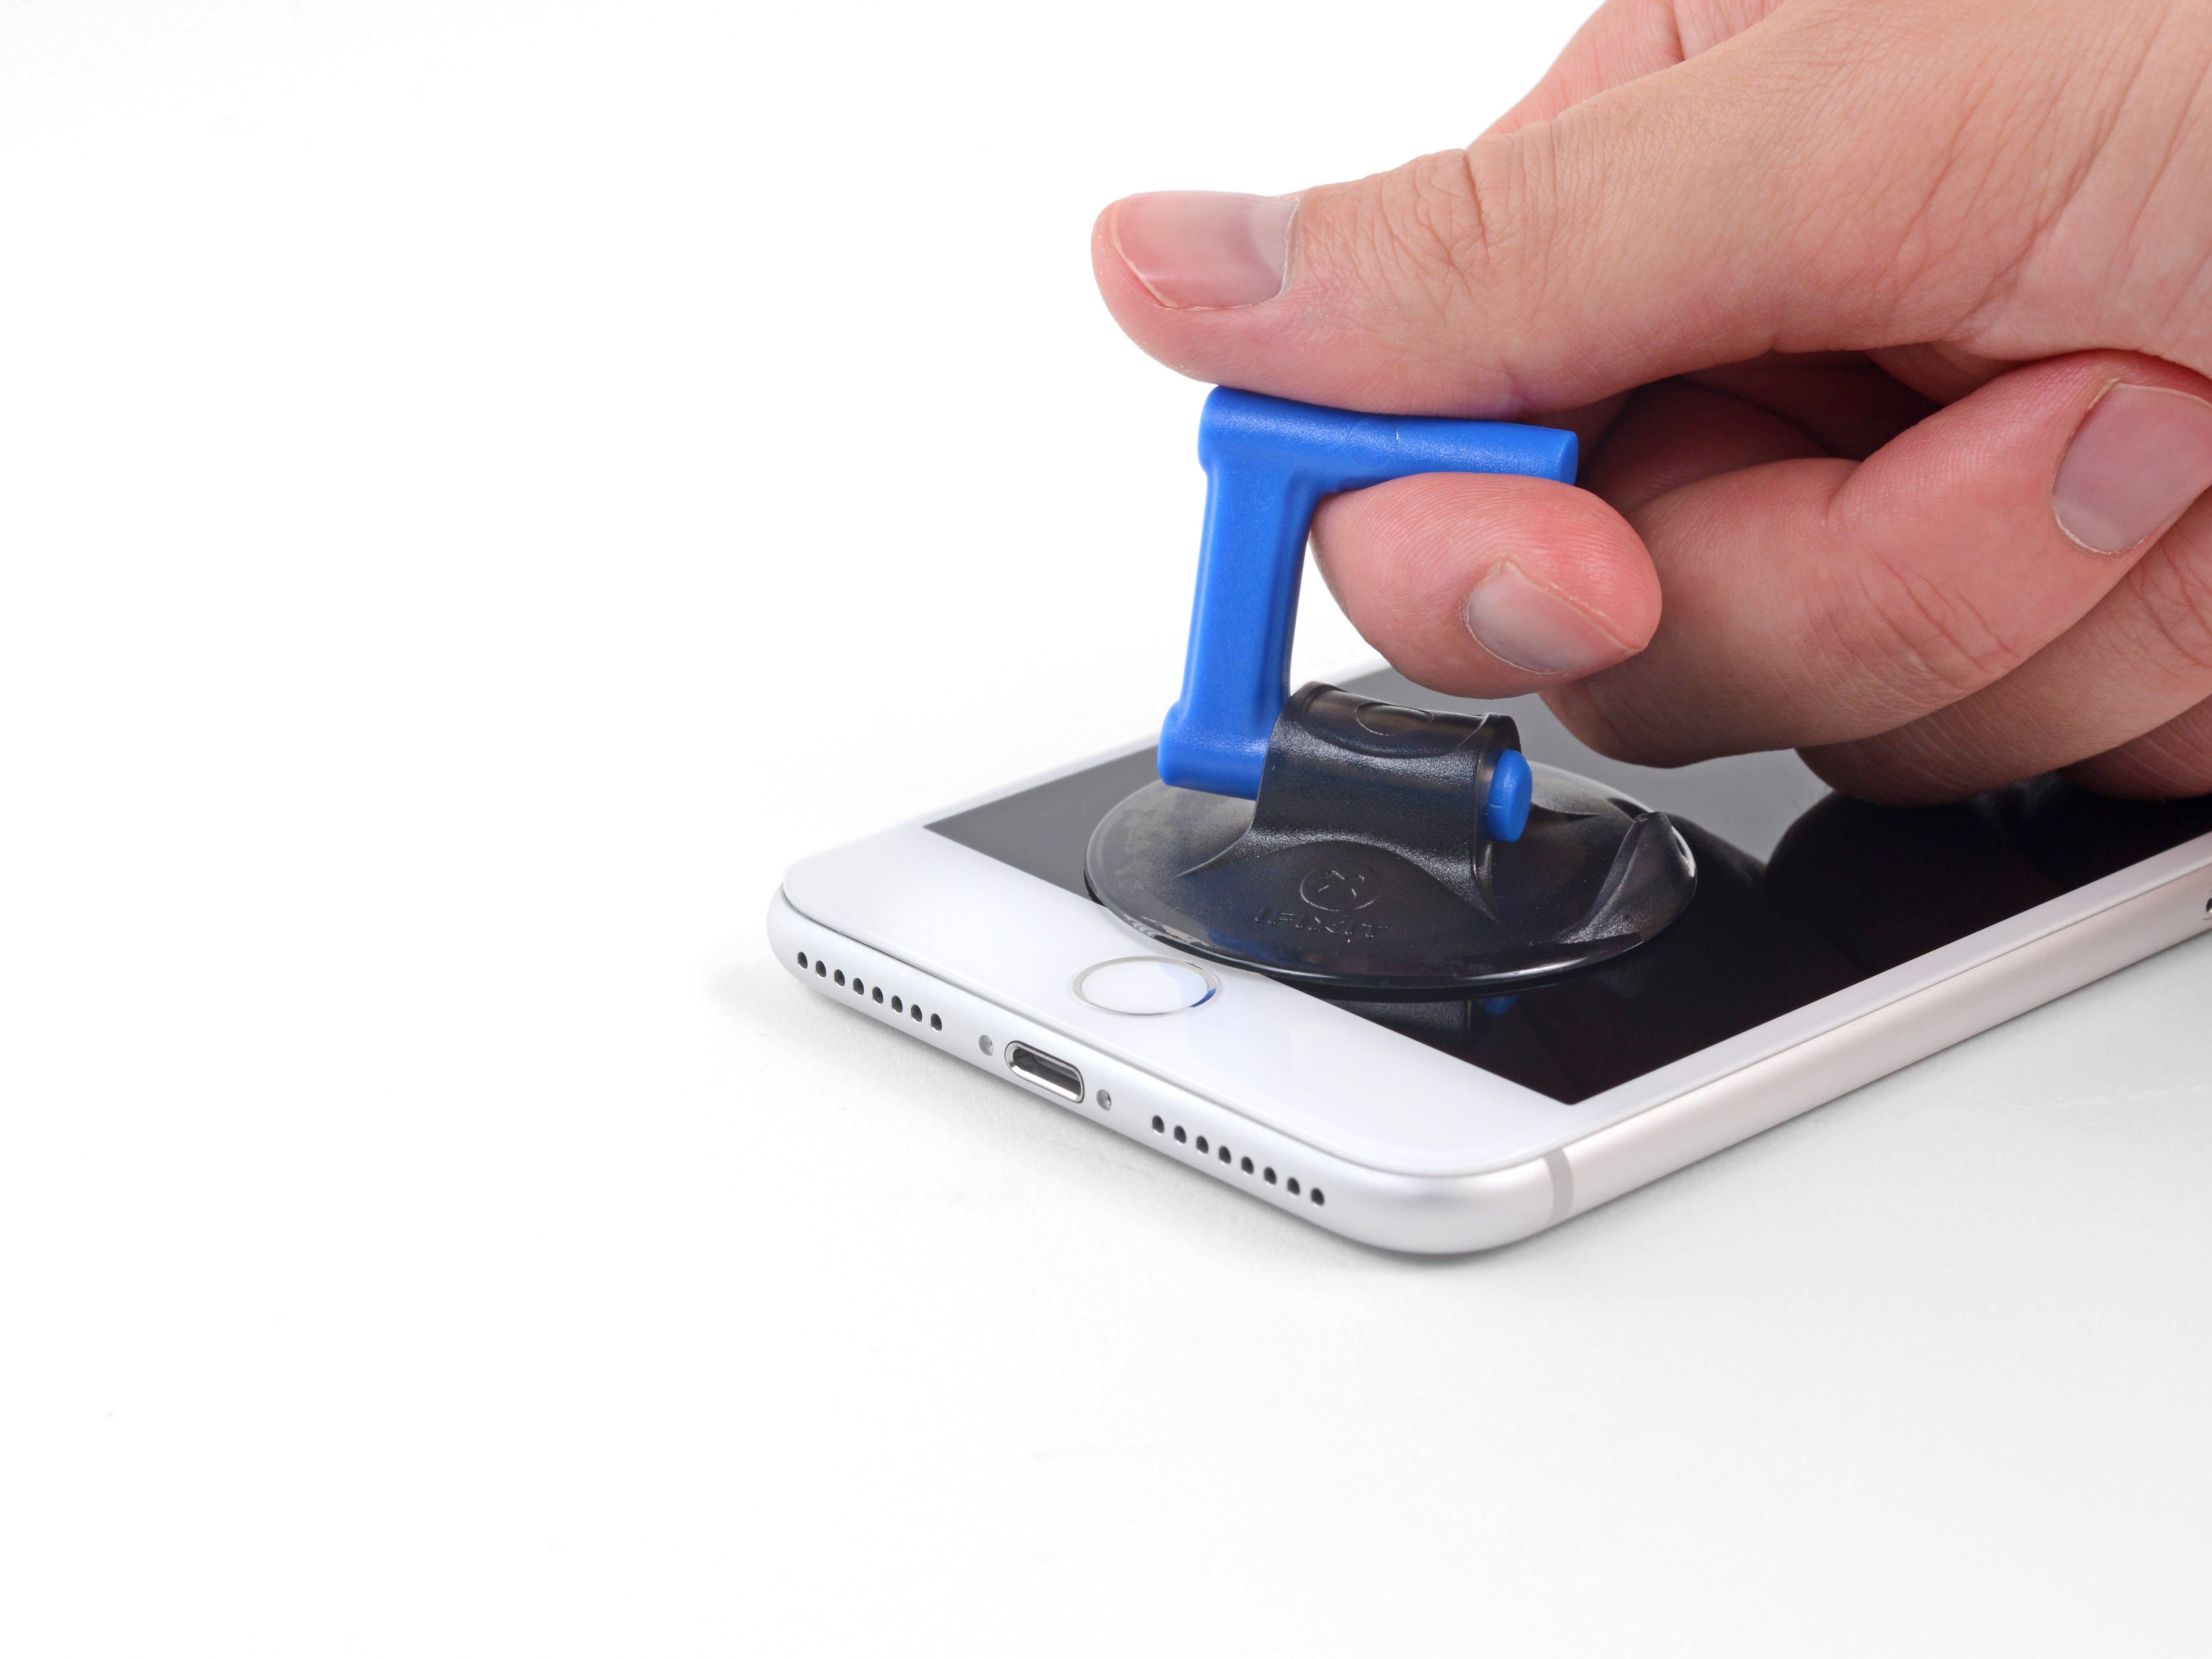
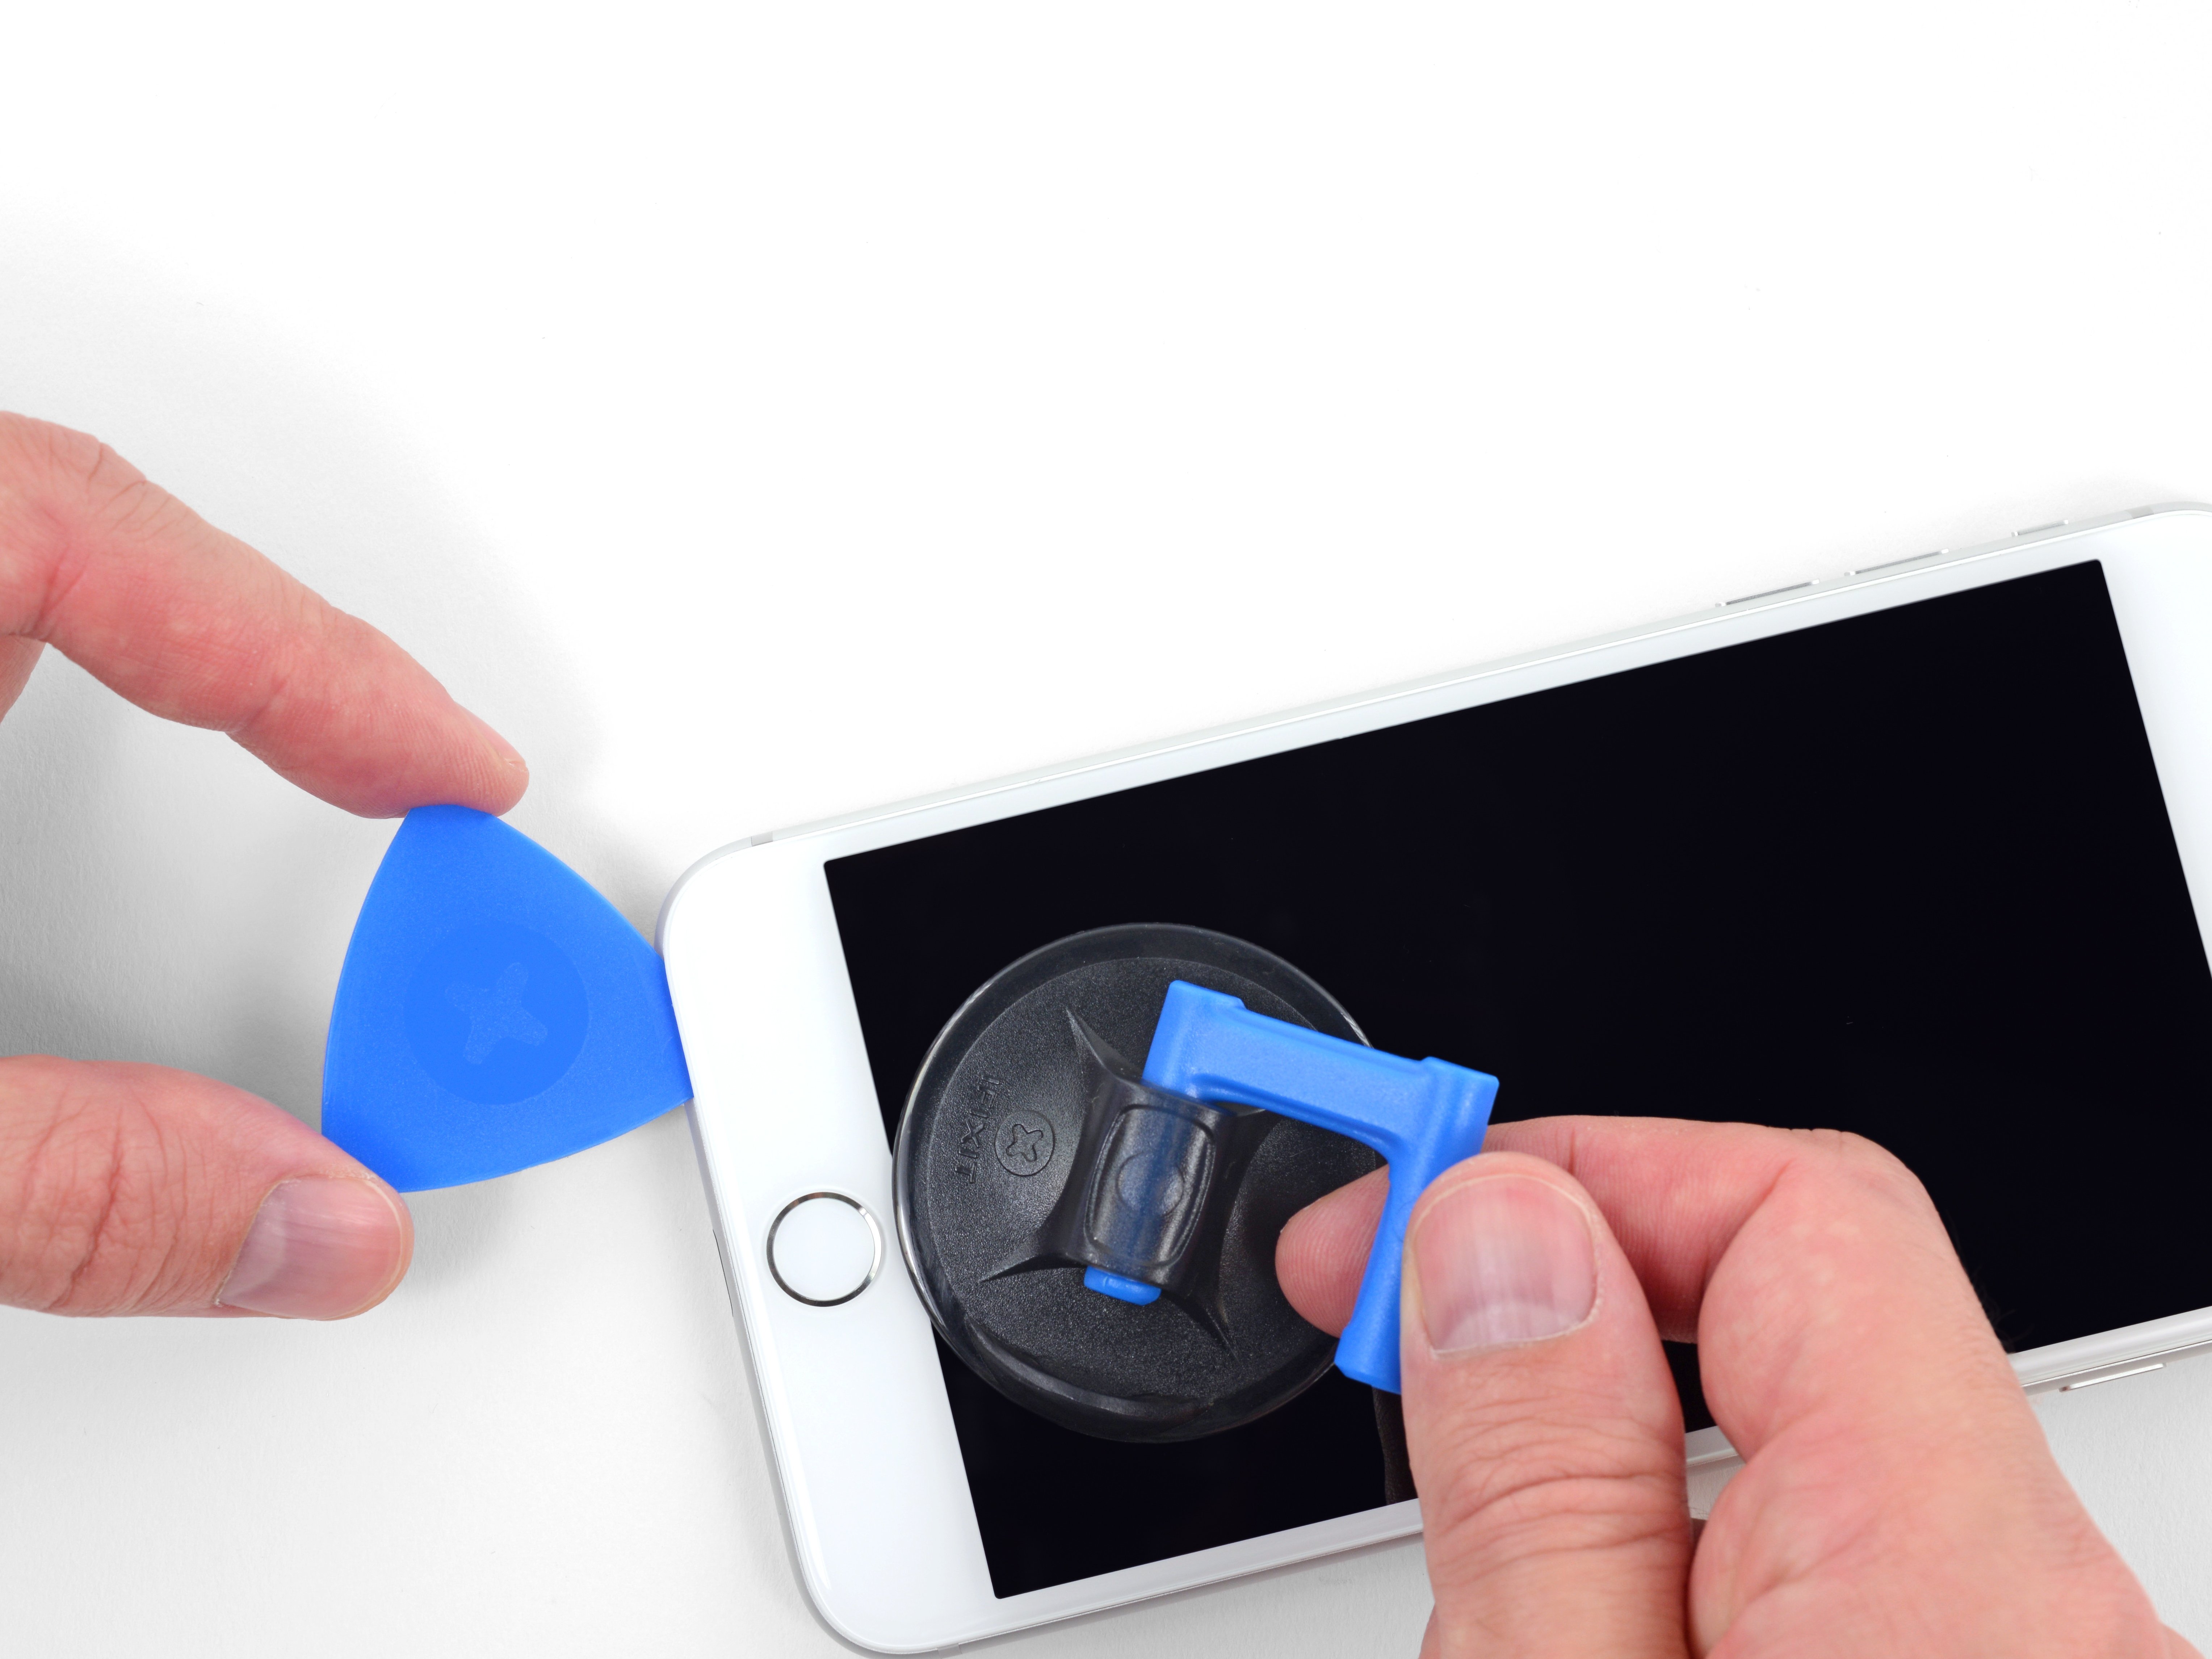
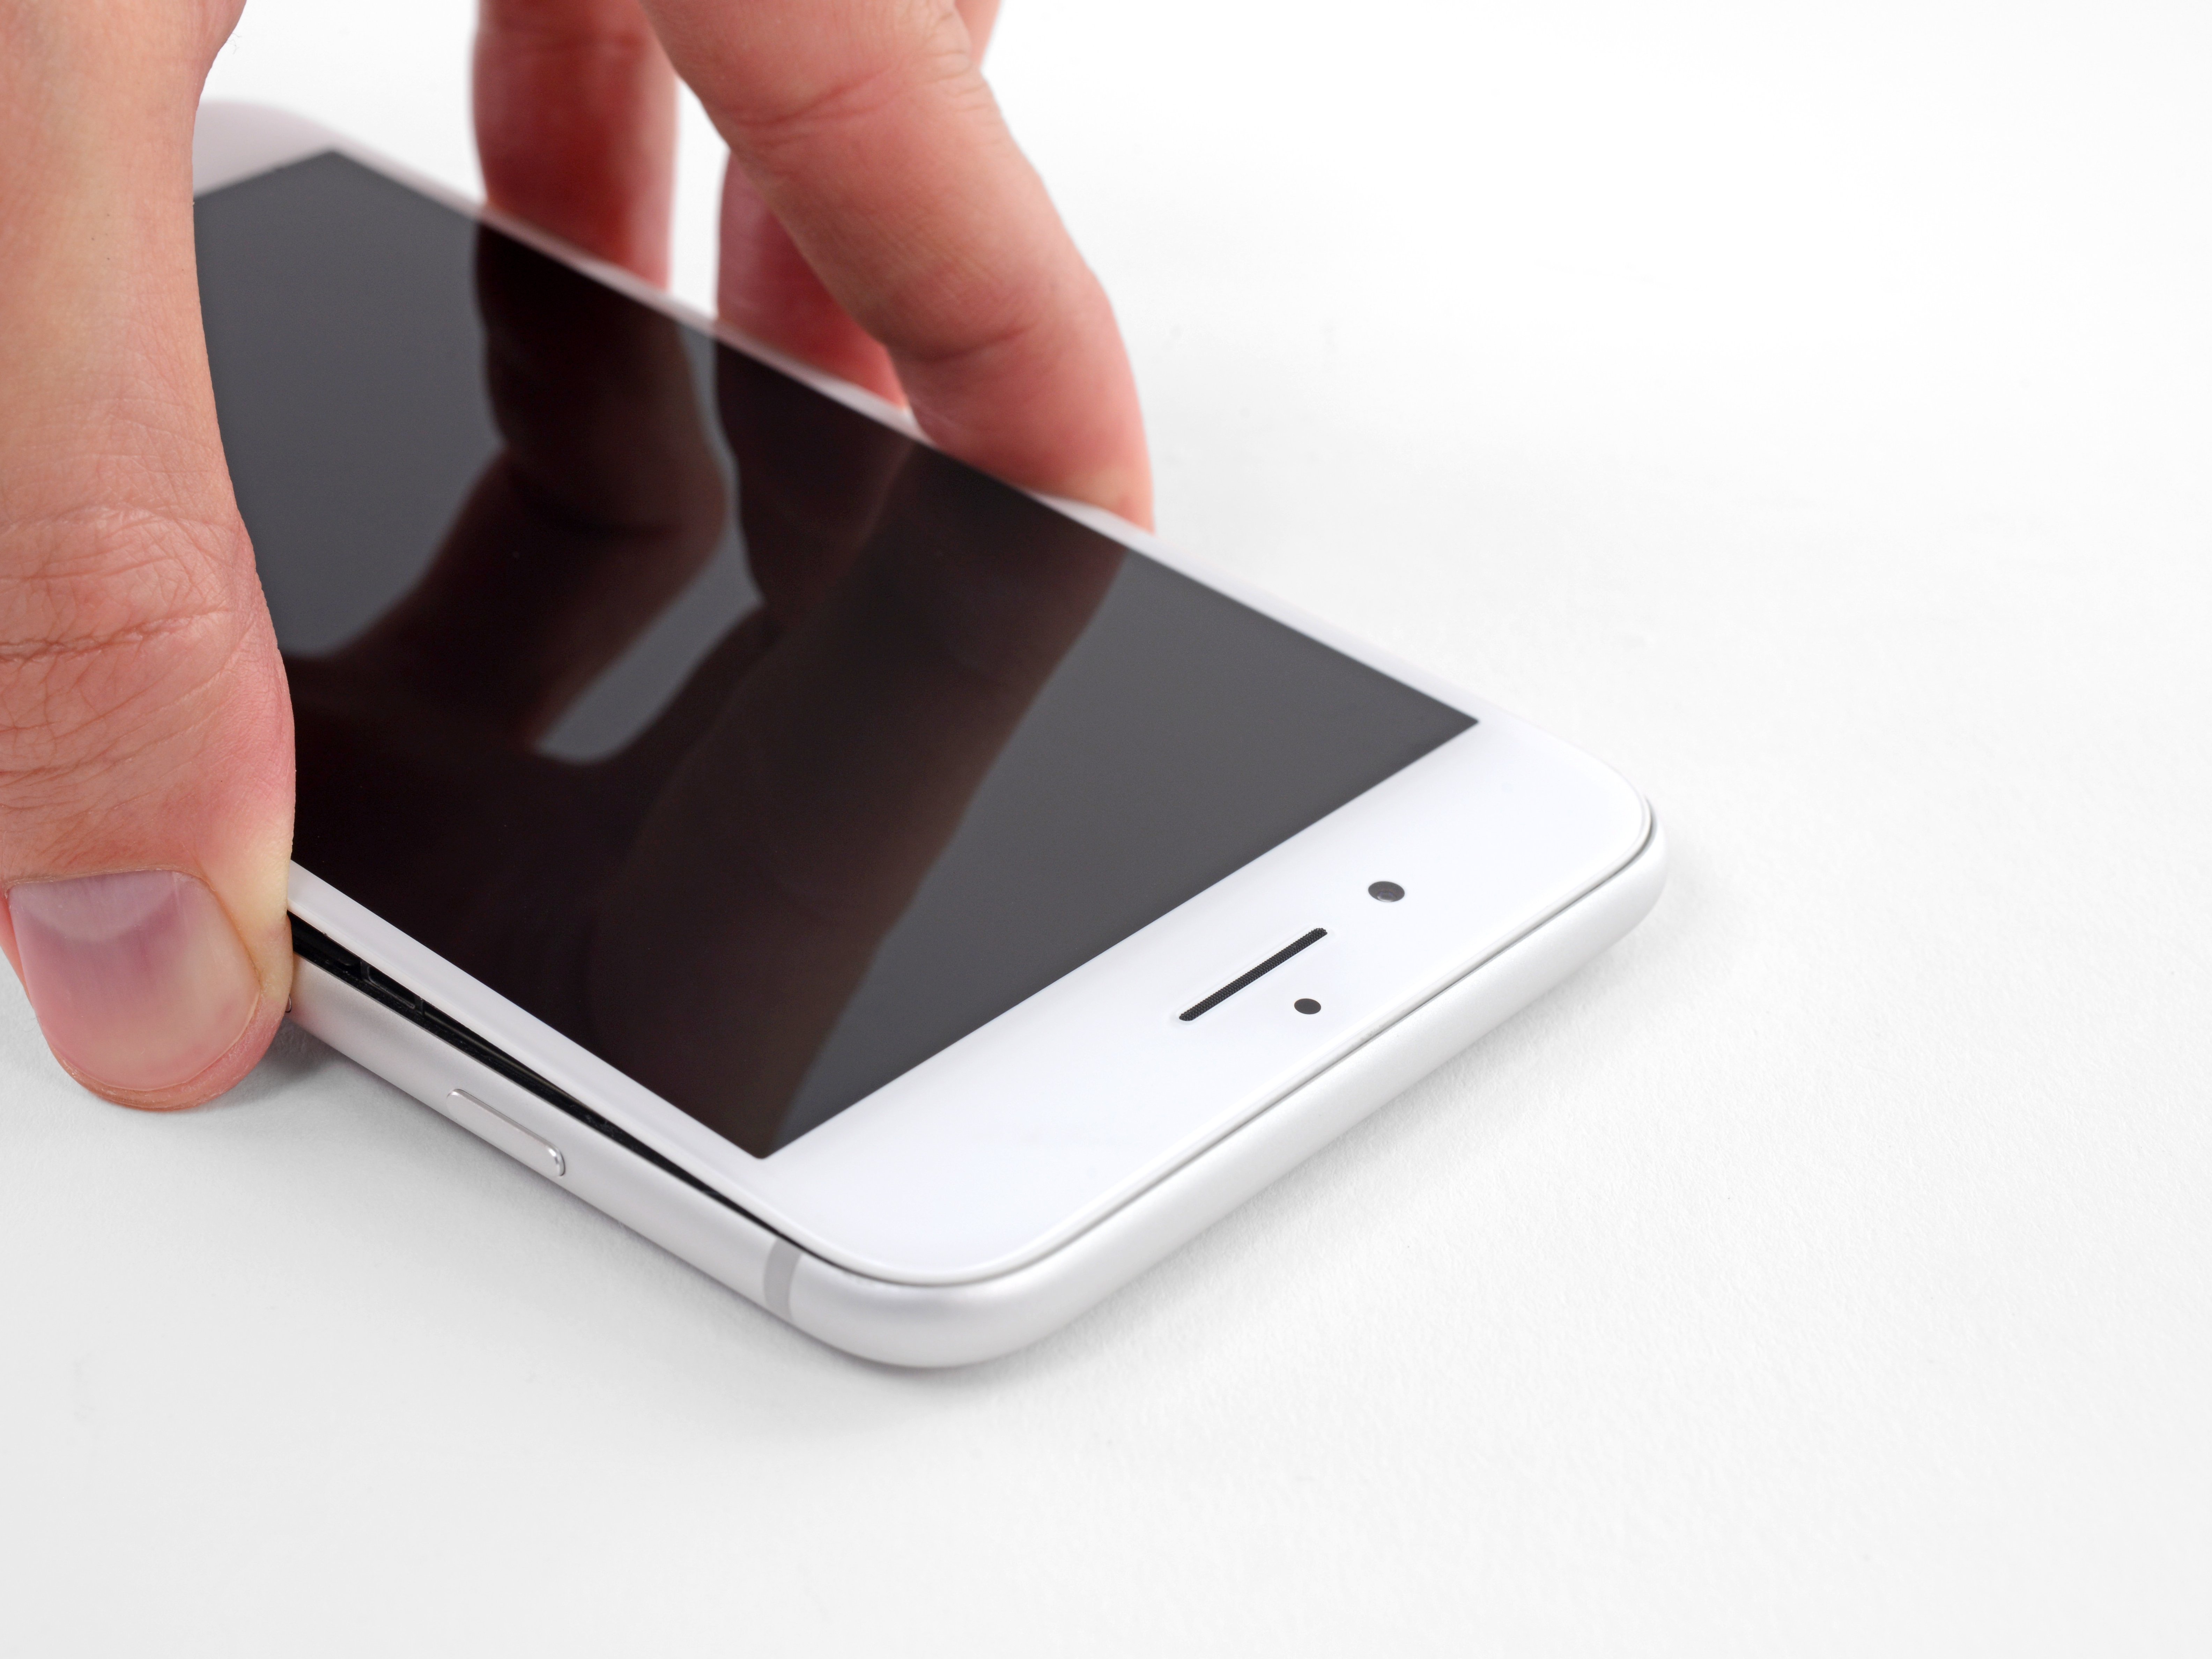
  • Pull up on the suction cup with firm, constant pressure to create a slight gap between the front panel and rear case.
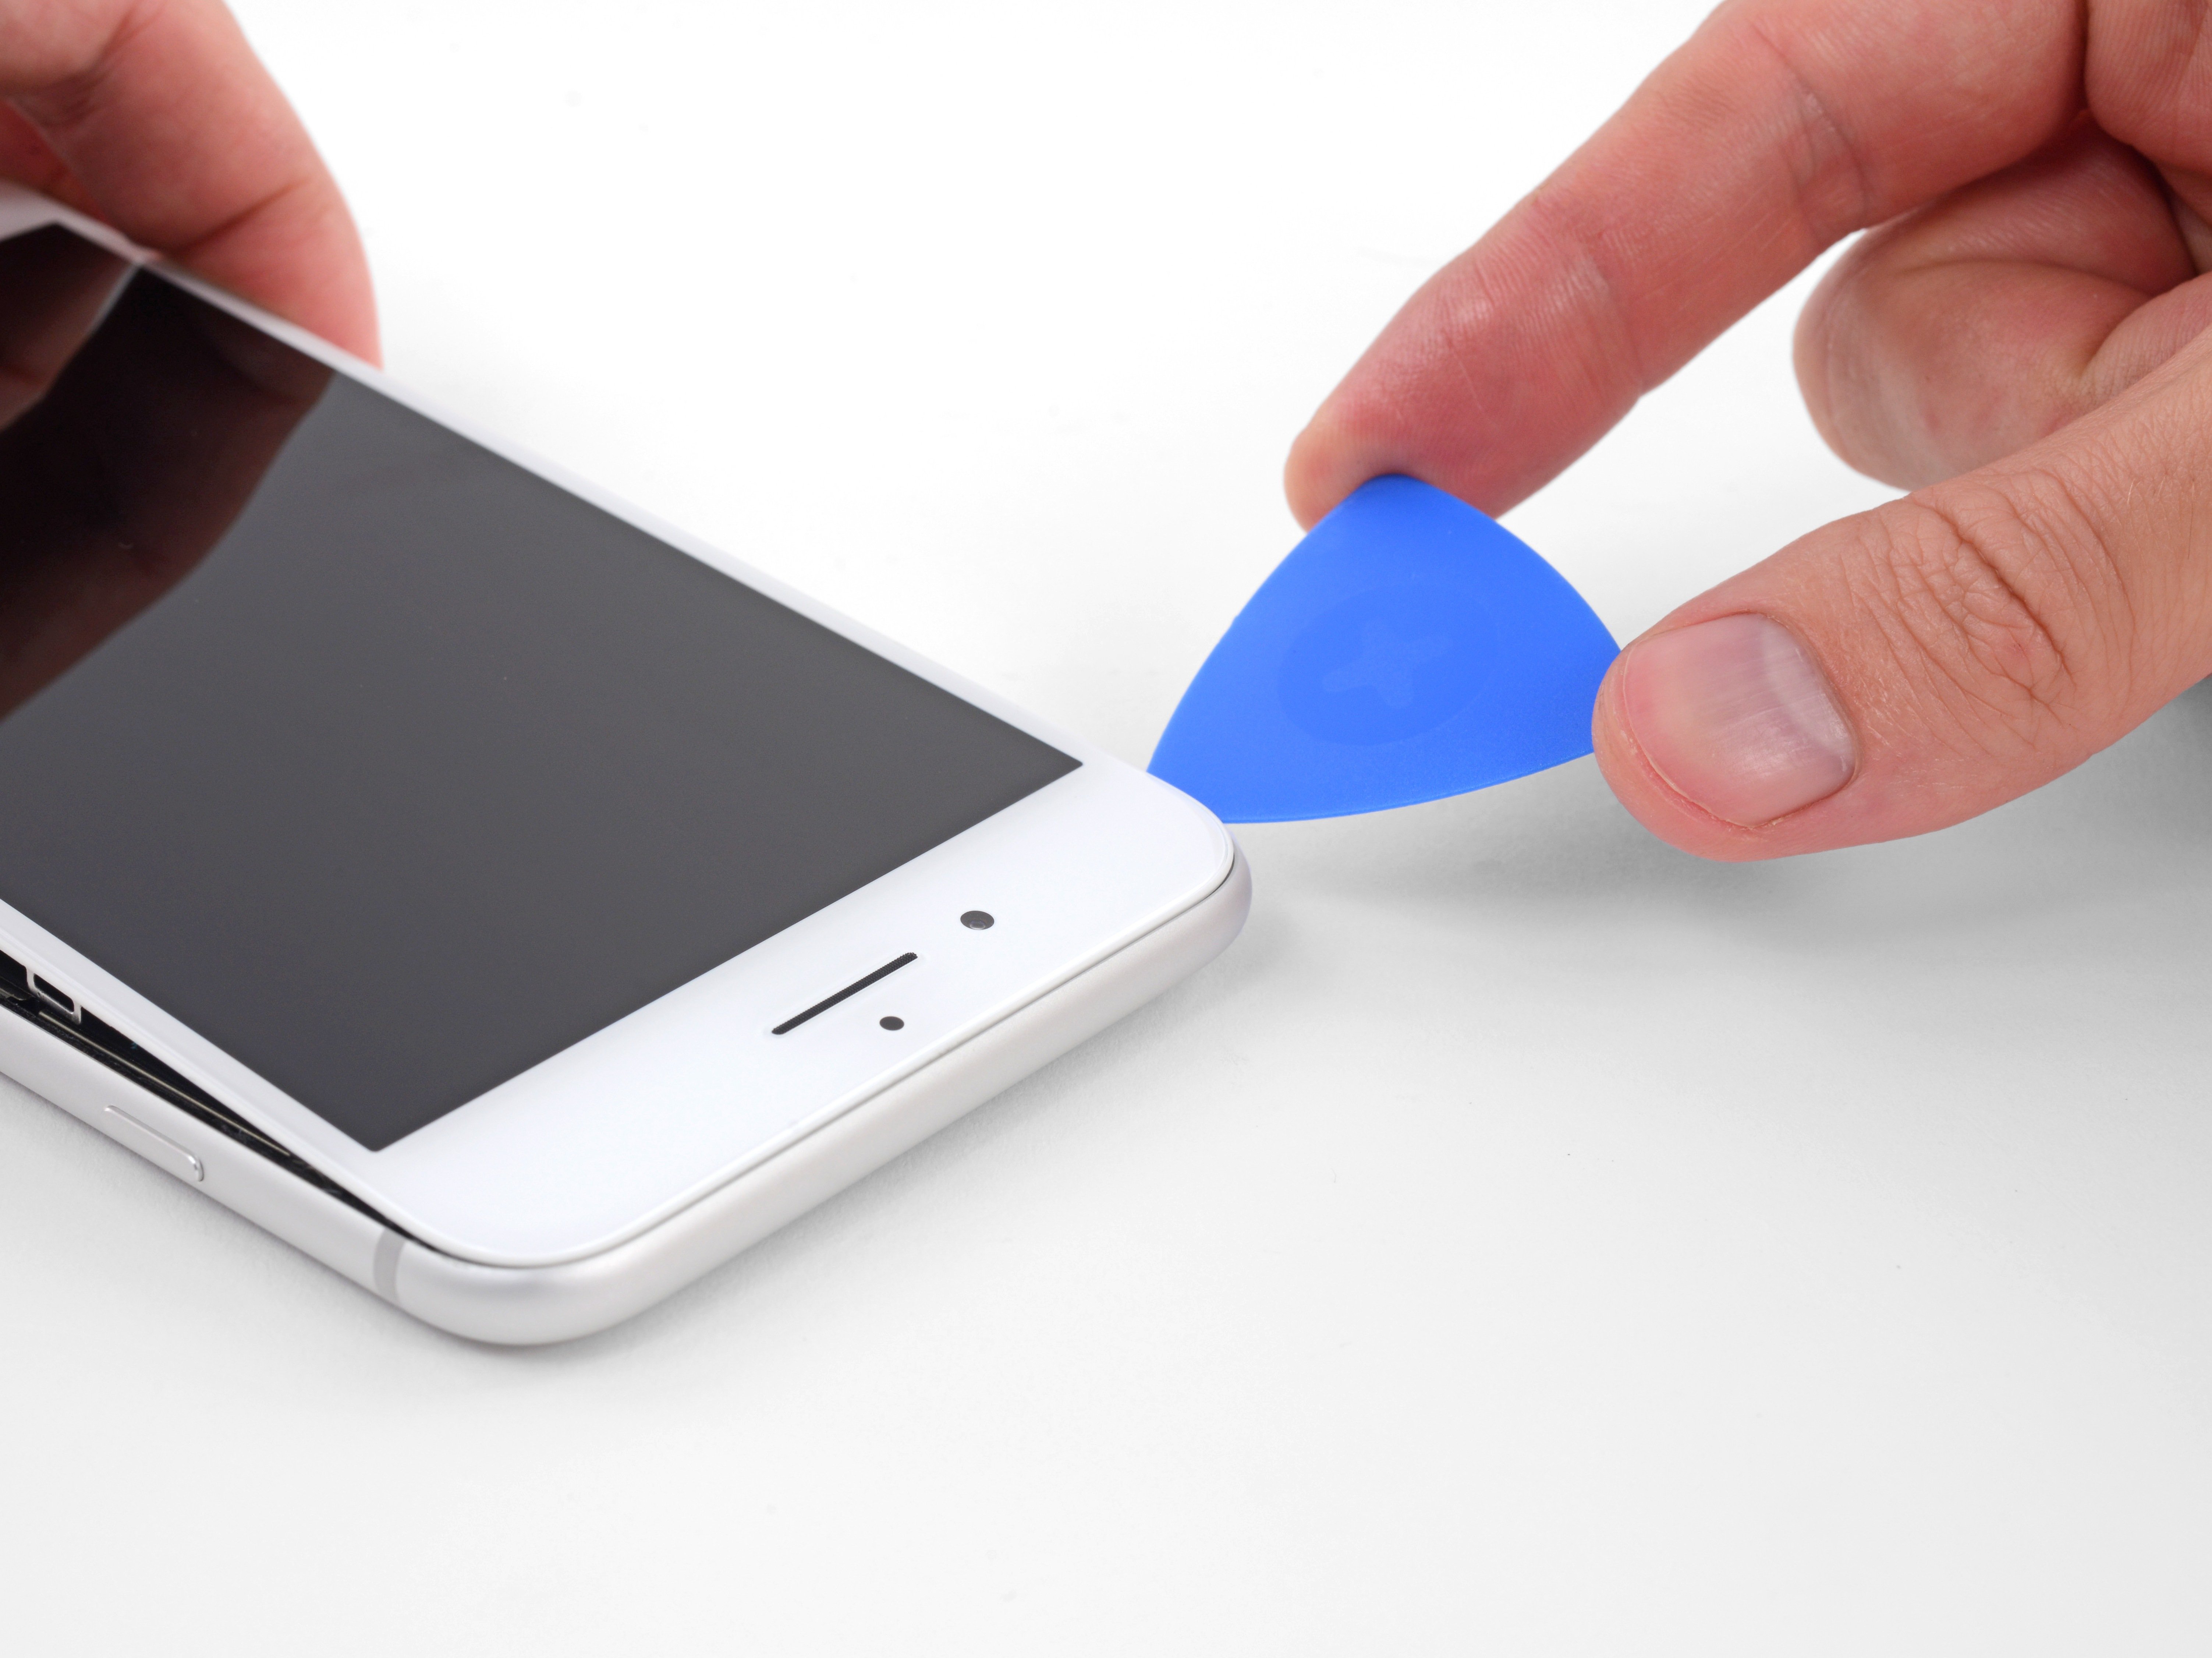
  • Insert an opening pick or other thin pry tool a few millimeters into the gap.
  • The watertight adhesive holding the display in place is very strong; creating this initial gap takes a significant amount of force. If you're having a hard time opening a gap, apply more heat, and gently rock the screen up and down to weaken the adhesive until you create enough of a gap to insert your tool.
Step 10

Repair step

  • Slide your pick around the corner and up the left edge of the phone, moving towards the volume control buttons and silent switch, breaking up the adhesive holding the display in place.
  • Stop near the top left corner of the display.
Step 11

Screen information

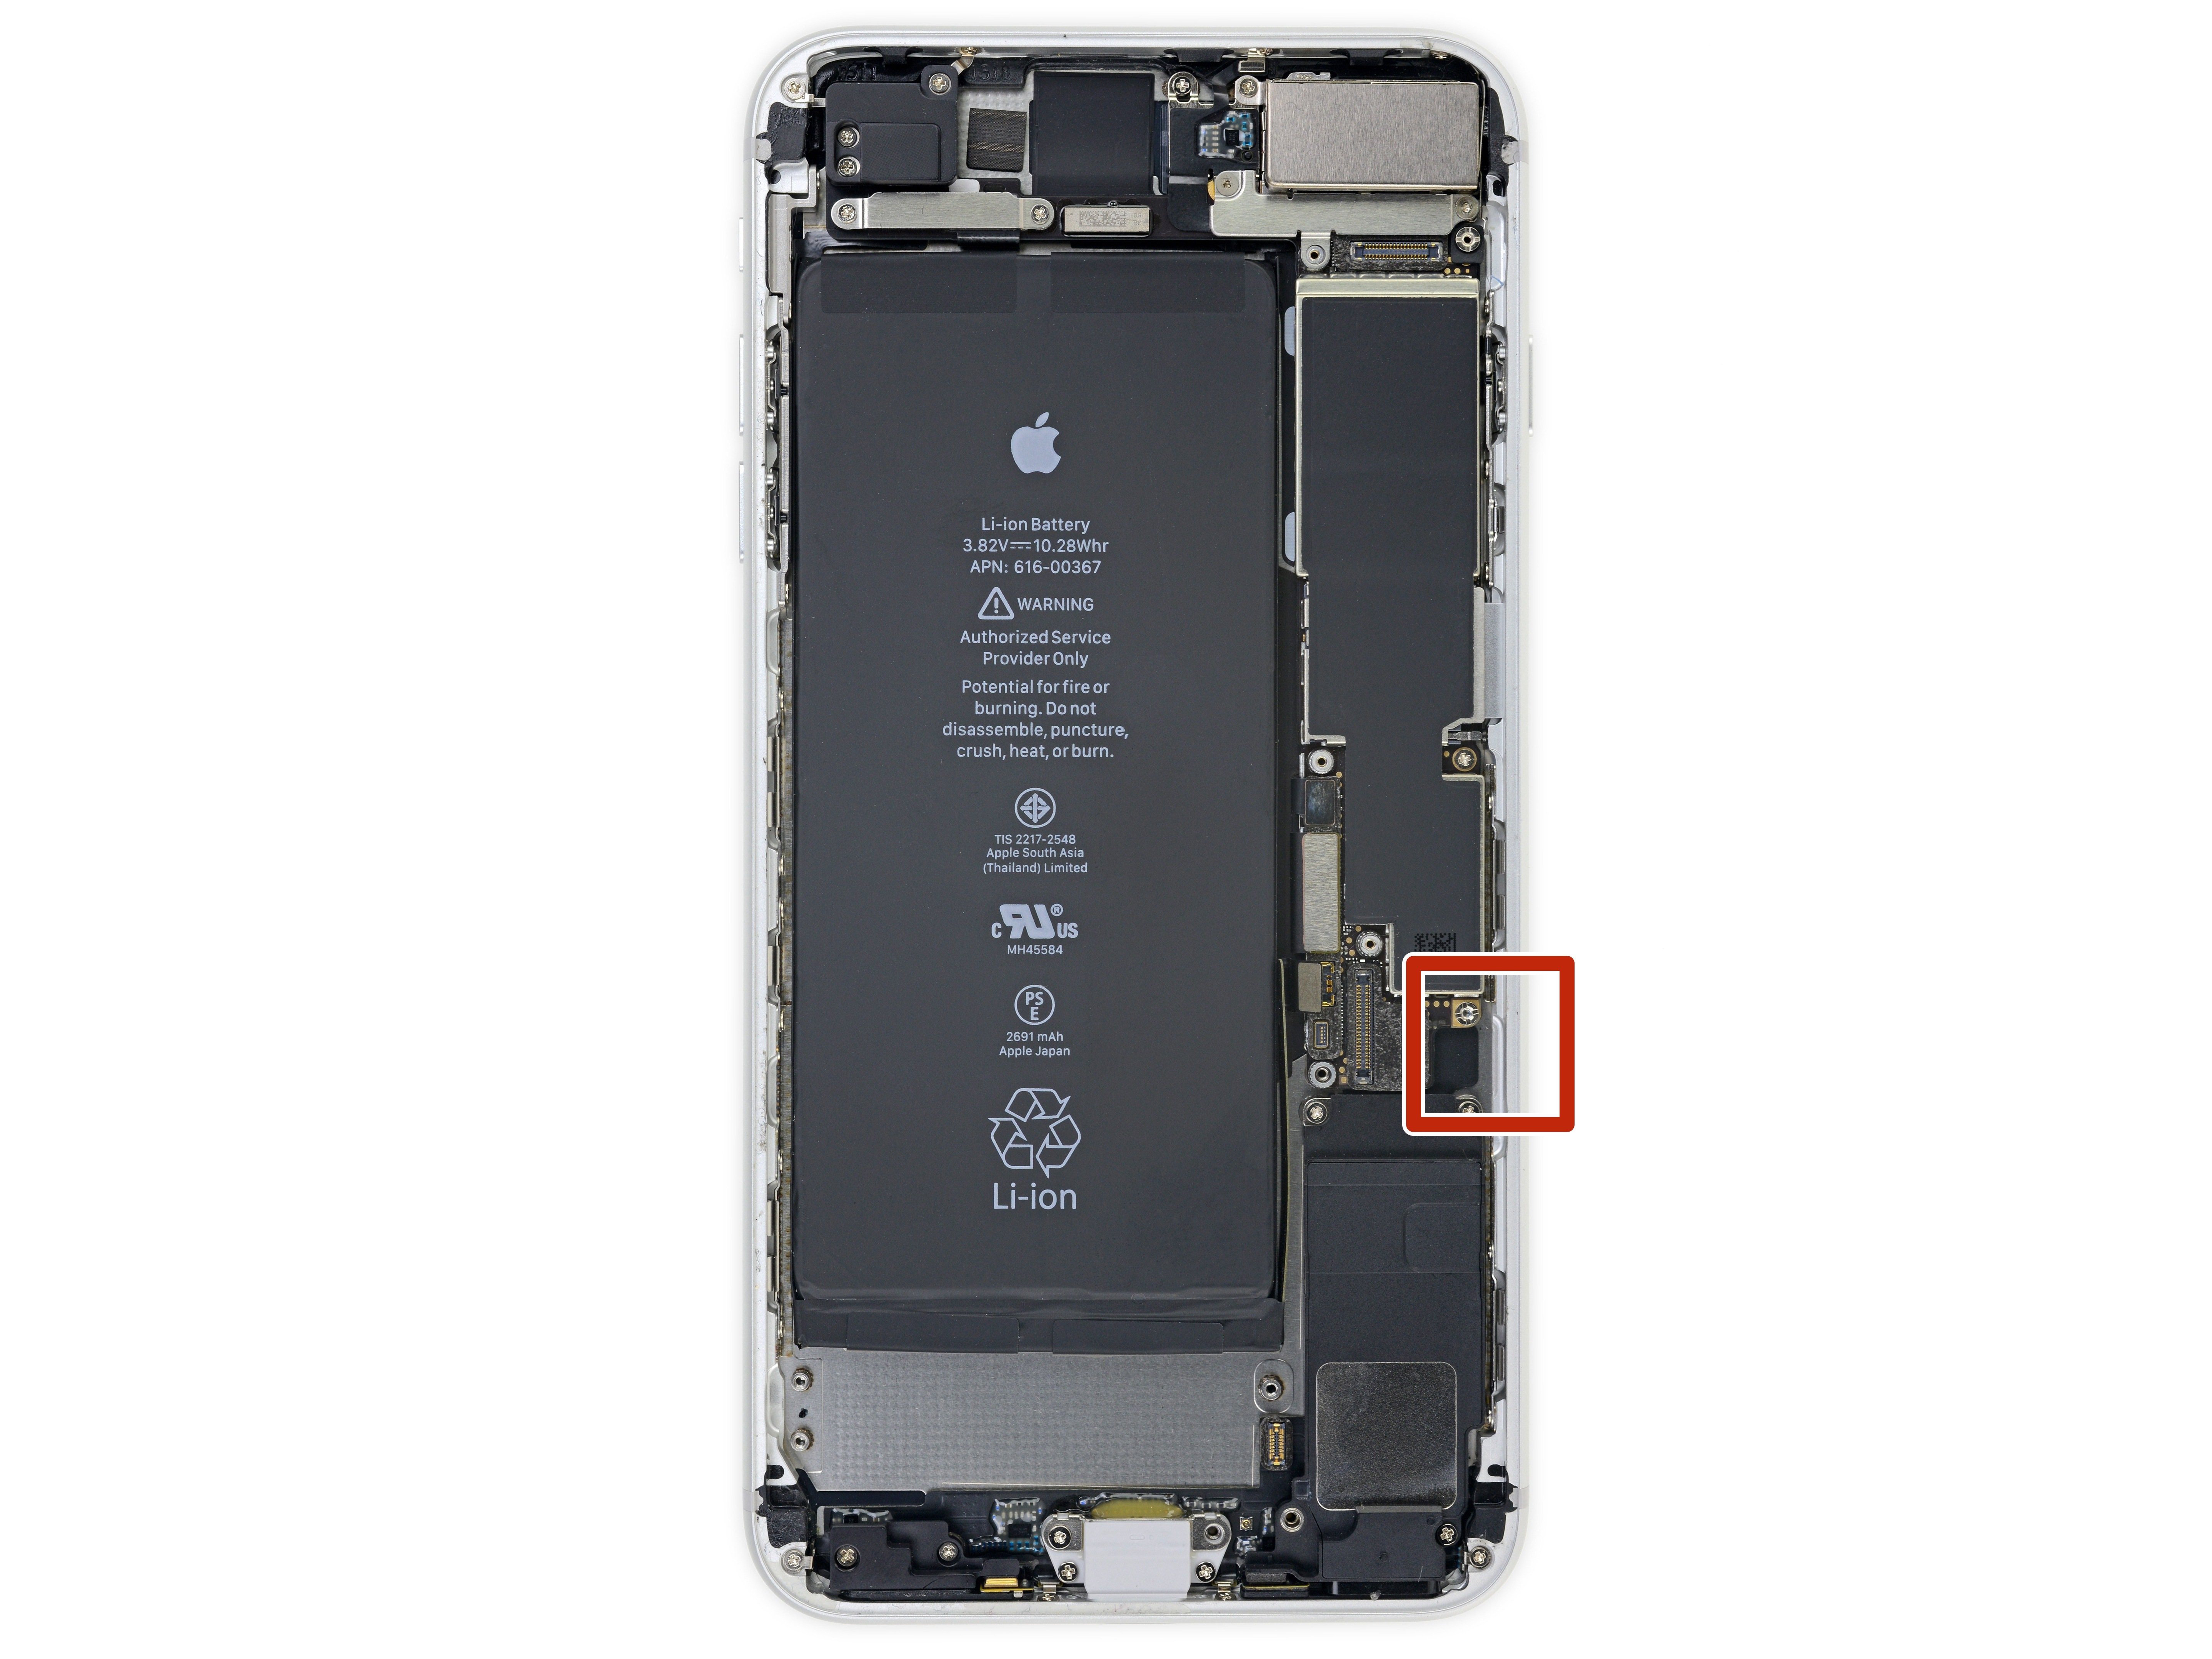
  • There's a delicate cable along the right edge of your iPhone. Don't insert your pick here, as you may damage the cable.
Step 12

Repair step

  • Re-insert your tool at the lower right corner of the iPhone, and slide it around the corner and up the right side of the phone to separate the adhesive.
  • Don't insert your pick more than 3 mm, as you may damage the display cables.
Step 13

Repair step

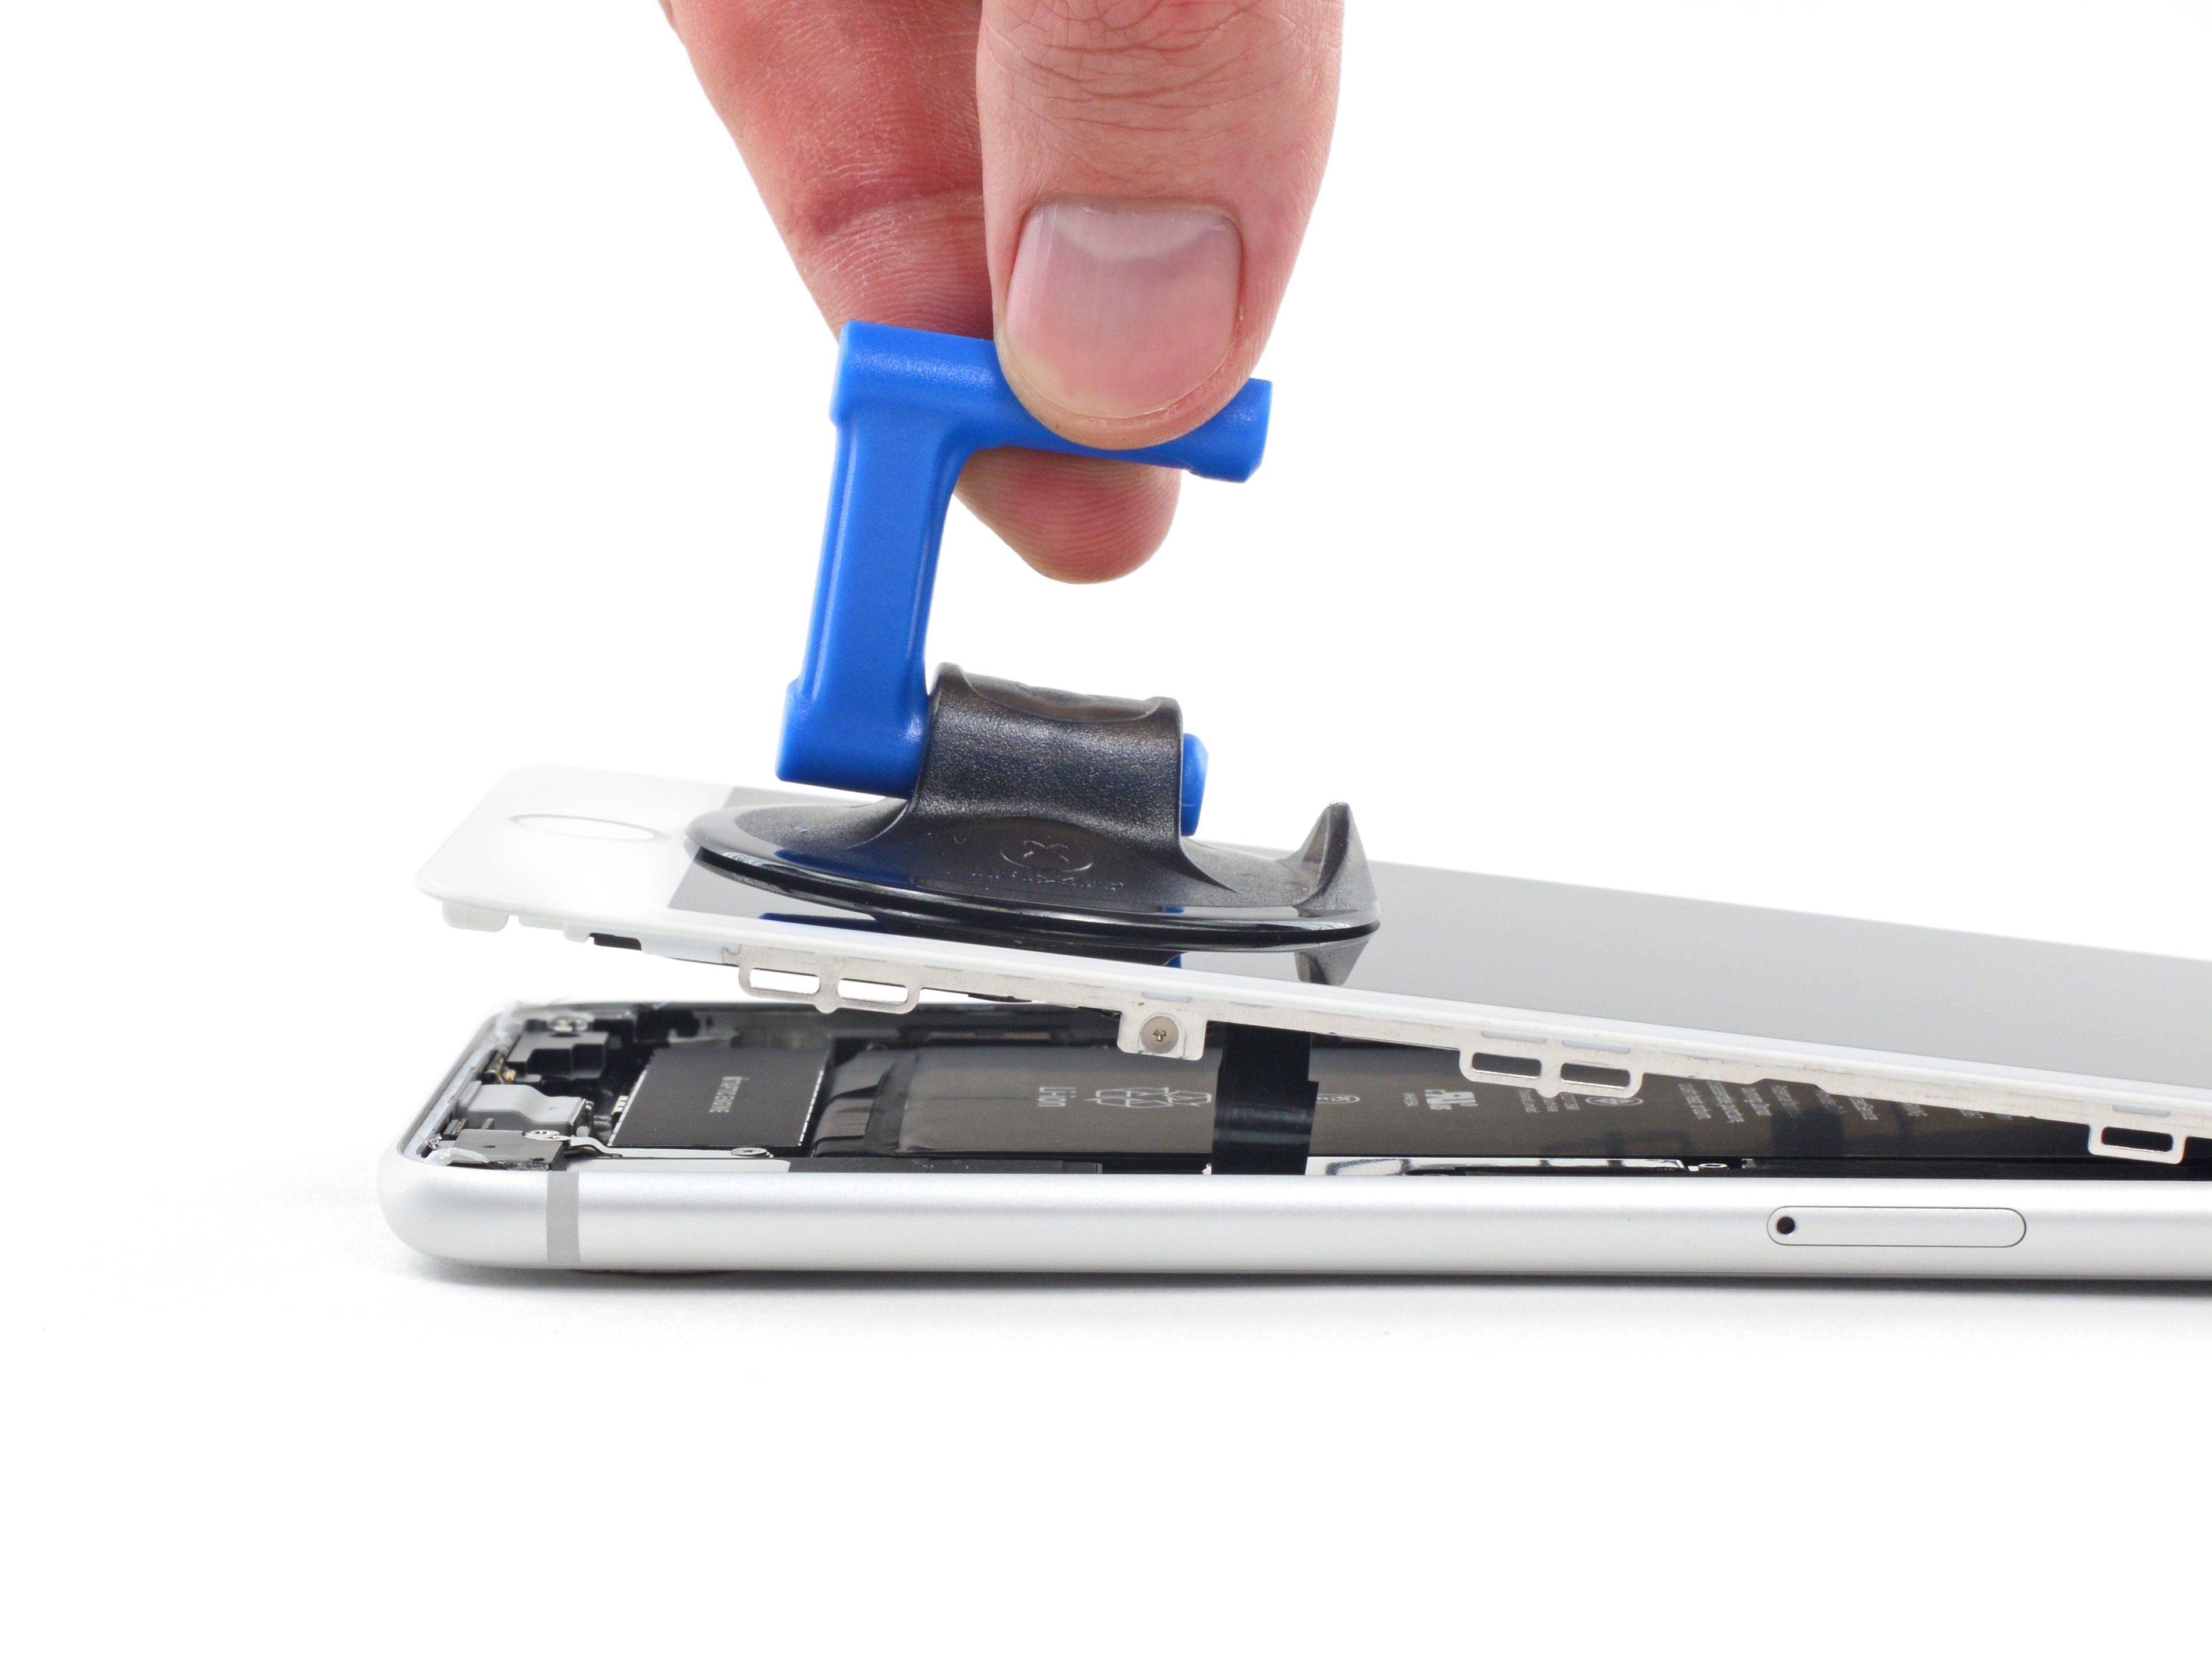
  • Gently pull up on the suction cup to lift up the bottom edge of the display.
  • Do not raise the display more than 15º or you'll risk straining or tearing the ribbon cables connecting the display.
Step 14

Repair step

  • Pull on the small nub on the suction cup to remove it from the front panel.
Step 15

Repair step

  • Slide an opening pick underneath the display along the top edge of the phone to loosen the last of the adhesive.
Step 16

Repair step

  • Slide the display assembly slightly down (away from the top edge of the phone) to disengage the clips holding it to the rear case.
Step 17

Repair step

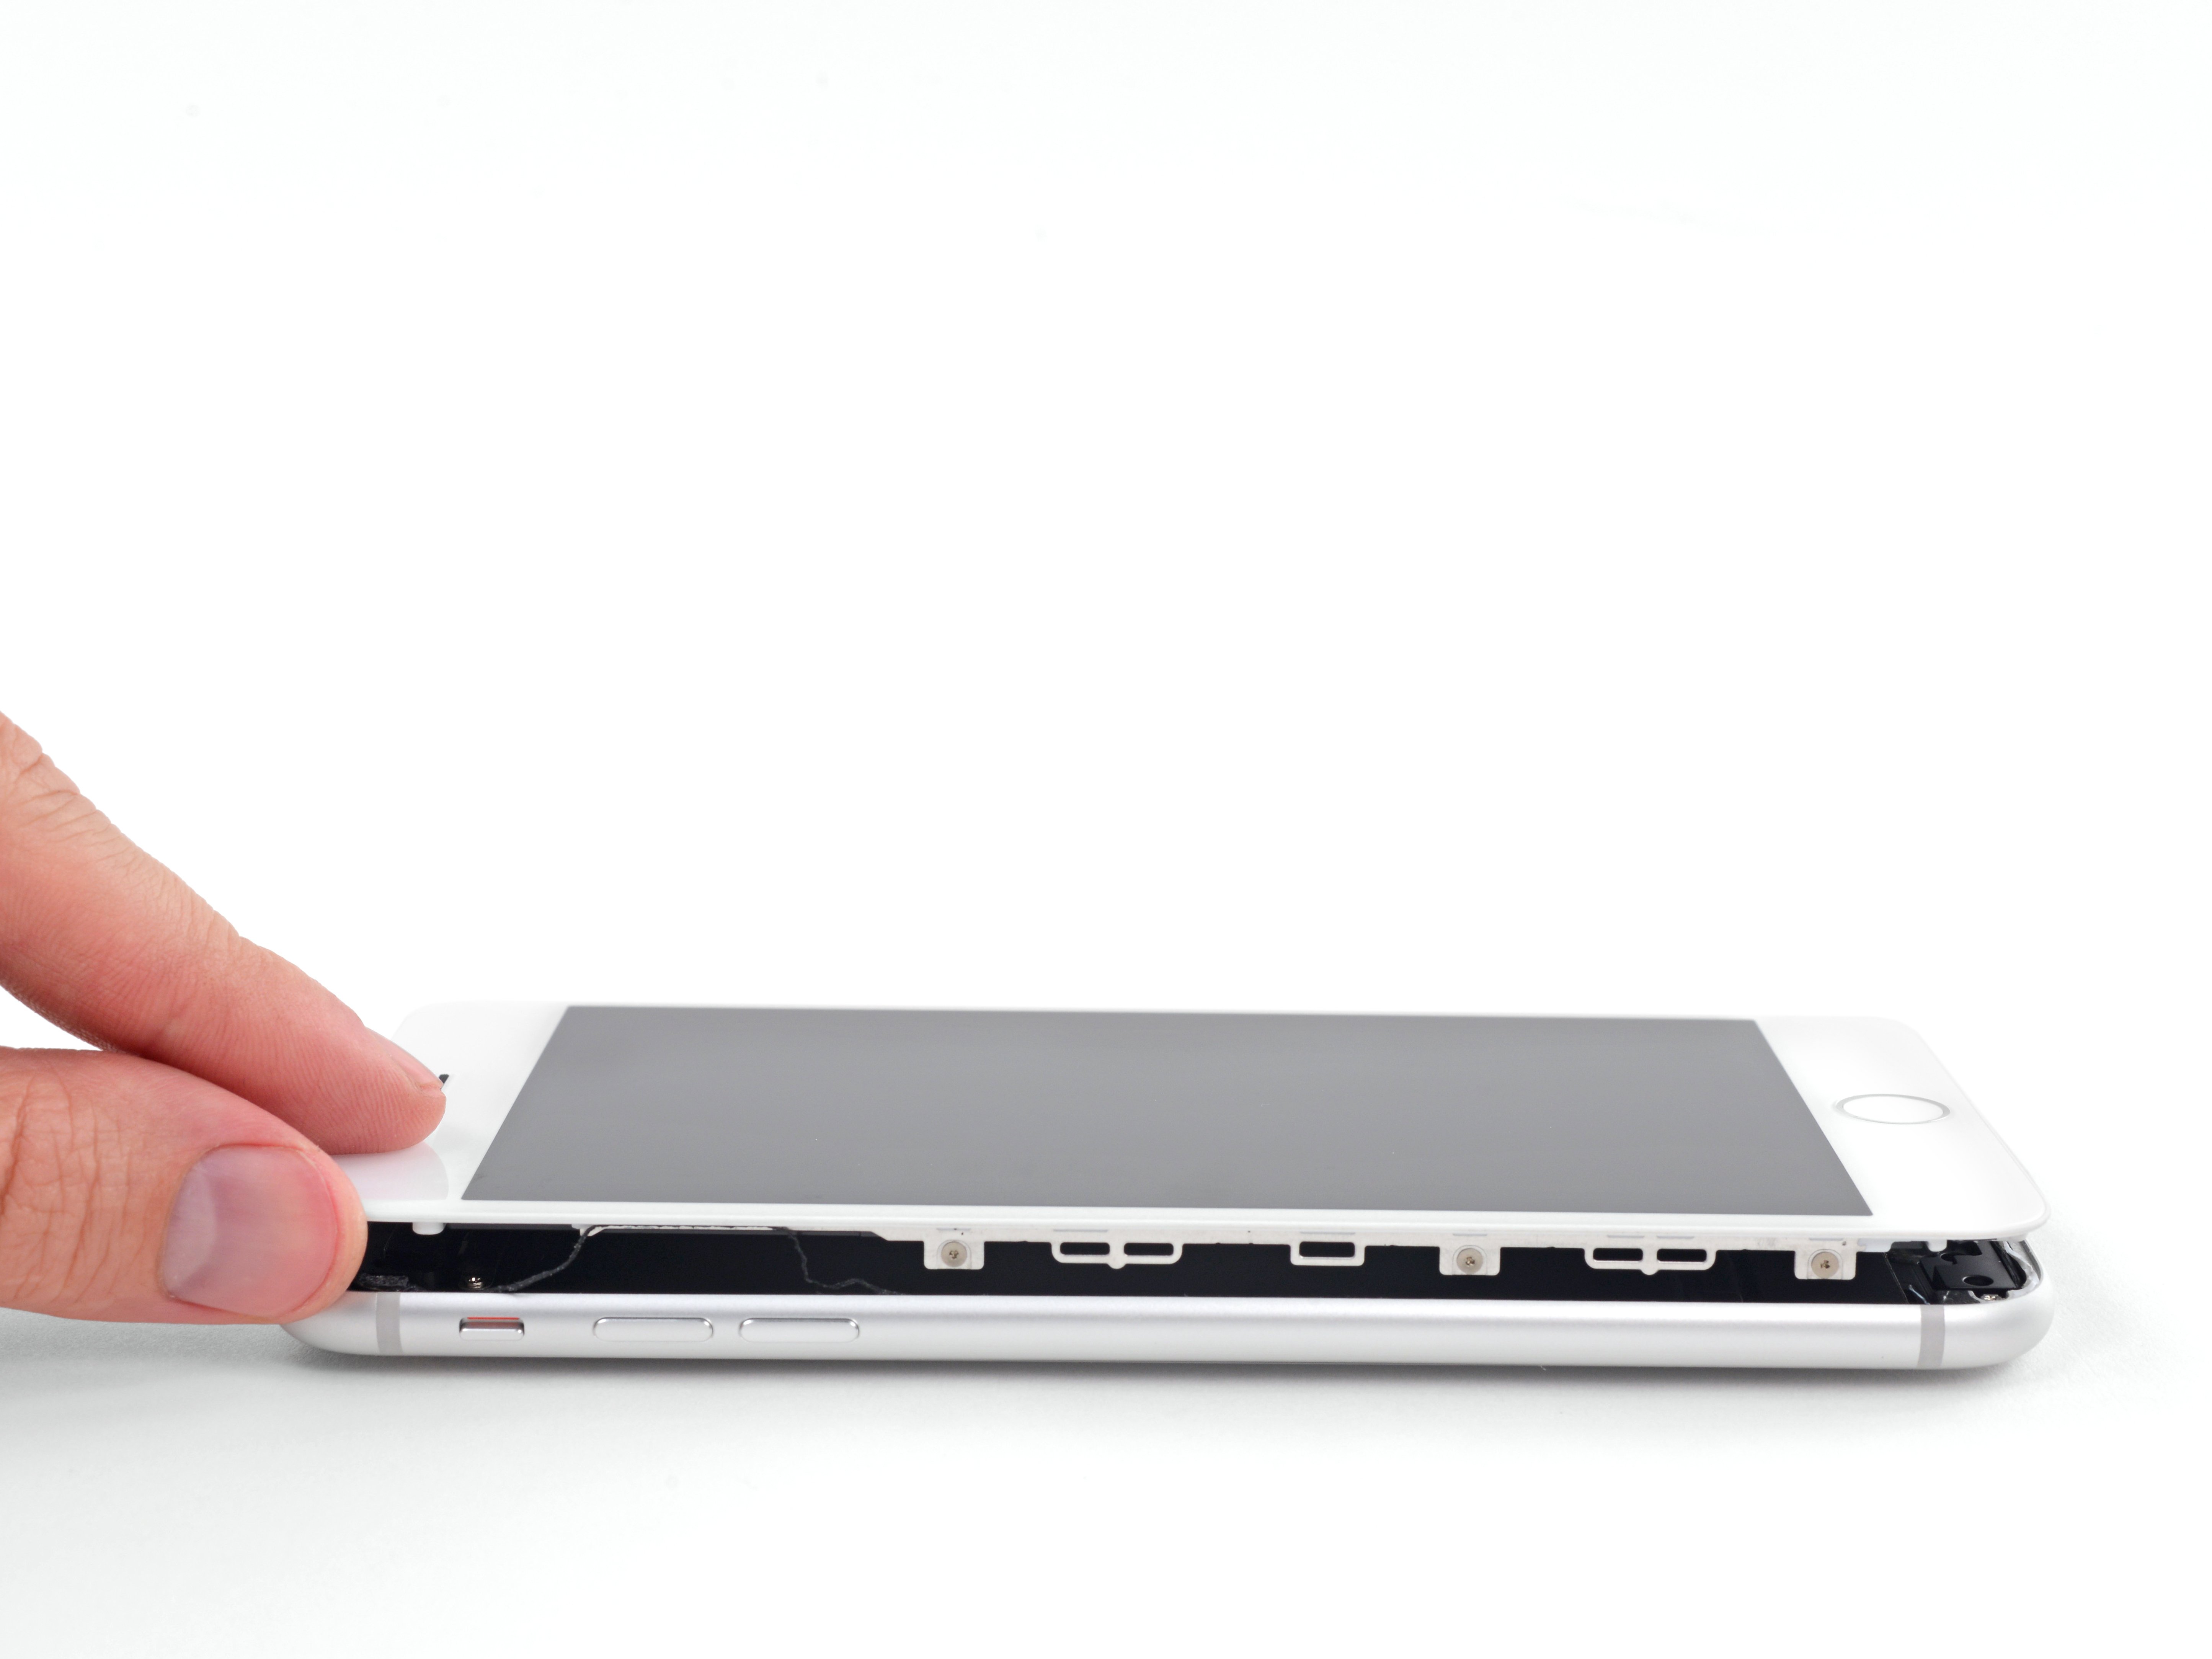
  • Open the iPhone by swinging the display up from the left side, like the back cover of a book.
  • Don't try to fully separate the display yet, as several fragile ribbon cables still connect it to the iPhone's logic board.
  • Lean the display against something to keep it propped up while you're working on the phone.
Step 18

Battery Disconnection

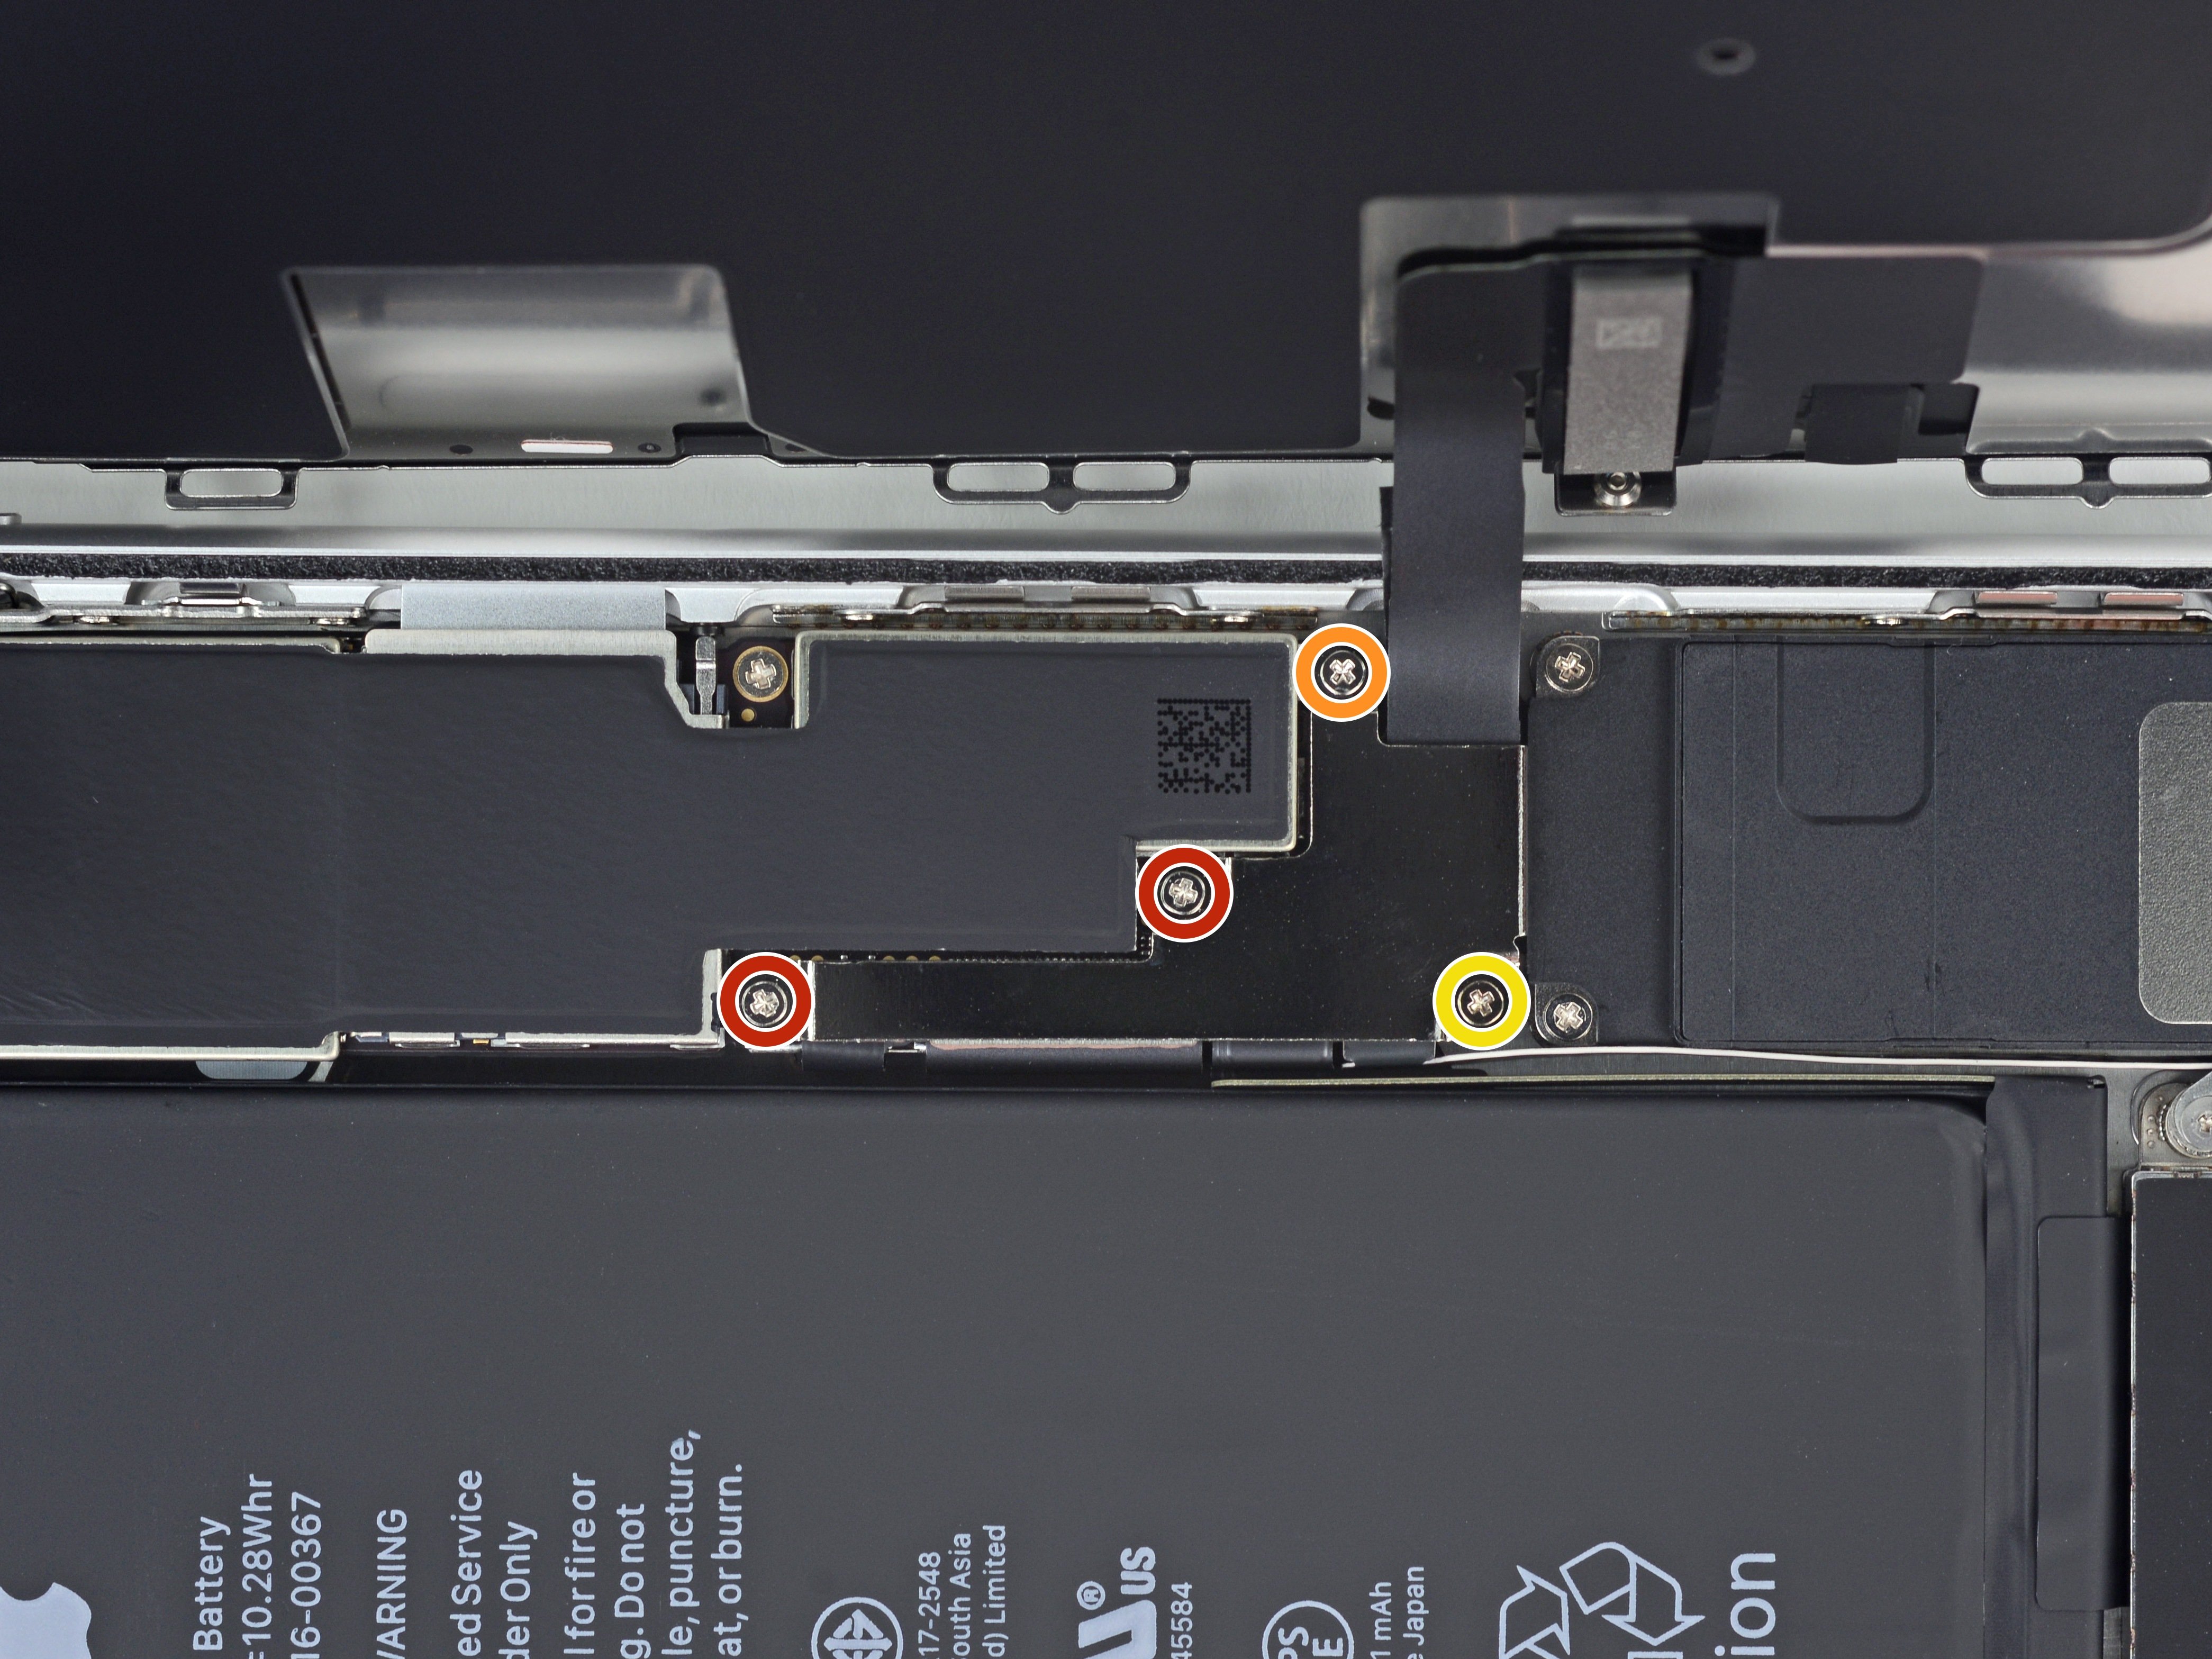
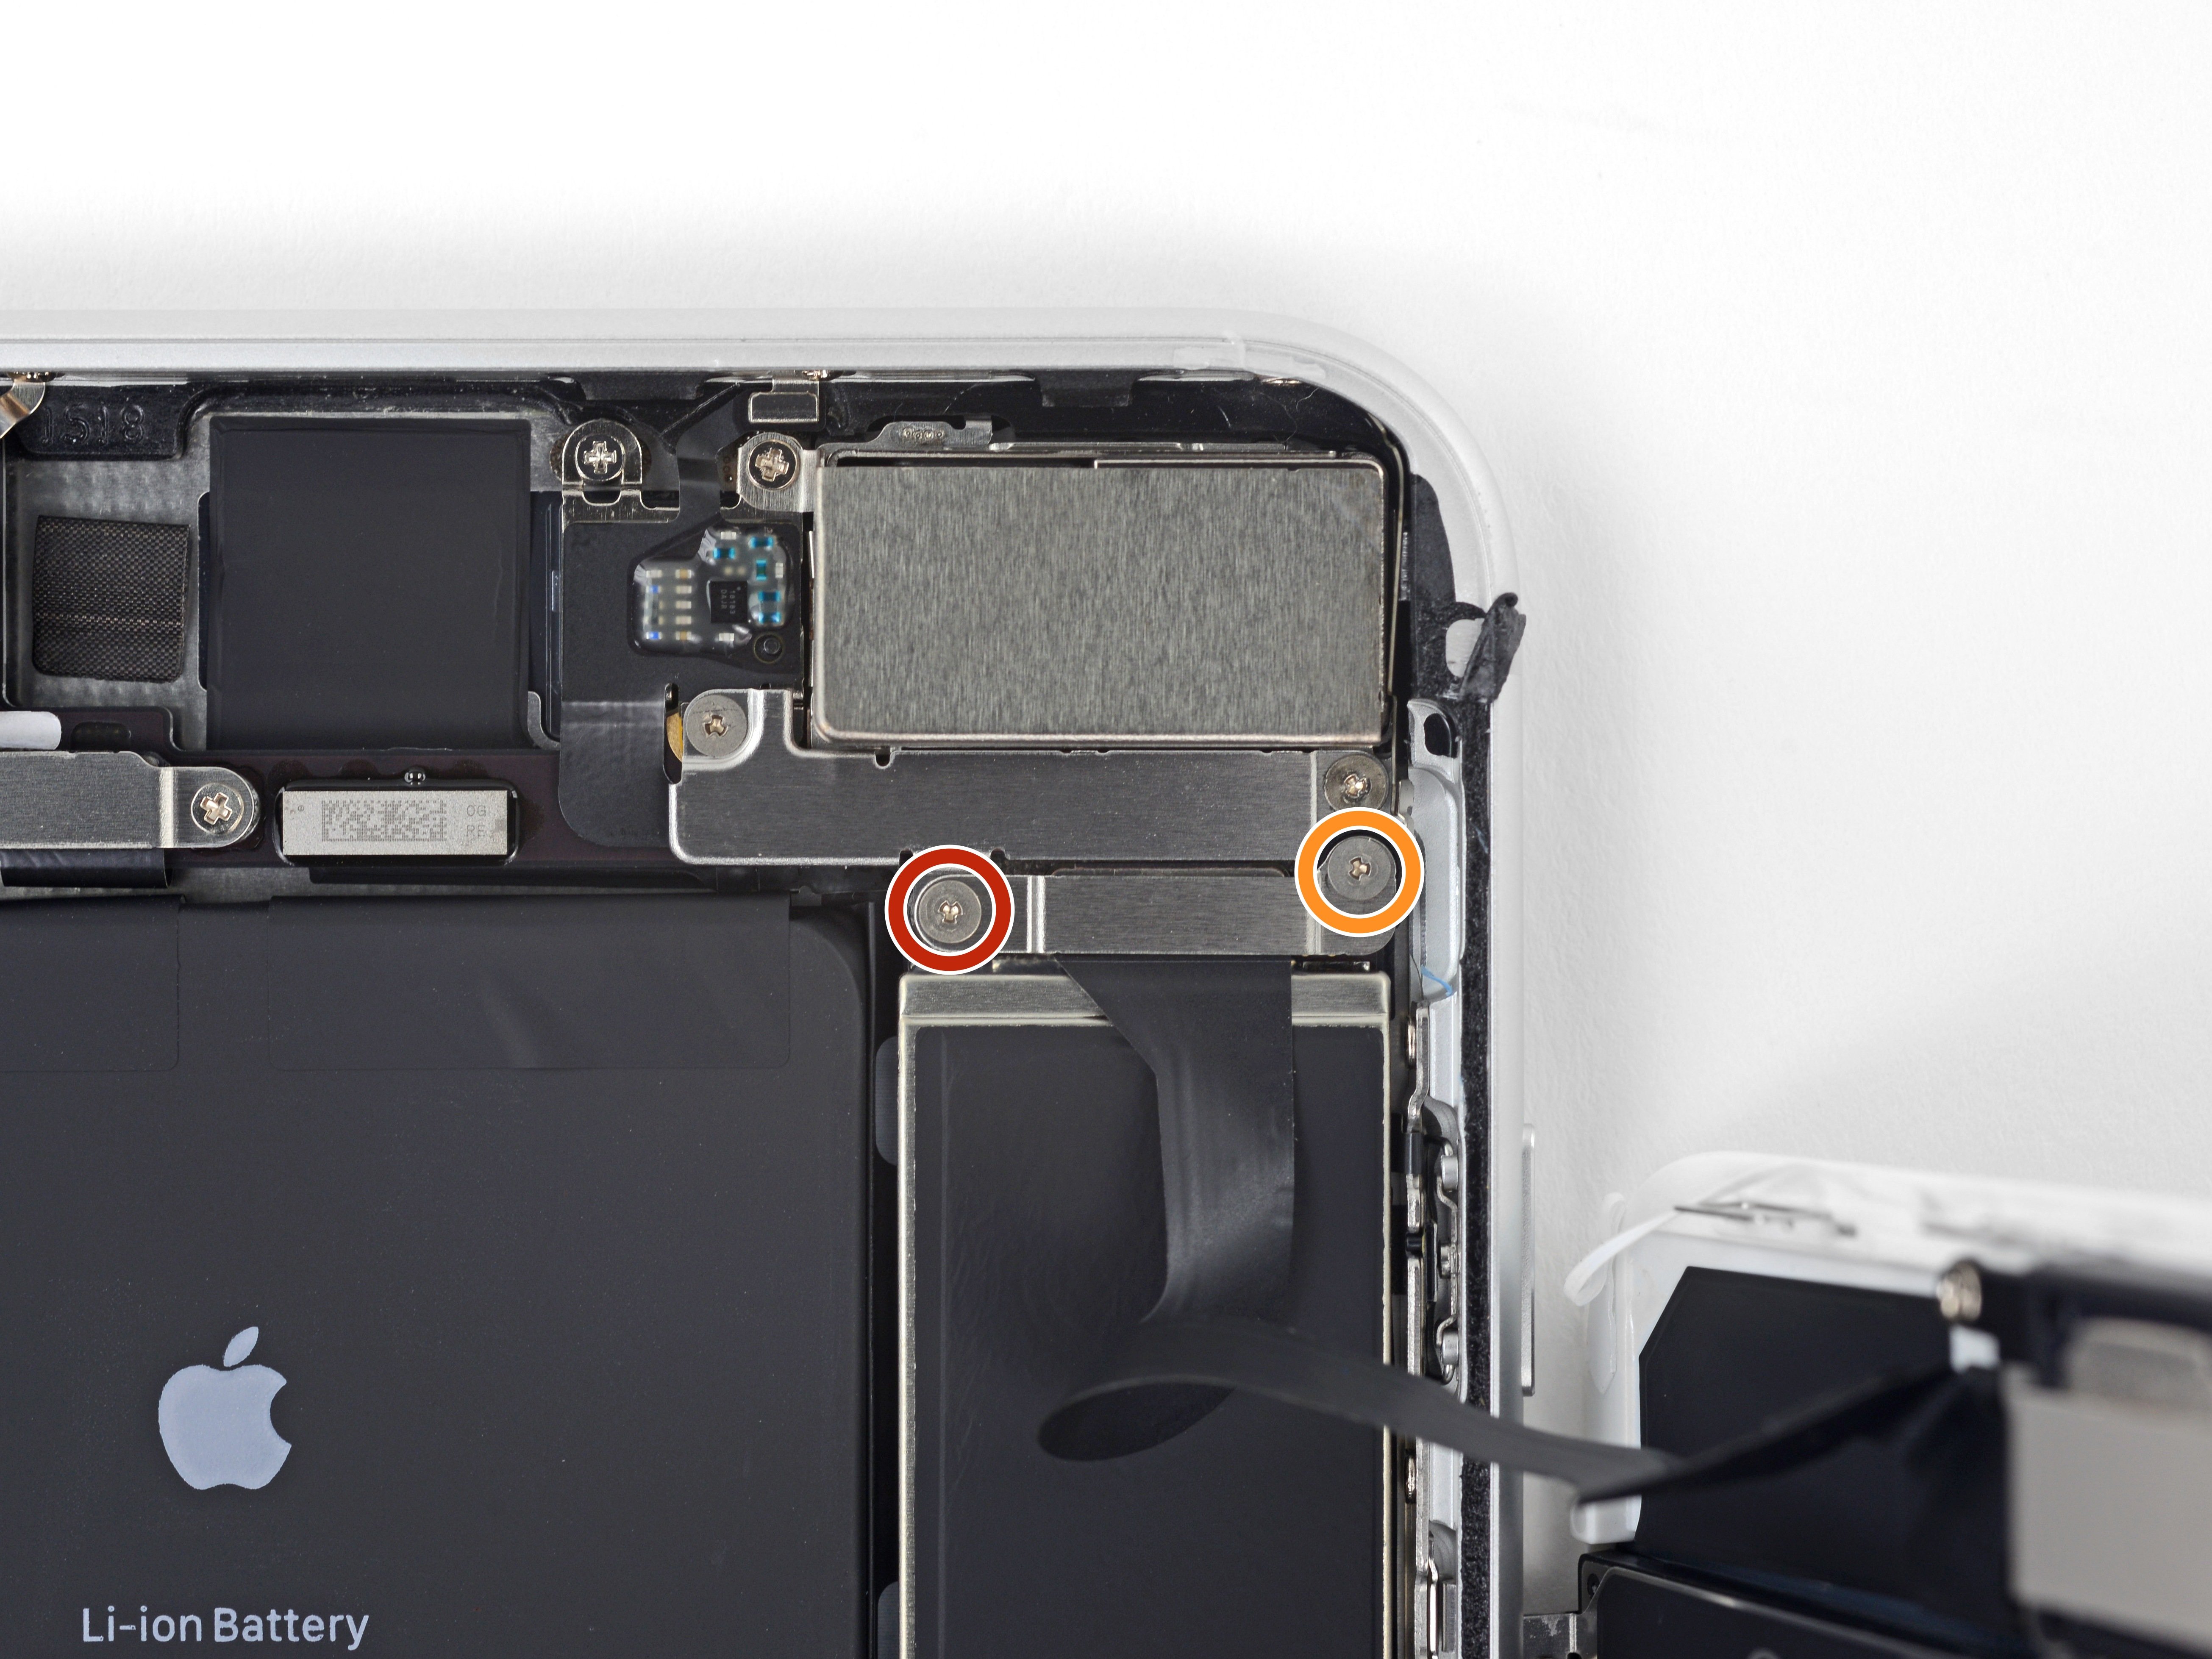
  • Remove four Phillips (JIS) screws securing the lower display cable bracket to the logic board, of the following lengths:
  • Two 1.3 mm screws
  • One 1.4 mm screw
  • One 2.7 mm screw
  • Throughout this guide, keep careful track of your screws so that each one goes back where it came from during reassembly. Installing a screw in the wrong place can cause permanent damage.
Step 19

Repair step

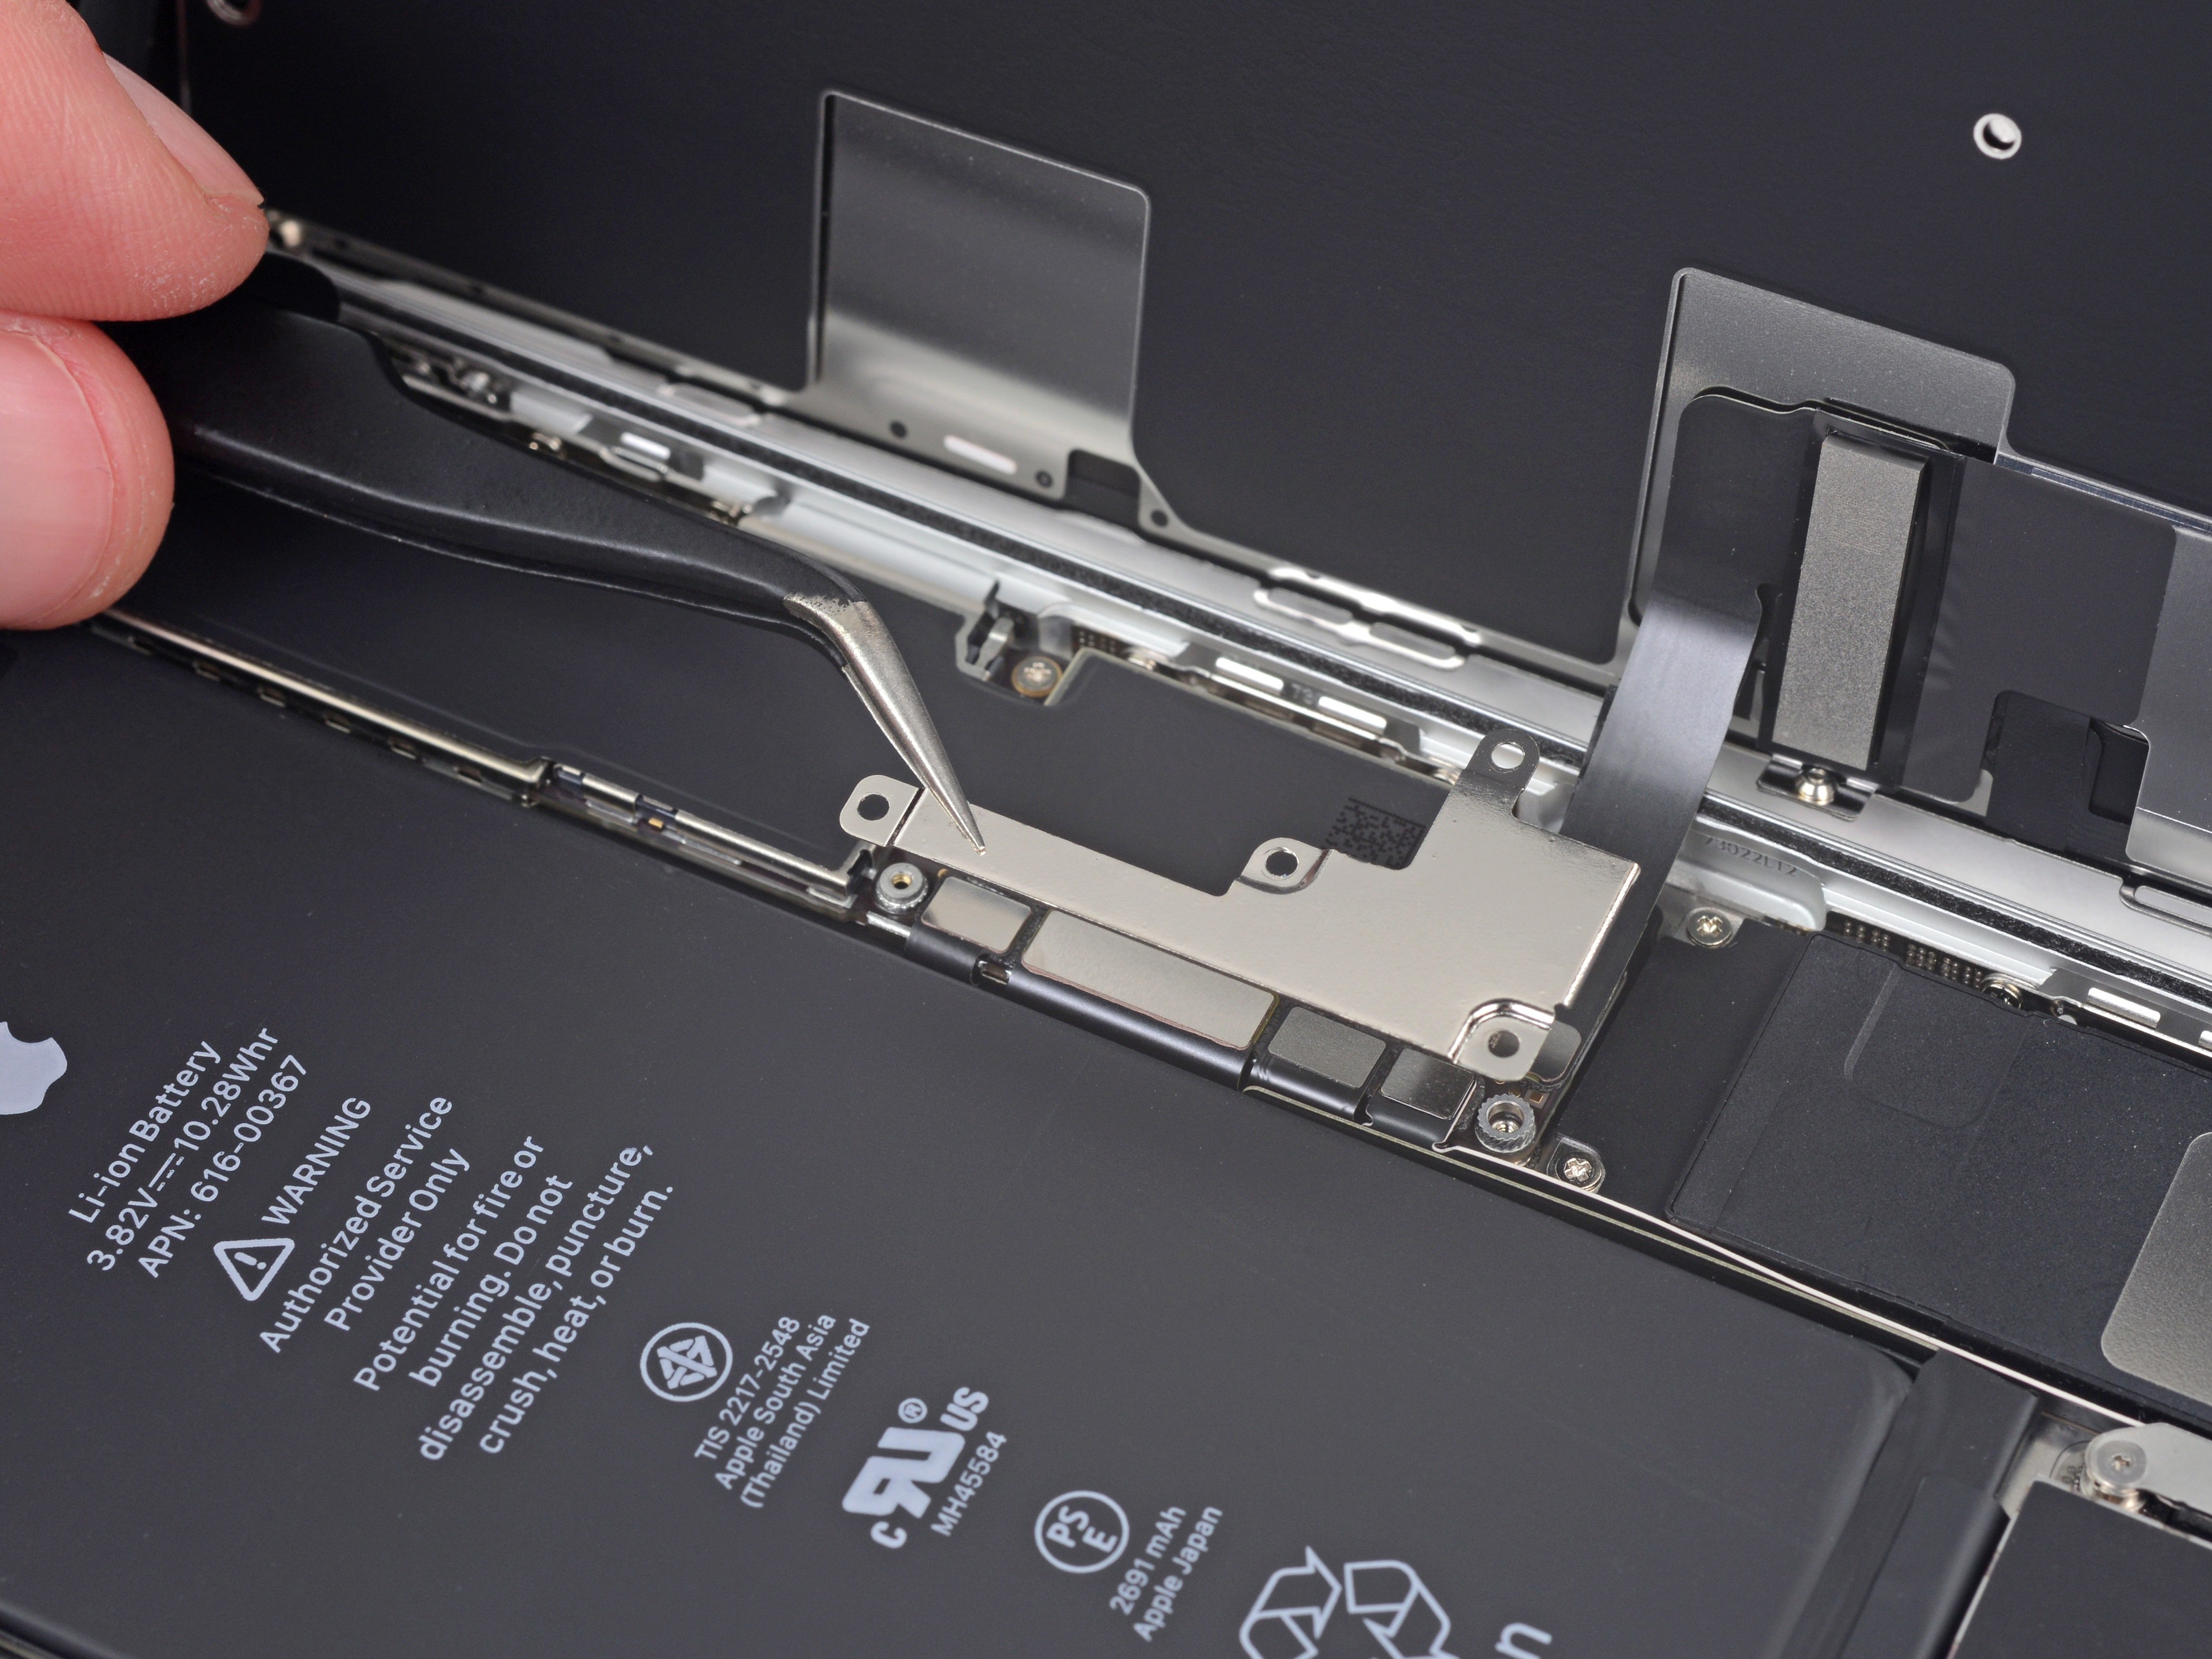
  • Remove the lower display cable bracket.
Step 20

Repair step

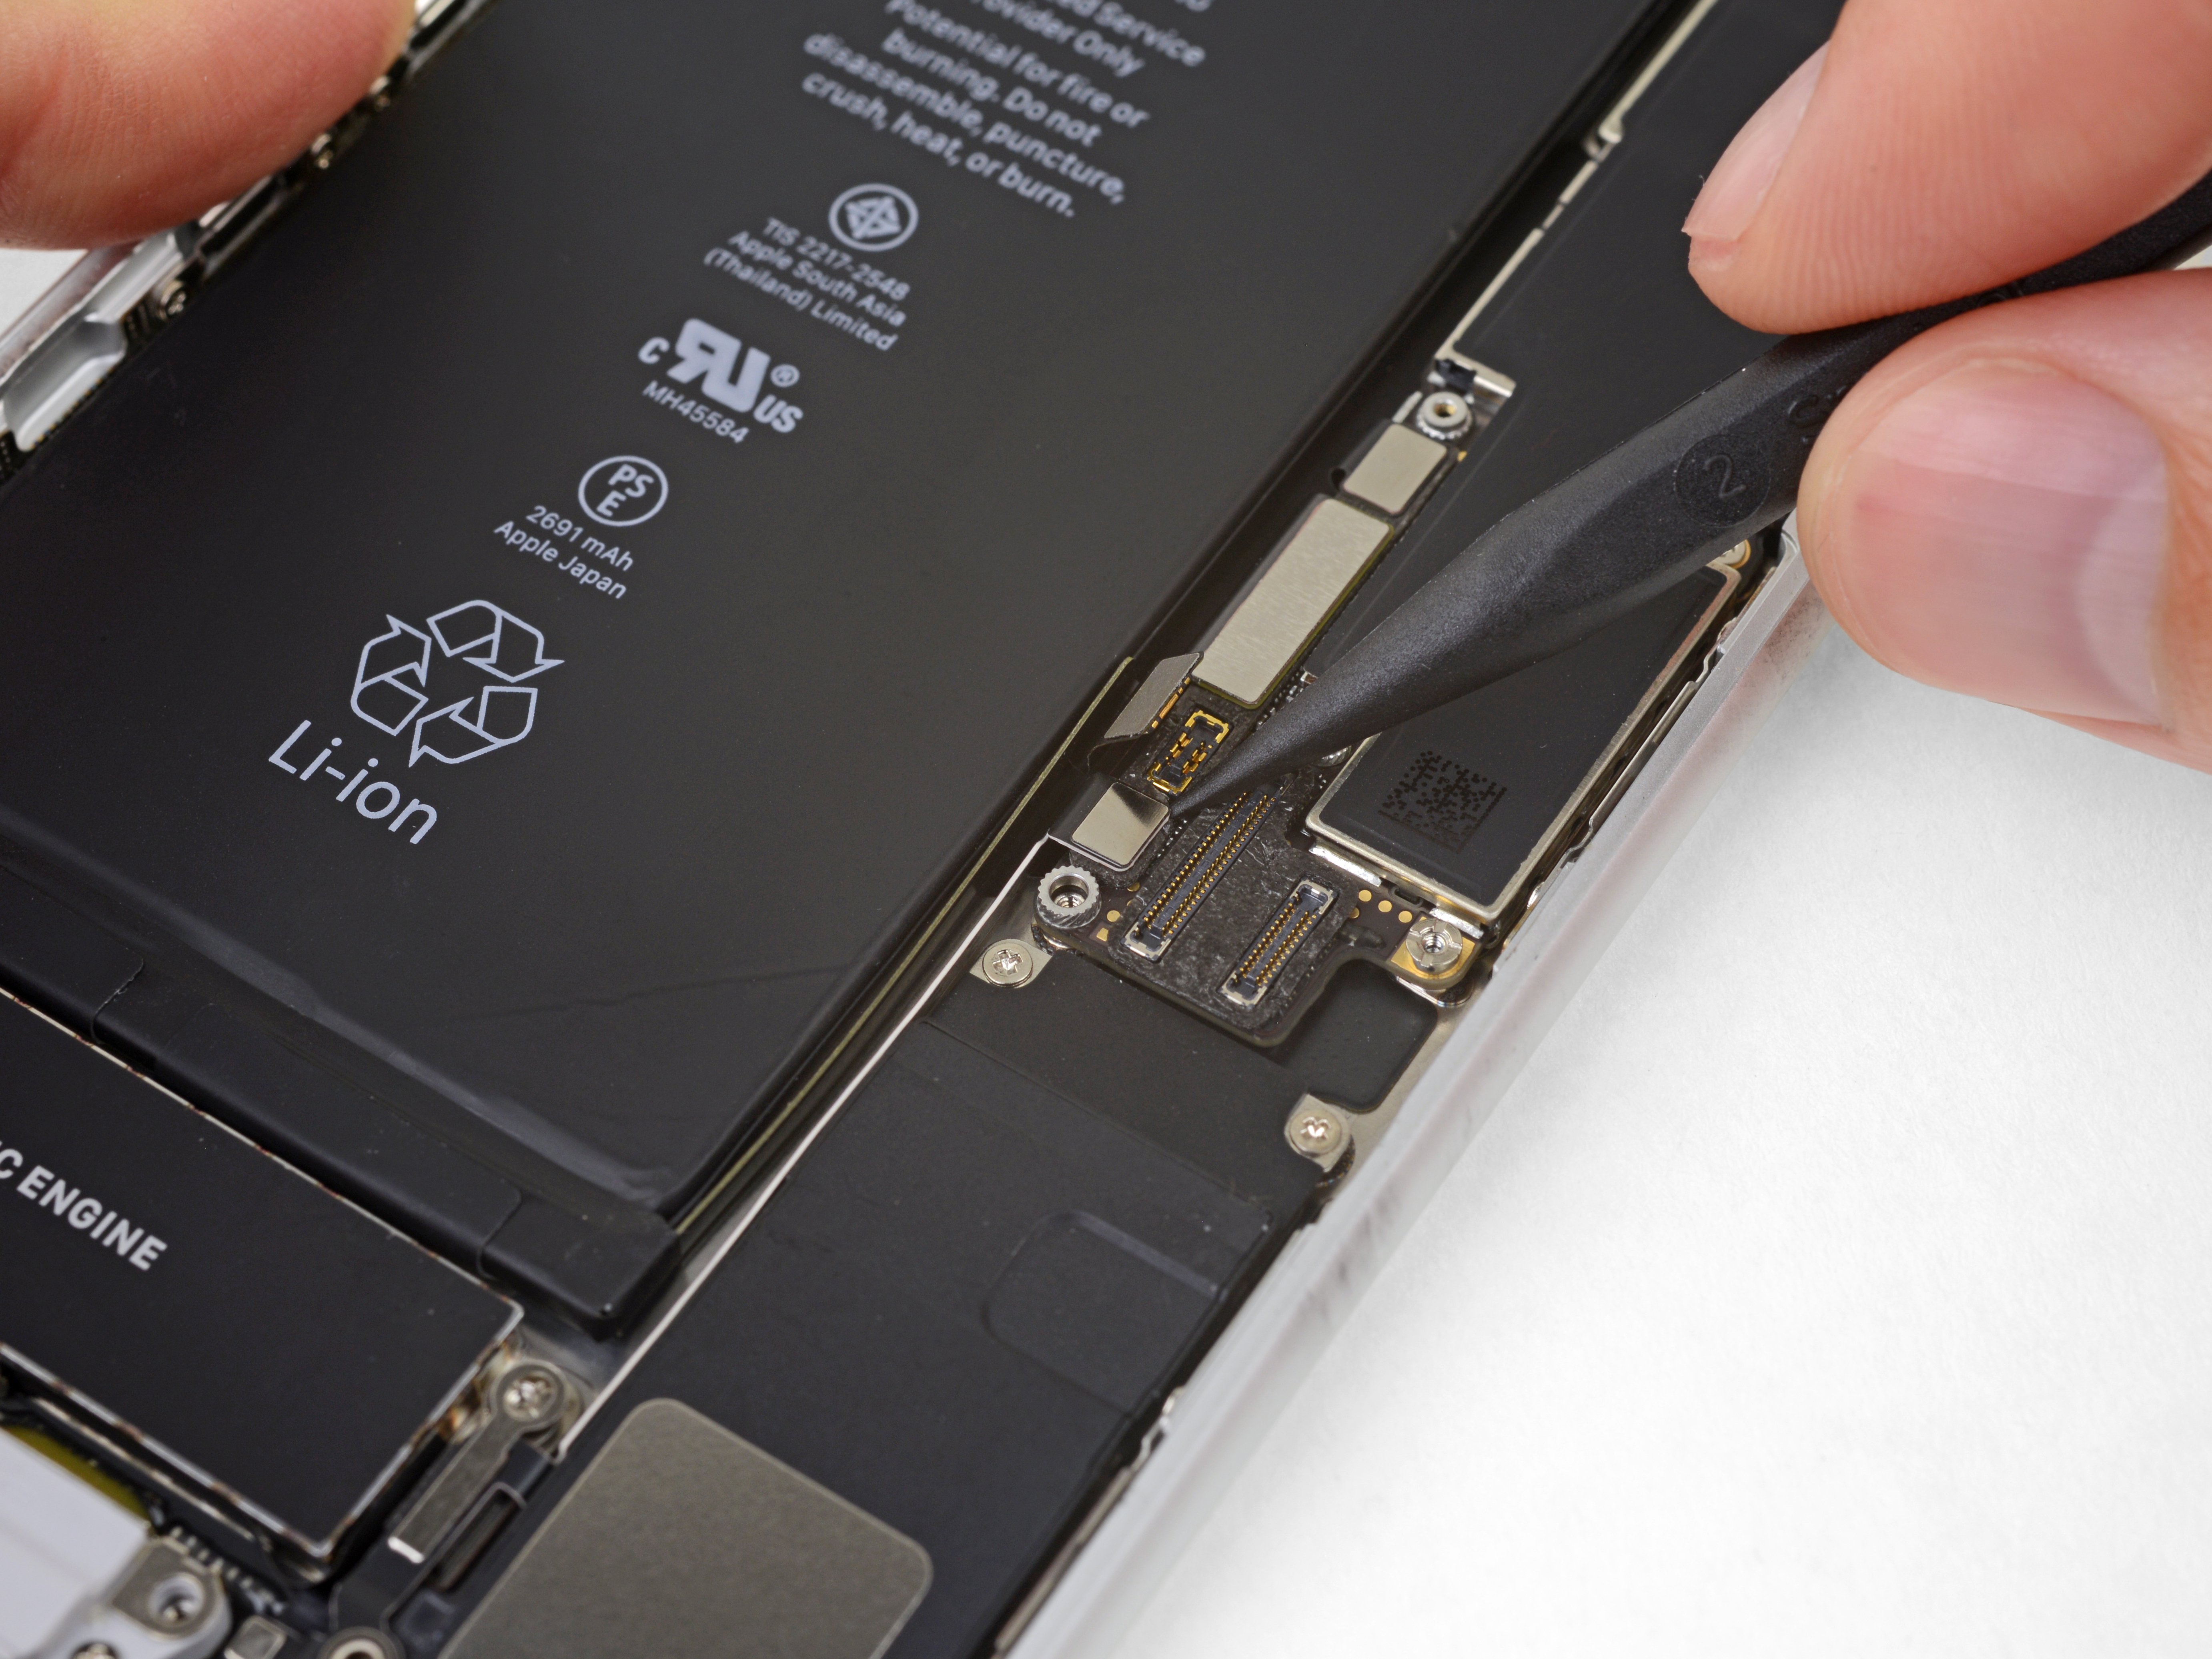
  • Use the point of a spudger to pry the battery connector up from its socket on the logic board.
  • Bend the connector cable up slightly to prevent it from accidentally making contact with the socket and providing power to the phone during your repair.
Step 21

Repair step

  • Use the tip of a spudger or a fingernail to disconnect the large lower display connector by prying it straight up from its socket.
  • To re-attach press connectors like this one, press down on one side until it clicks into place, then repeat on the other side. Do not press down on the middle. If the connector is even slightly misaligned, the connector can bend, causing permanent damage.
Step 22

Repair step

  • Disconnect the second lower display cable connector, directly behind the one you disconnected in the previous step.
Step 23

Repair step

  • Remove the two tri-point Y000 screws securing the bracket over the front panel sensor assembly connector:
  • One 1.0 mm screw
  • One 1.2 mm screw
Step 24

Repair step

  • Remove the bracket covering the front panel sensor assembly connector.
Step 25

Repair step

  • Use the tip of a spudger or a fingernail to disconnect the front panel sensor assembly connector from its socket.
Step 26

Repair step

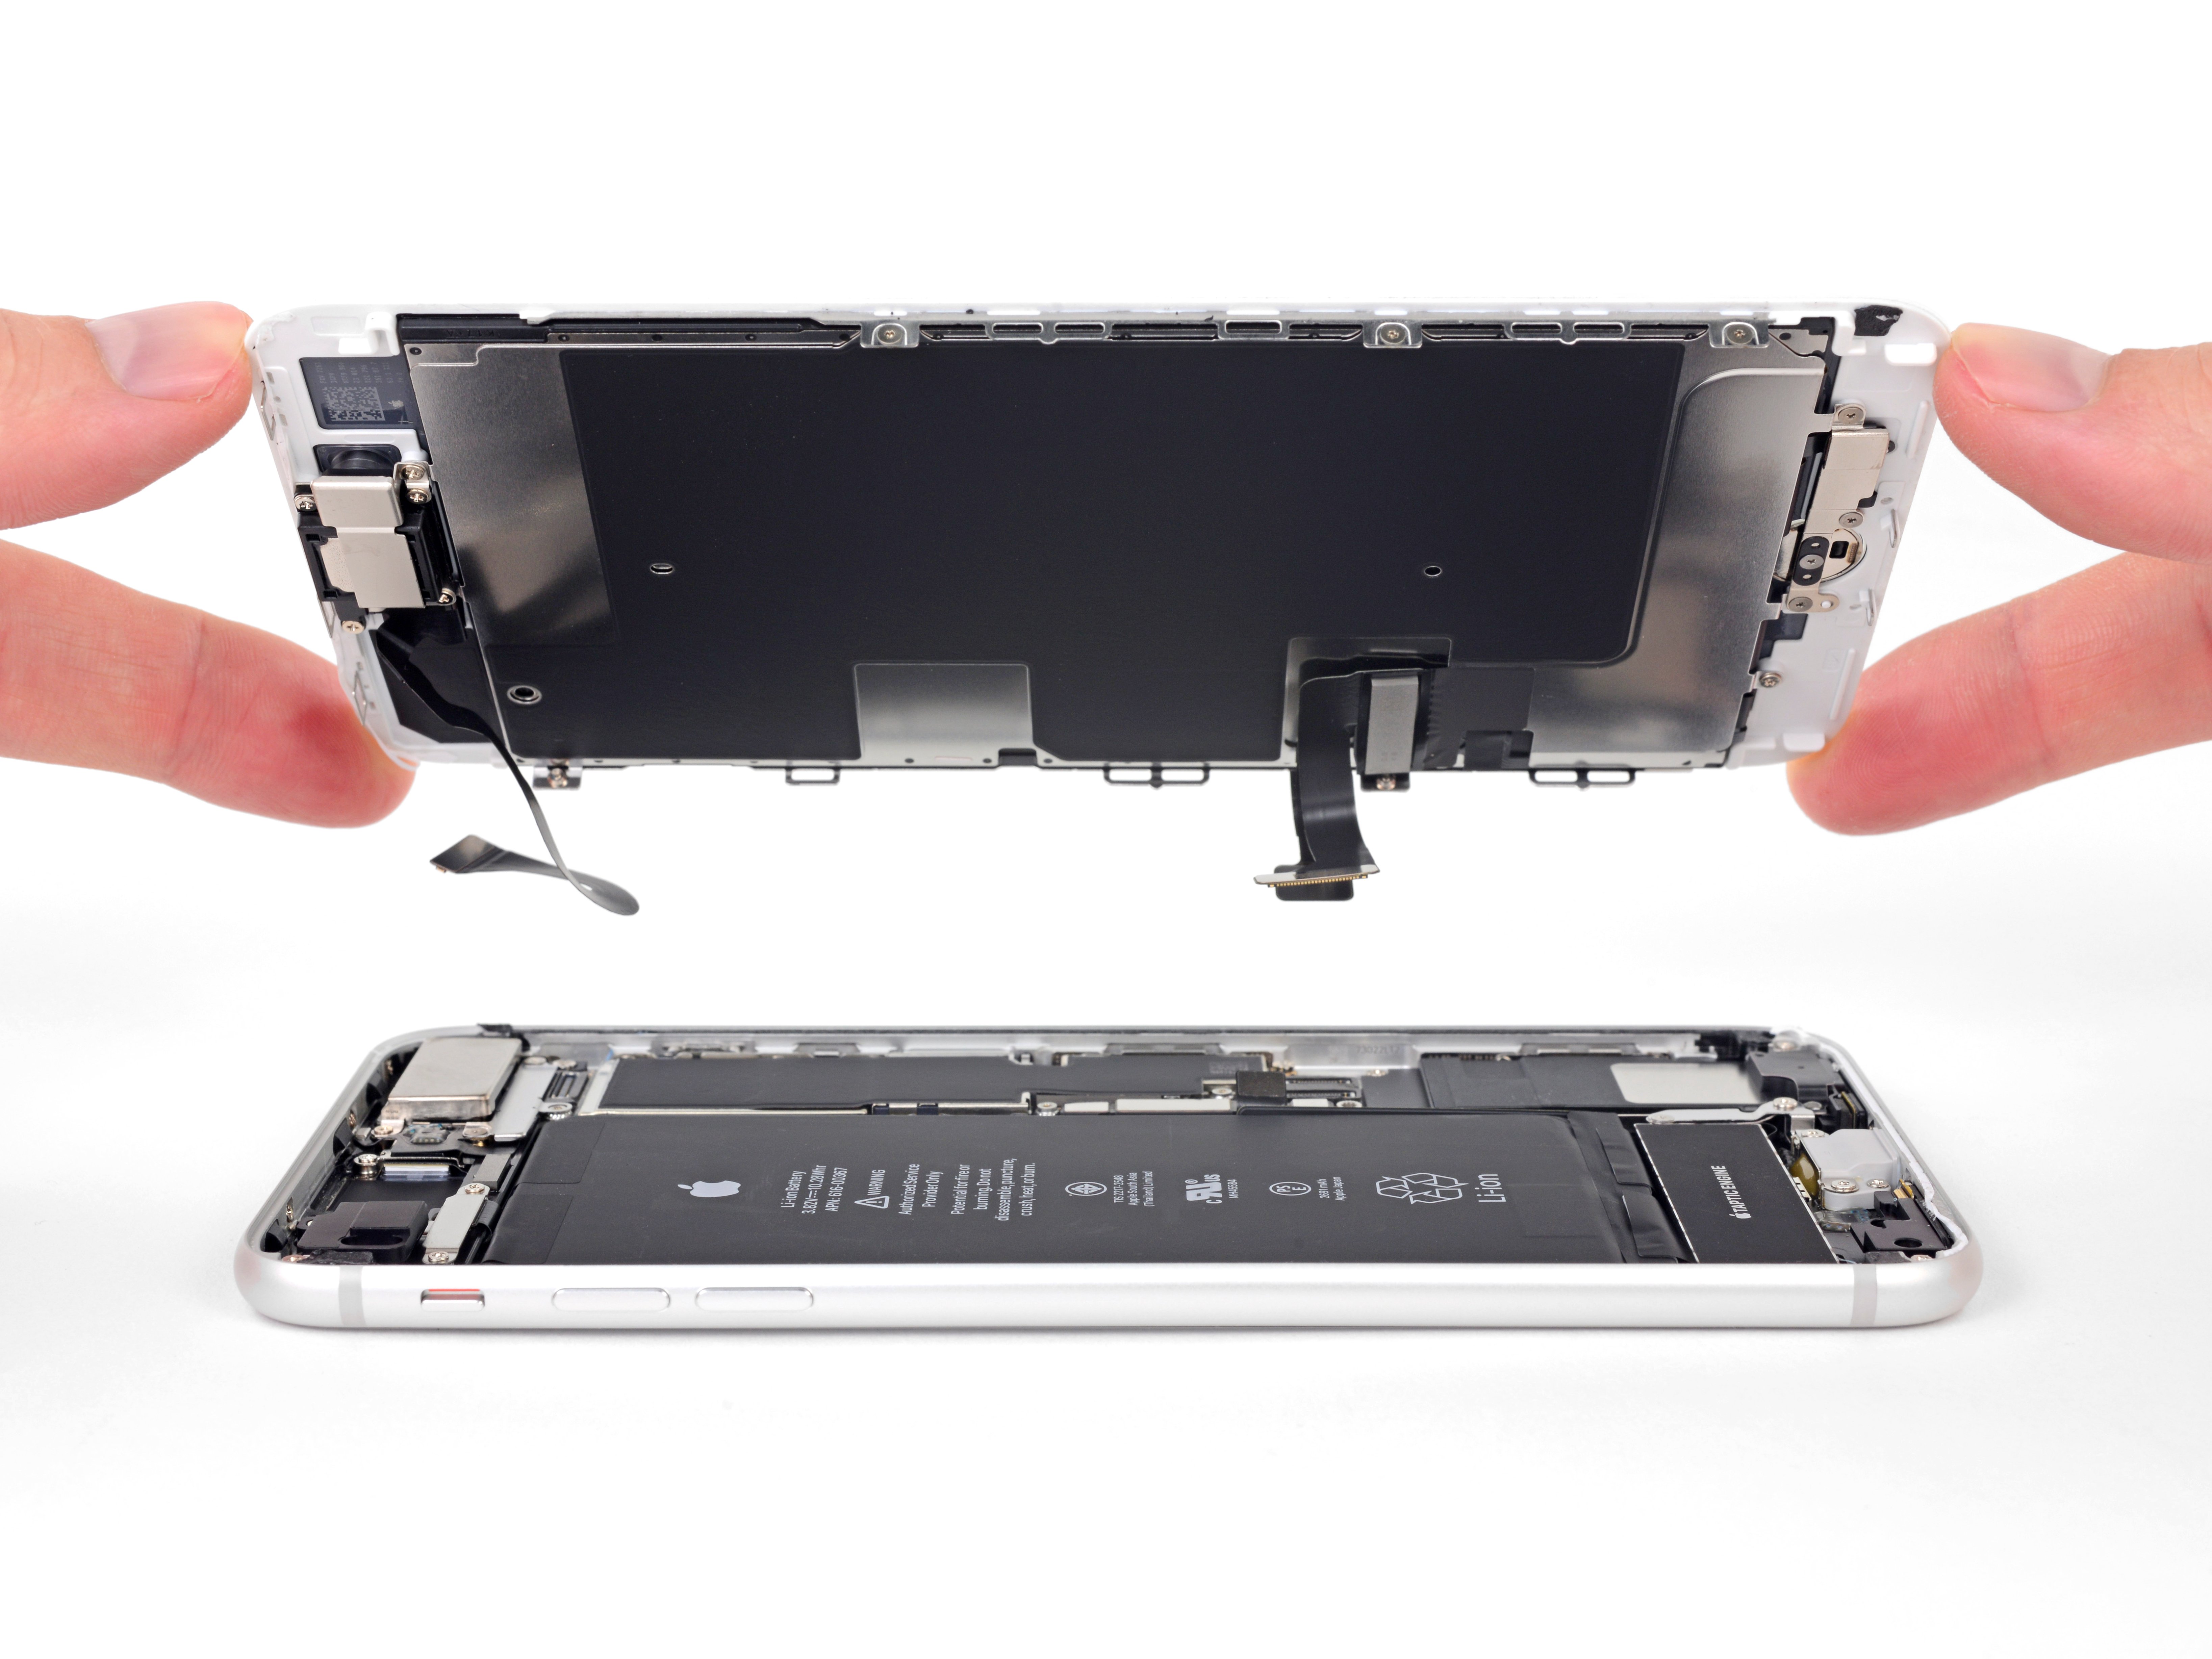
  • Remove the display assembly.
  • During reassembly, pause here if you wish to replace the adhesive around the edges of the display.
Step 27

Repair step

  • Remove the two Y000 screws securing the rear camera connector cover bracket:
  • One 1.4 mm screw
  • One 1.4 mm (nonferrous) screw
  • This screw tends to not be attracted to a magnetized screwdriver. Make sure to reinstall it in the correct place—a magnetized screw may interfere with the compass.
Step 28

Repair step

  • Remove the bracket.
Step 29

Repair step

  • Remove the two screws securing the rear camera module cover plate:
  • One 1.8 mm Phillips screw
  • One 2.7 mm (nonferrous) standoff screw
  • Standoff screws are best removed using a standoff screwdriver or bit.
  • In a pinch, a small flathead screwdriver will do the job—but use extra caution to ensure it doesn't slip and damage nearby components.
Step 30

Repair step

  • Remove the cover plate from the rear camera module.
Step 31

Repair step

  • Use an iFixit opening tool or a fingernail to disconnect the two camera cable connectors by prying them straight up from their sockets.
Step 32

Repair step

  • Use the flat end of a spudger to pry up the rear-facing camera assembly from the top edge of the iPhone.
  • If you have trouble, switch to the point of your spudger and lever the camera out from its top right corner.
Step 33

Repair step

  • Remove the rear-facing camera assembly.
Step 34

Repair step

  • Remove three Phillips screws securing the upper left antenna component:
  • Two 1.3 mm screws
  • One 3.1 mm screw
Step 35

Repair step

  • Remove the 1.3 mm Phillips screw securing the antenna component to the top edge of the rear case.
Step 36

Repair step

  • The screw boss at the top of the antenna component is tucked into a small recess in the top edge of the iPhone.
  • Tilt the antenna component up towards the top of the phone.
  • Slide the screw boss down and out of its recess.
Step 37

Repair step

  • Remove the top left antenna component.
Step 38

Repair step

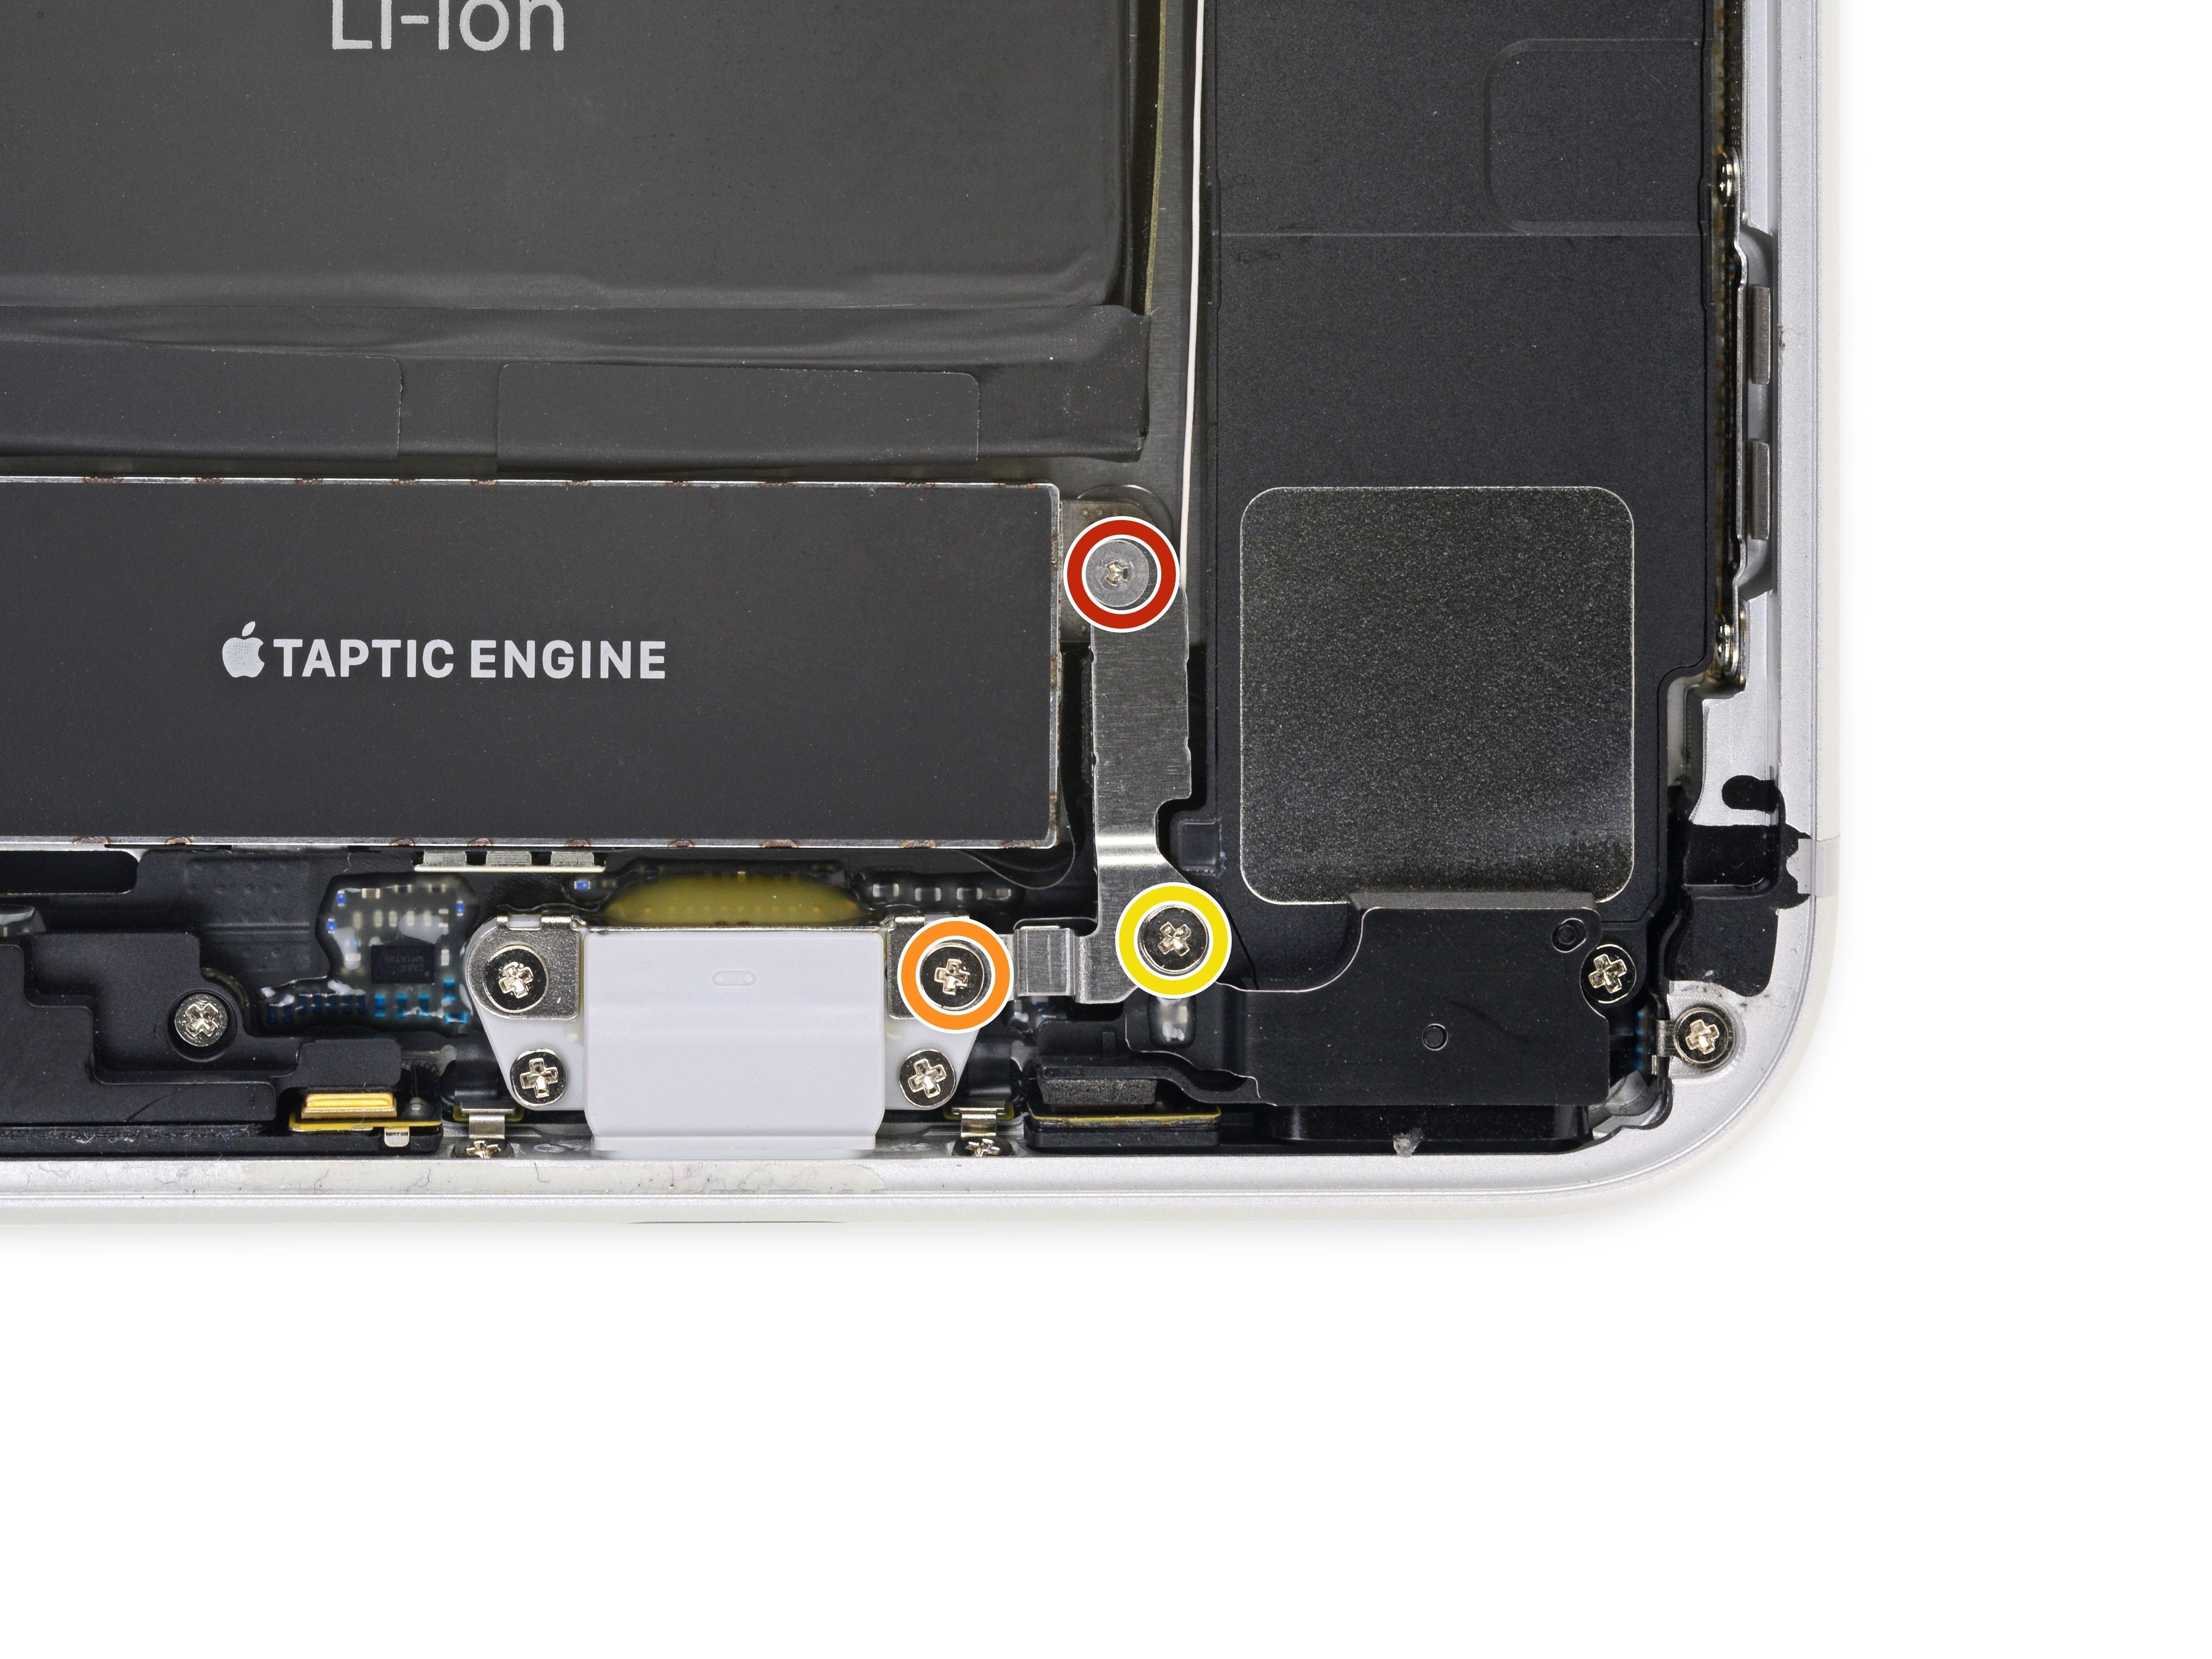
  • Remove the three screws securing the L-shaped bracket next to the Taptic Engine:
  • One 1.3 mm Y000 screw
  • One 2.6 mm Phillips screw
  • One 3.5 mm Phillips screw
Step 39

Repair step

  • Remove the bracket.
Step 40

Repair step

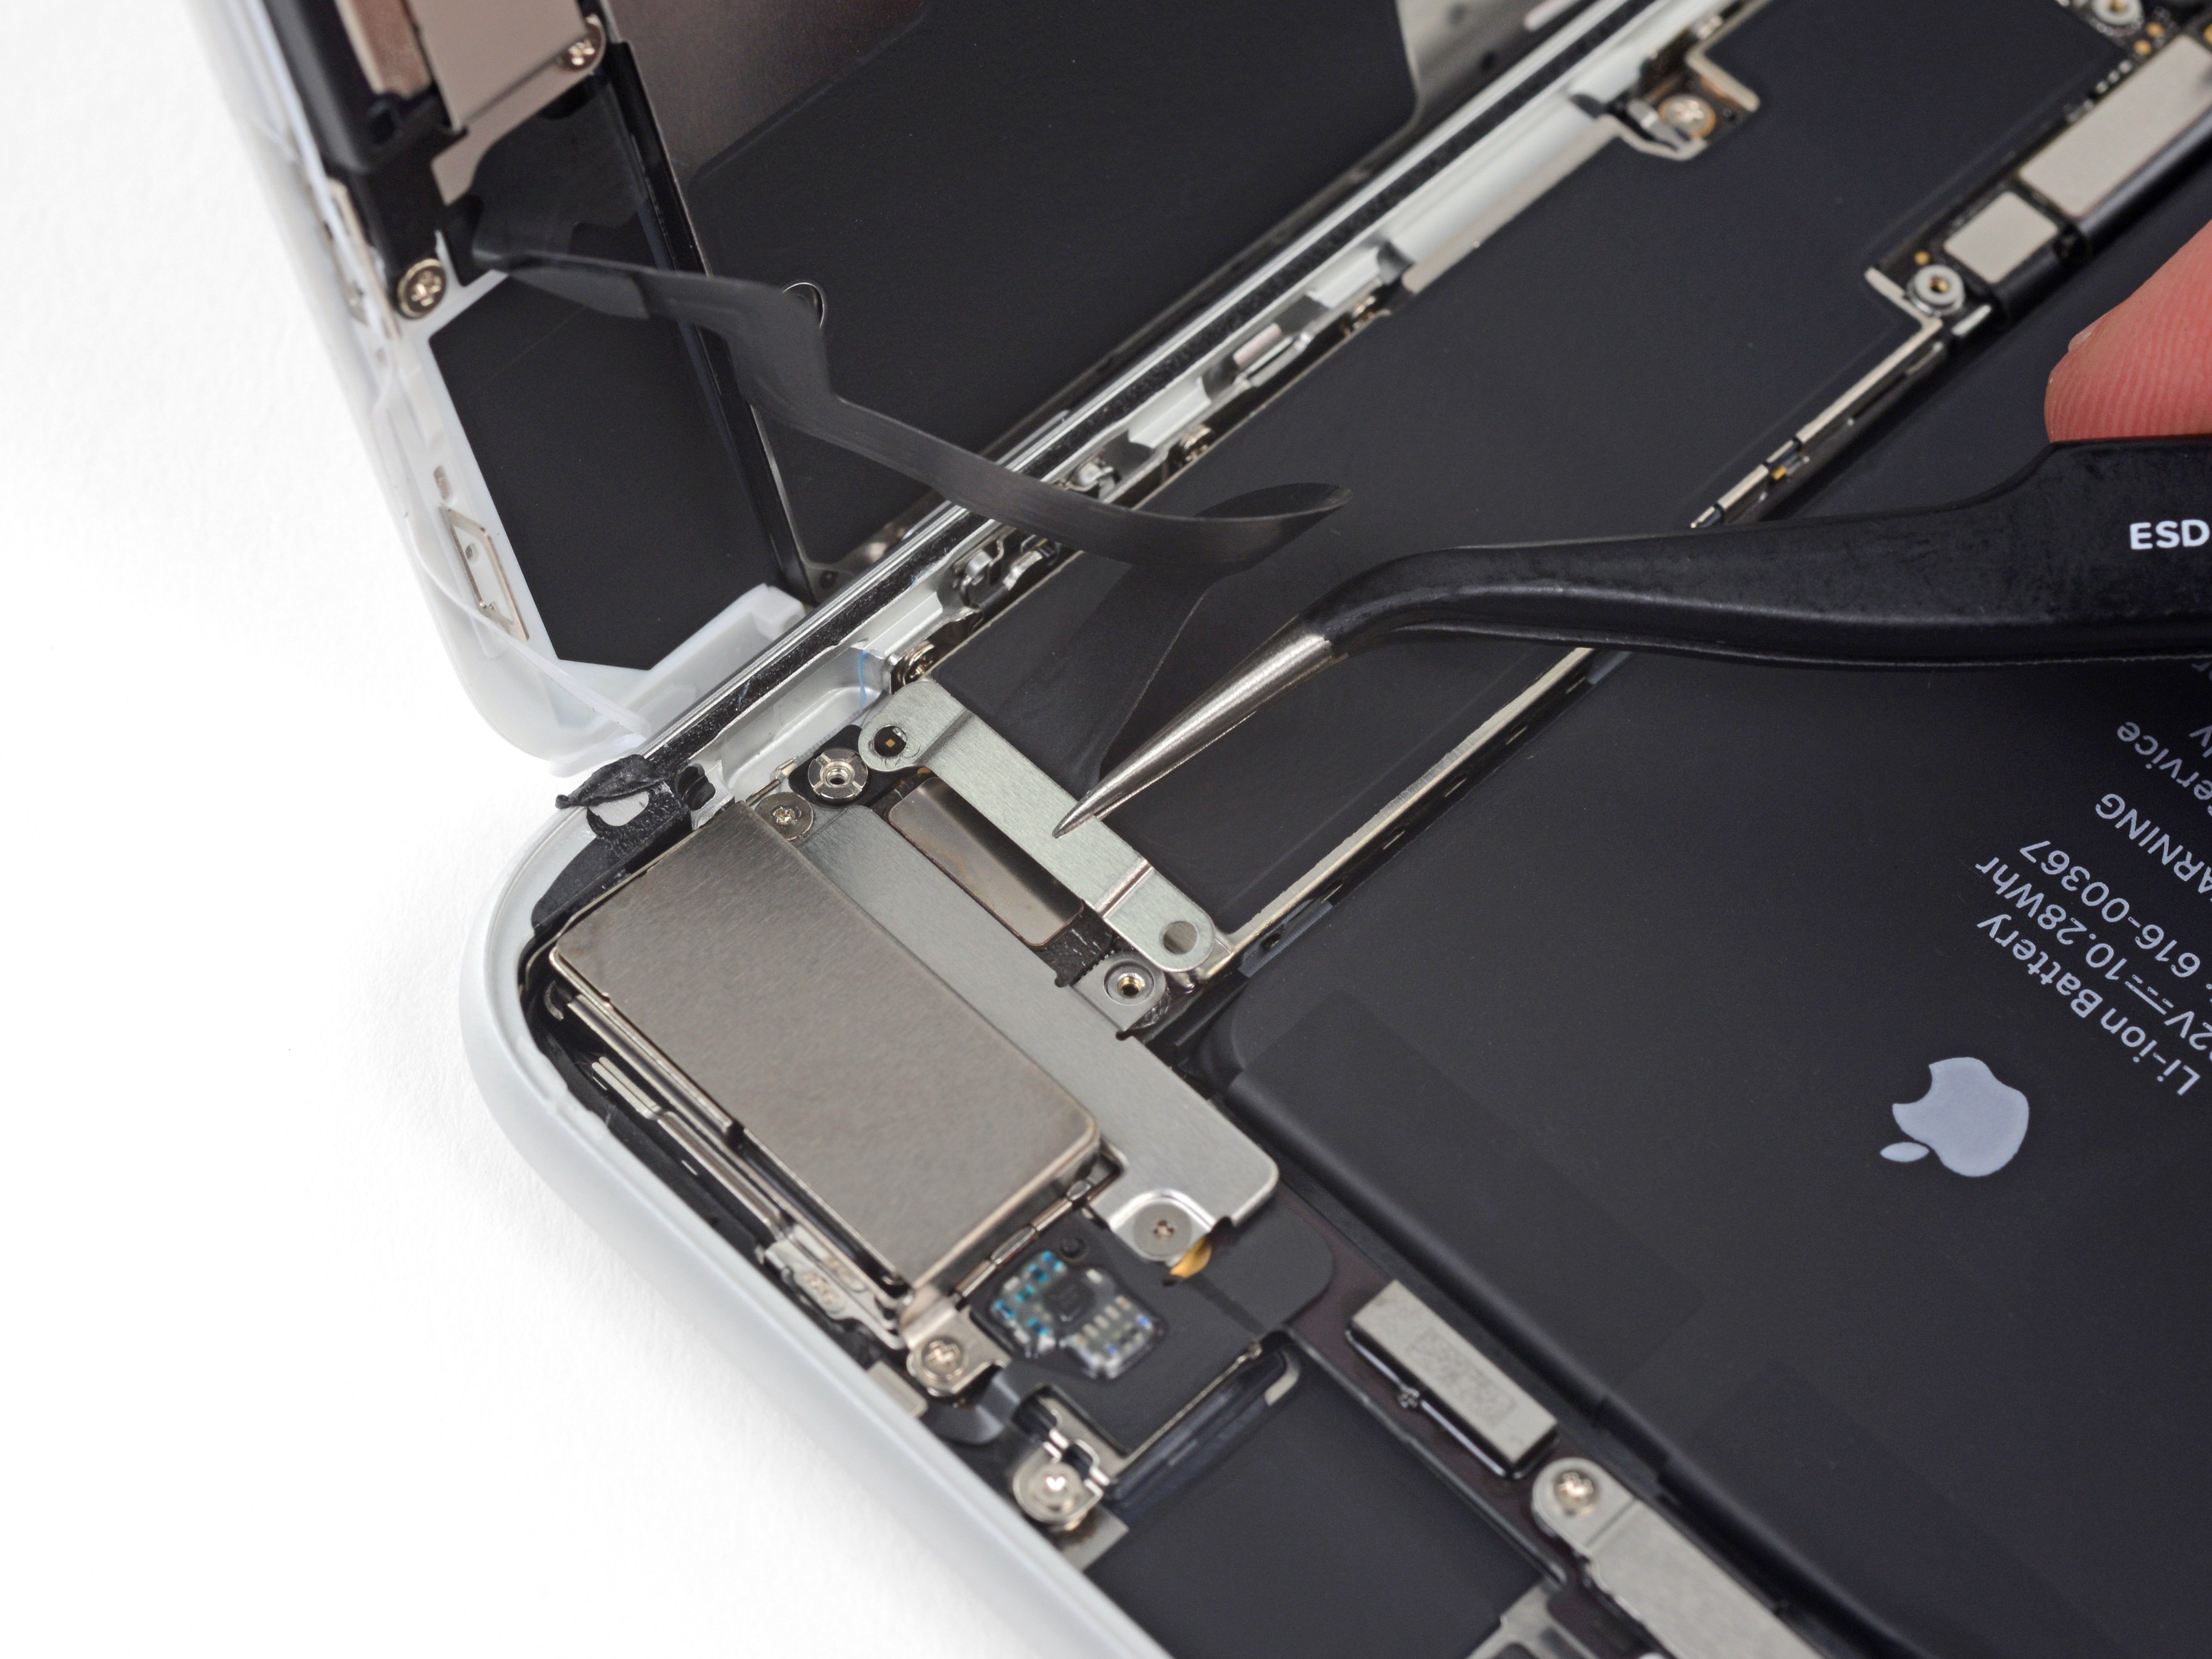
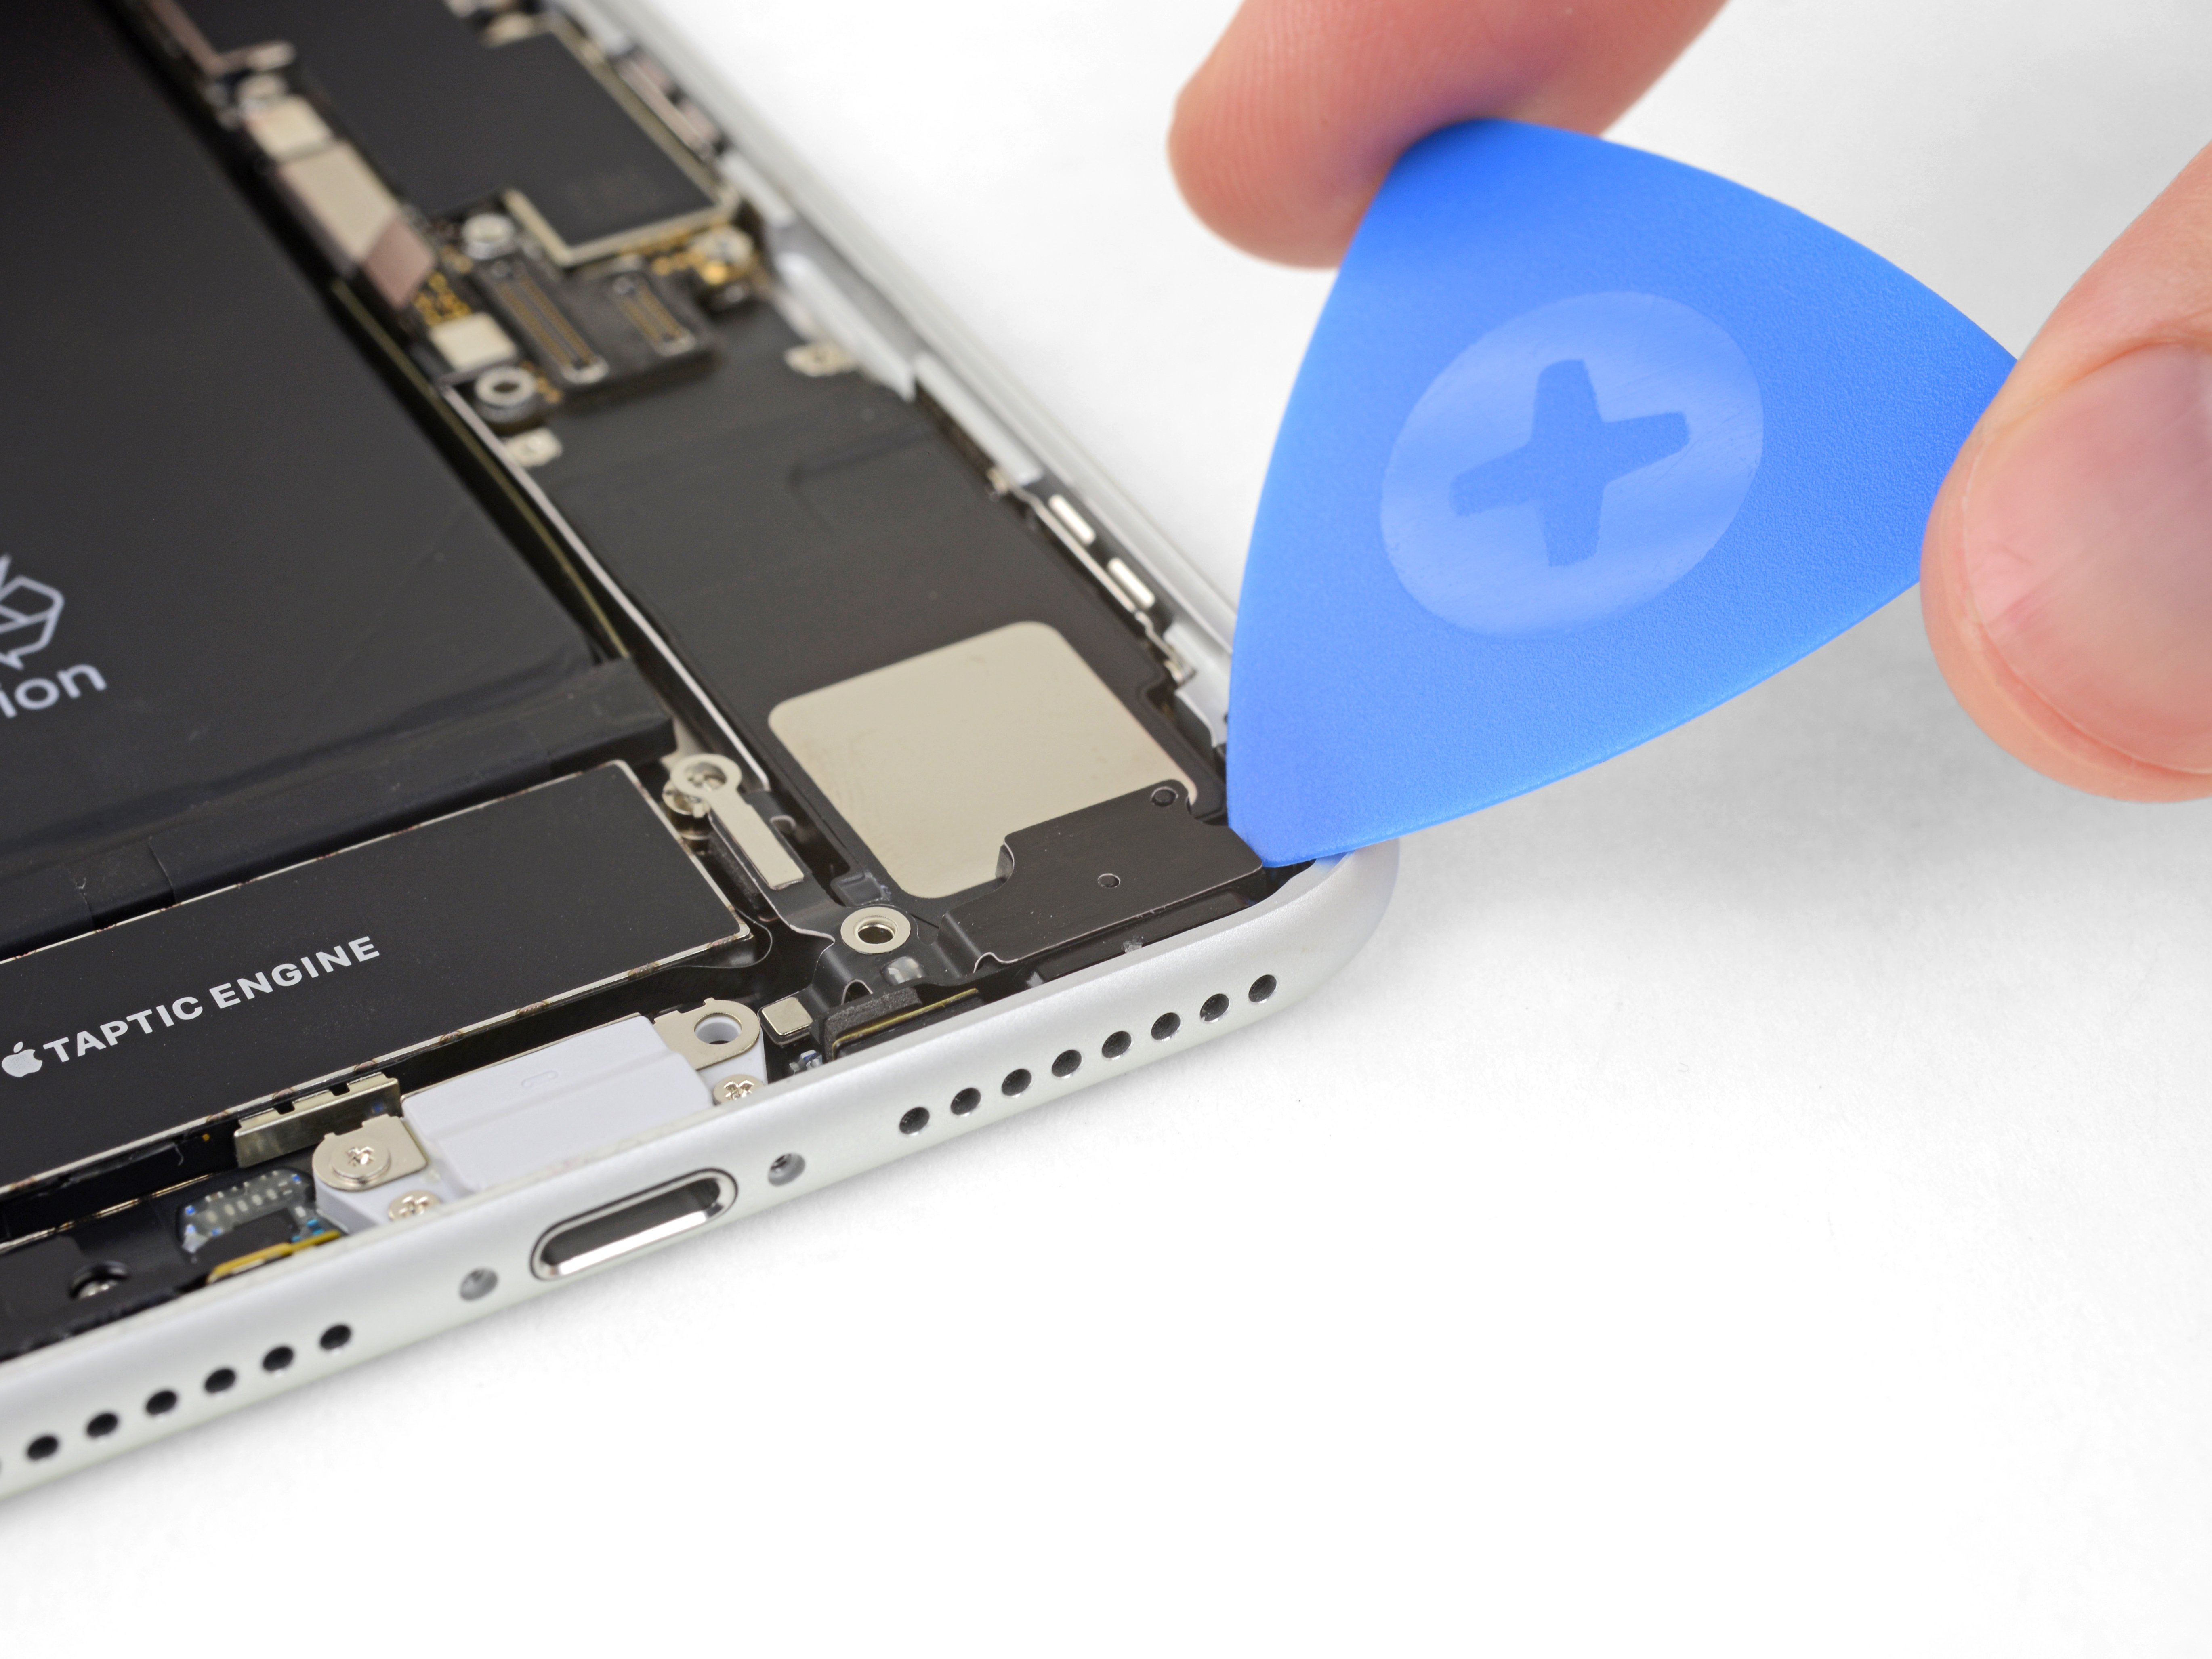
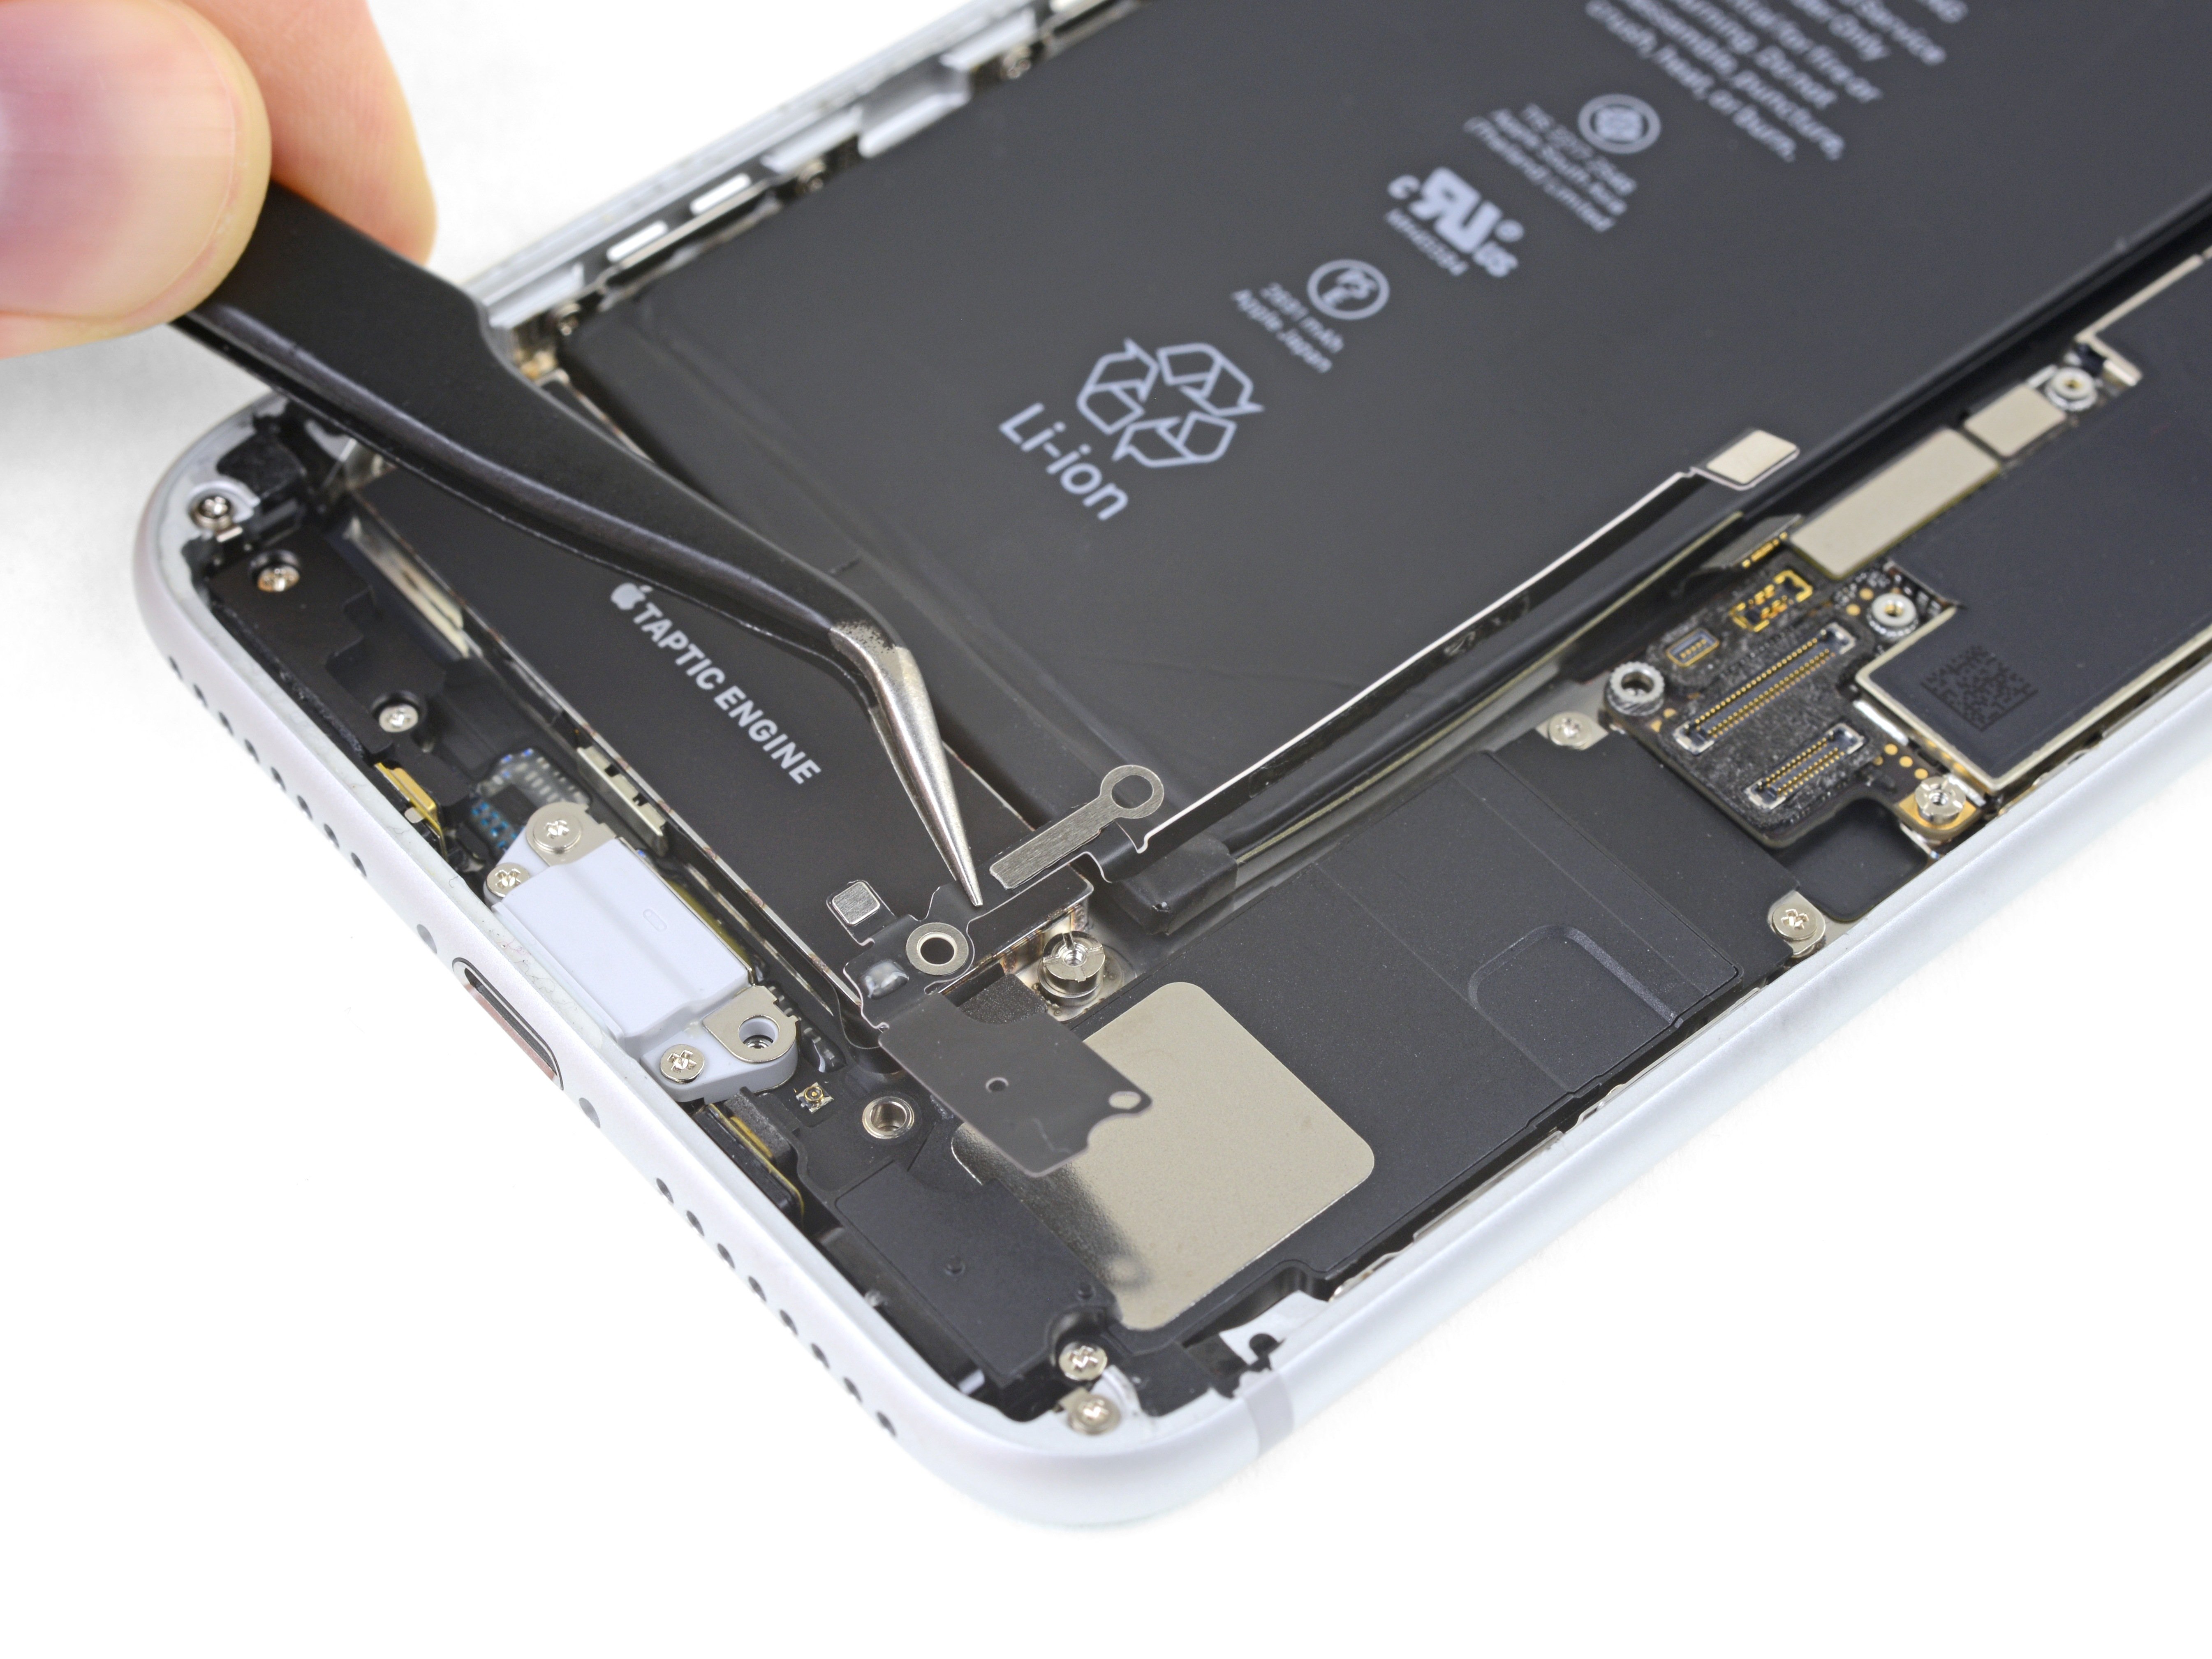
  • Use an opening pick to gently separate the adhered portion of the antenna flex cable from the top surface of the speaker.
  • This portion of the flex cable is lightly adhered in place. If necessary, apply a little heat from an iOpener or hair dryer to soften the adhesive. This makes it easier to separate (and re-adhere) the flex cable safely.
Step 41

Repair step

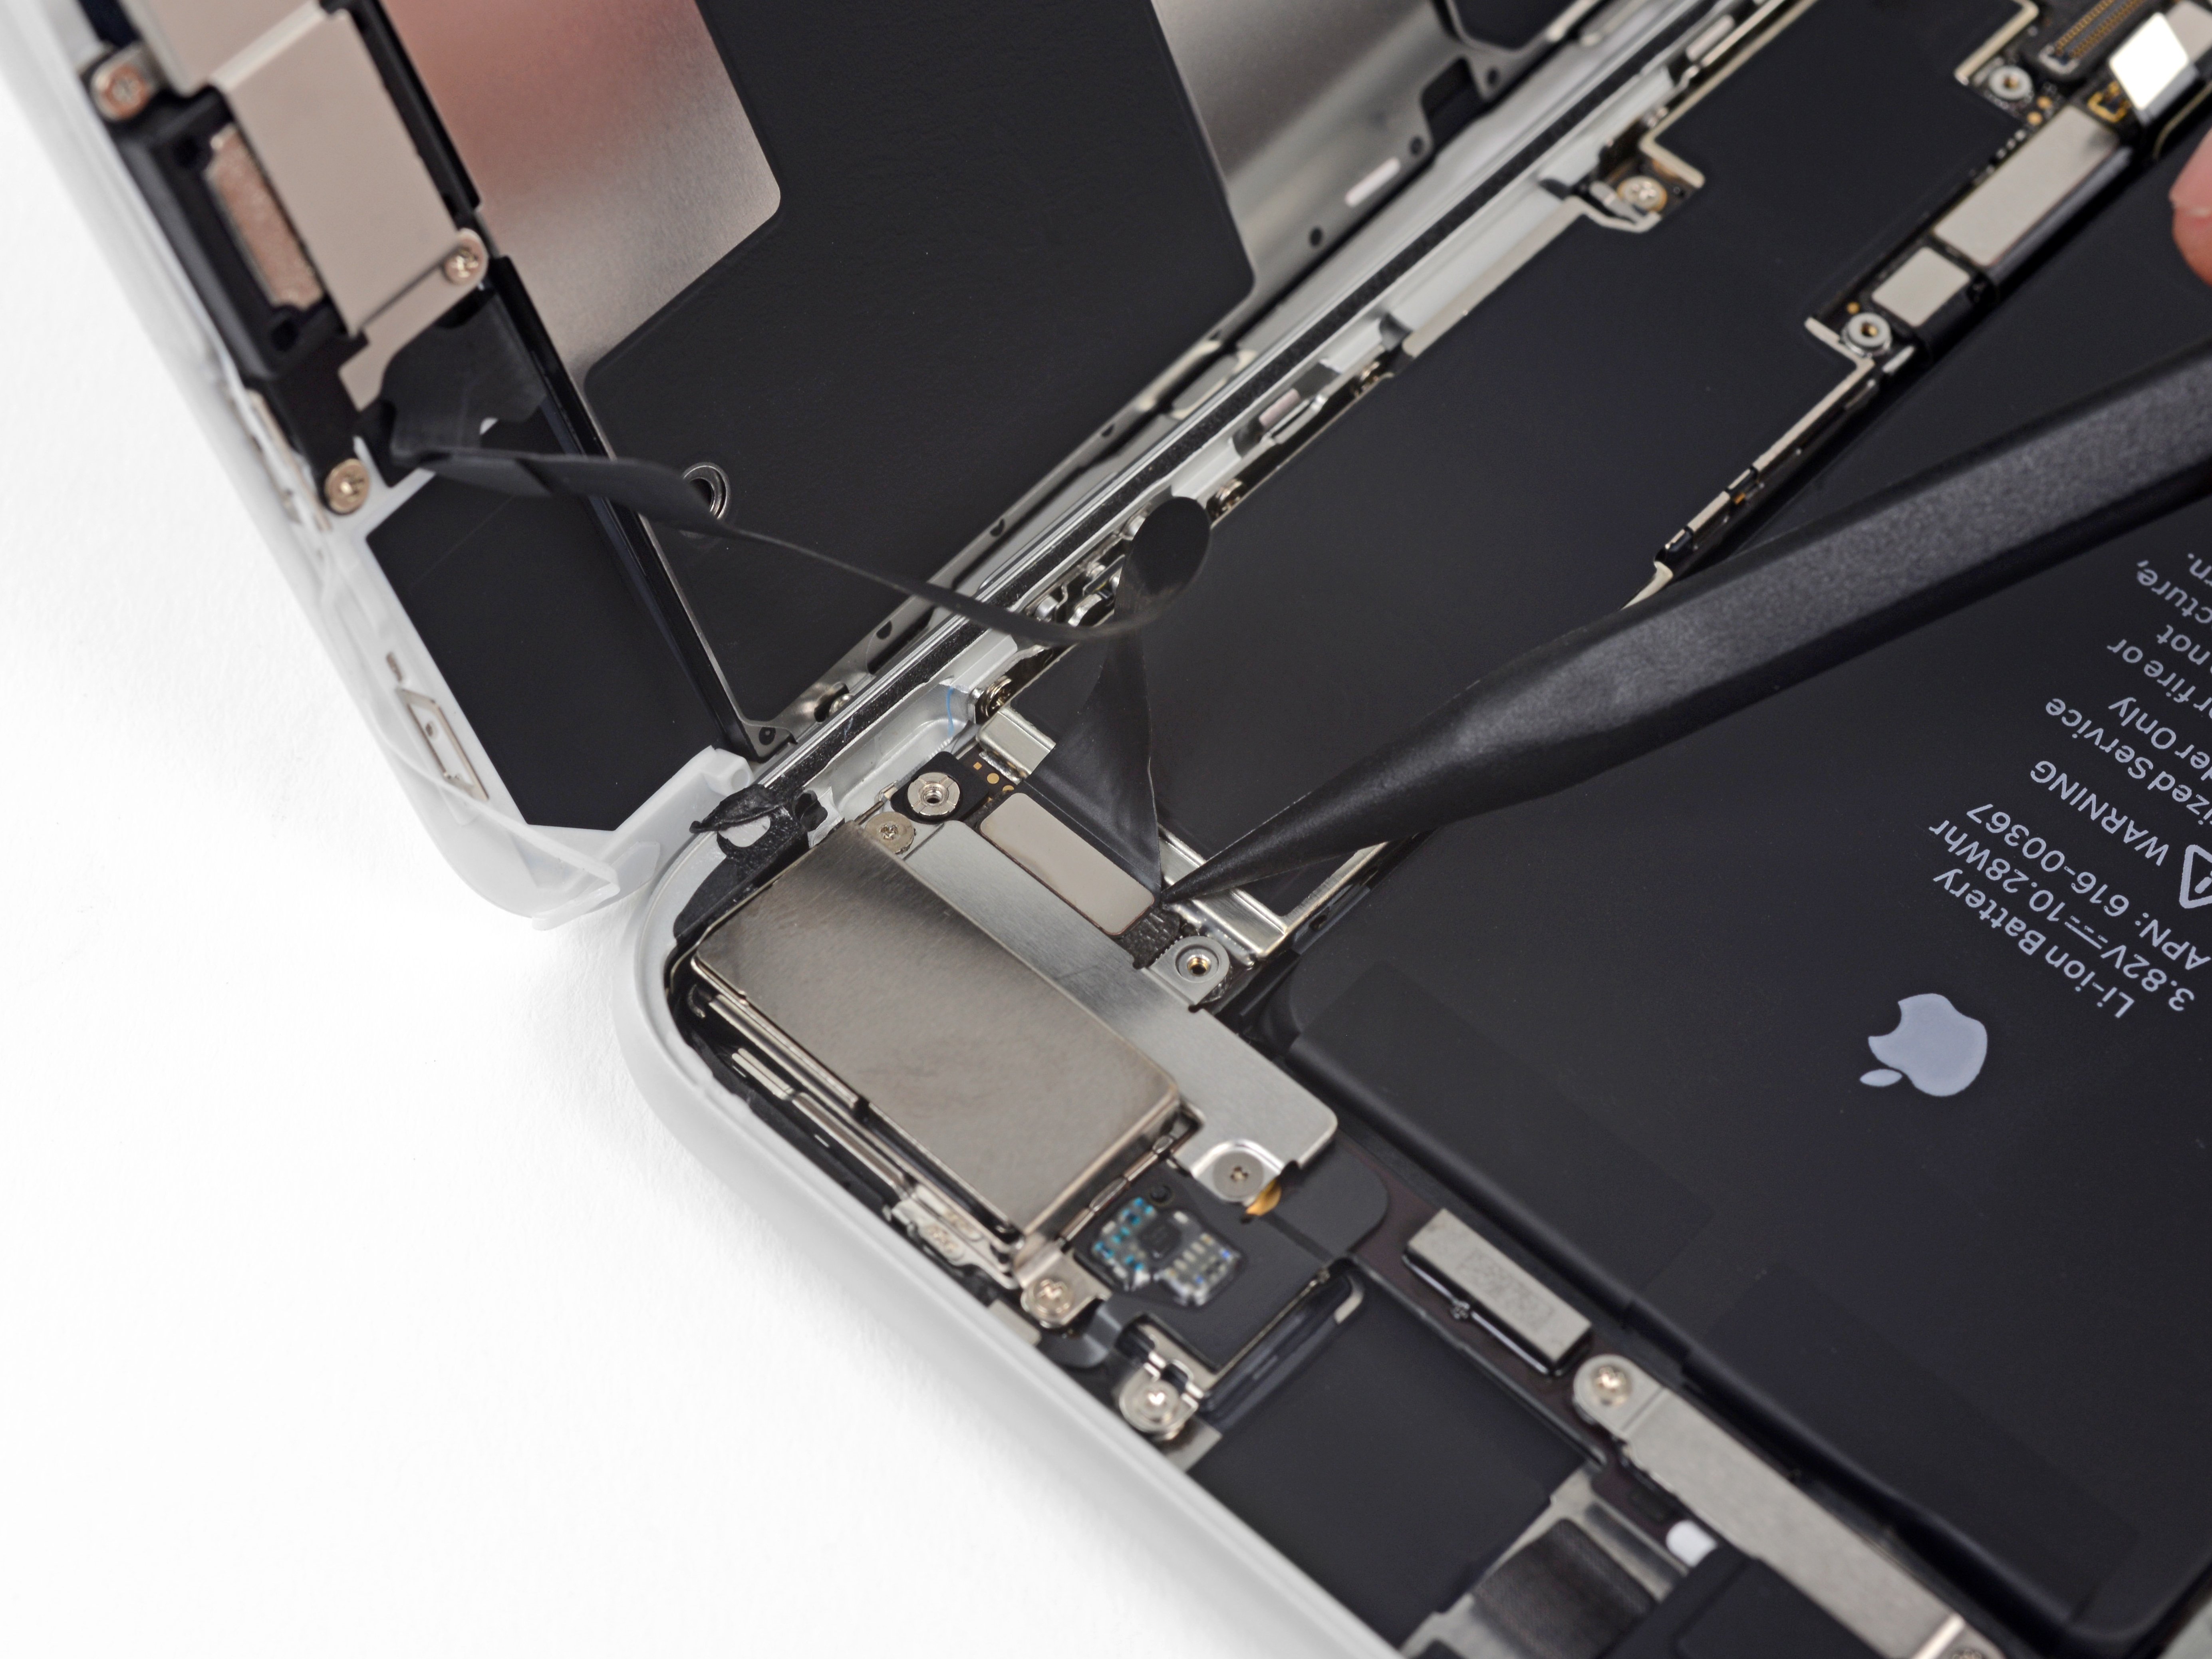
  • Use the point of a spudger to pry up and disconnect the antenna flex cable from the logic board.
Step 42

Repair step

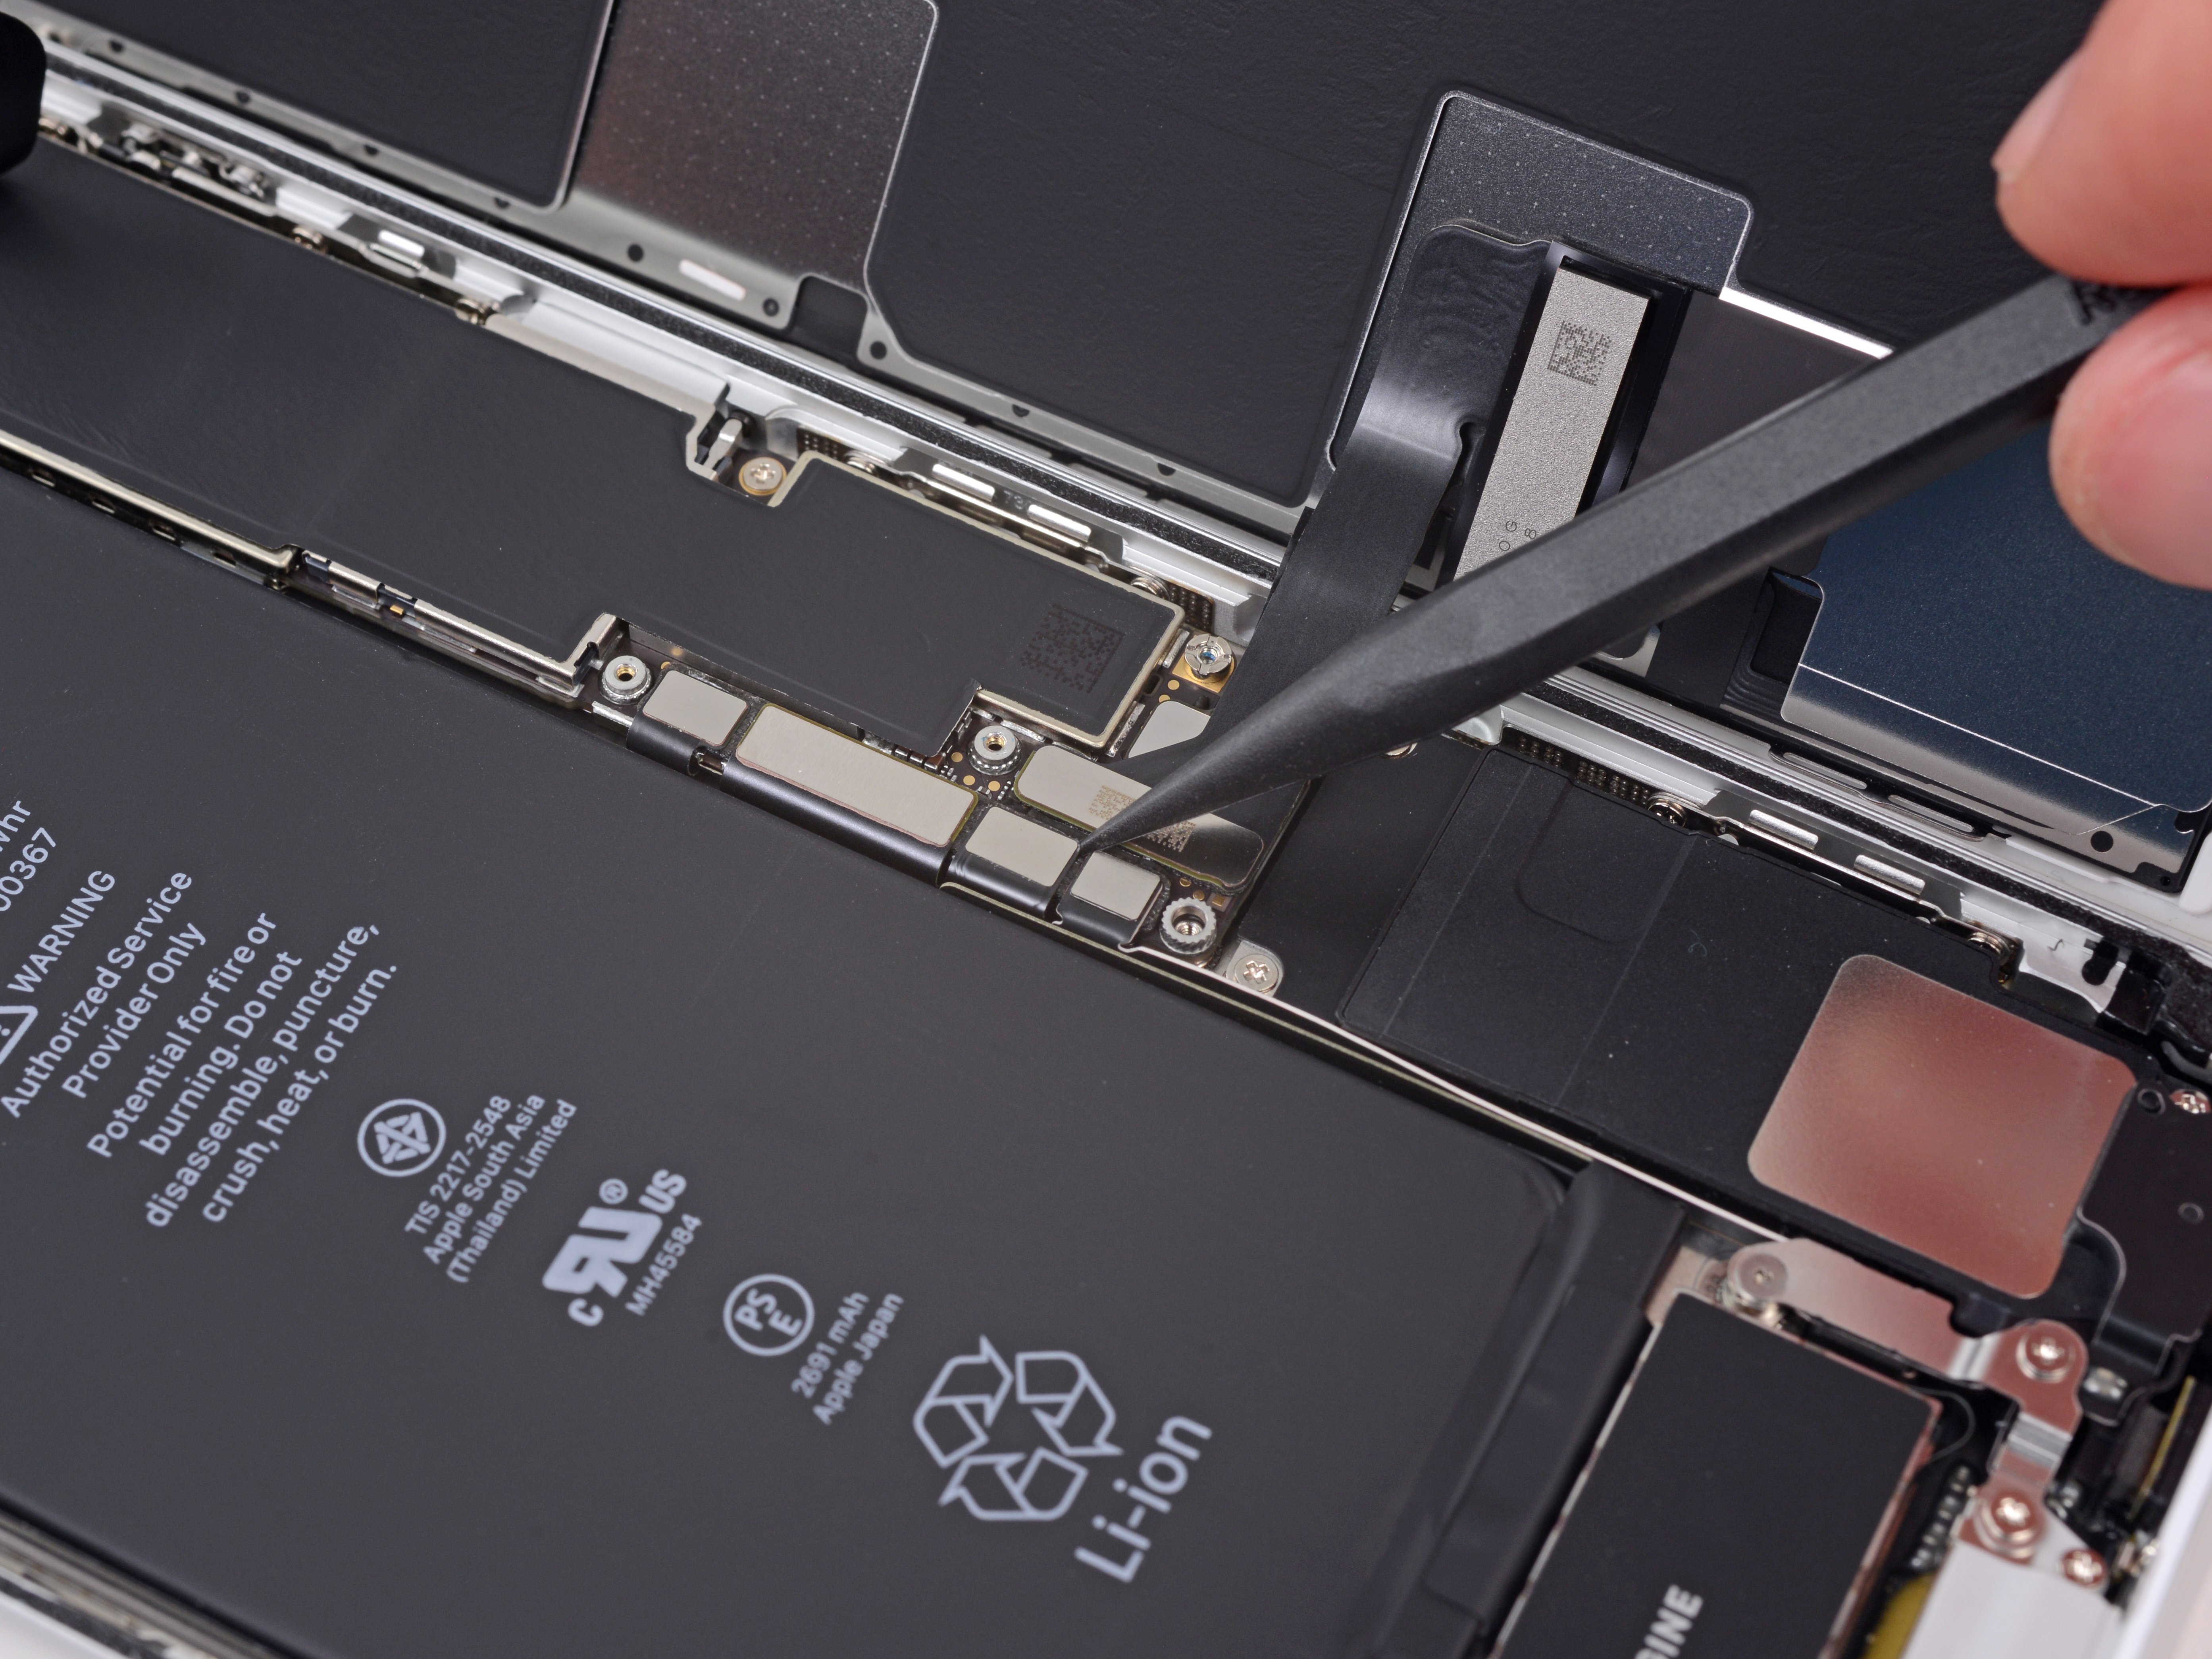
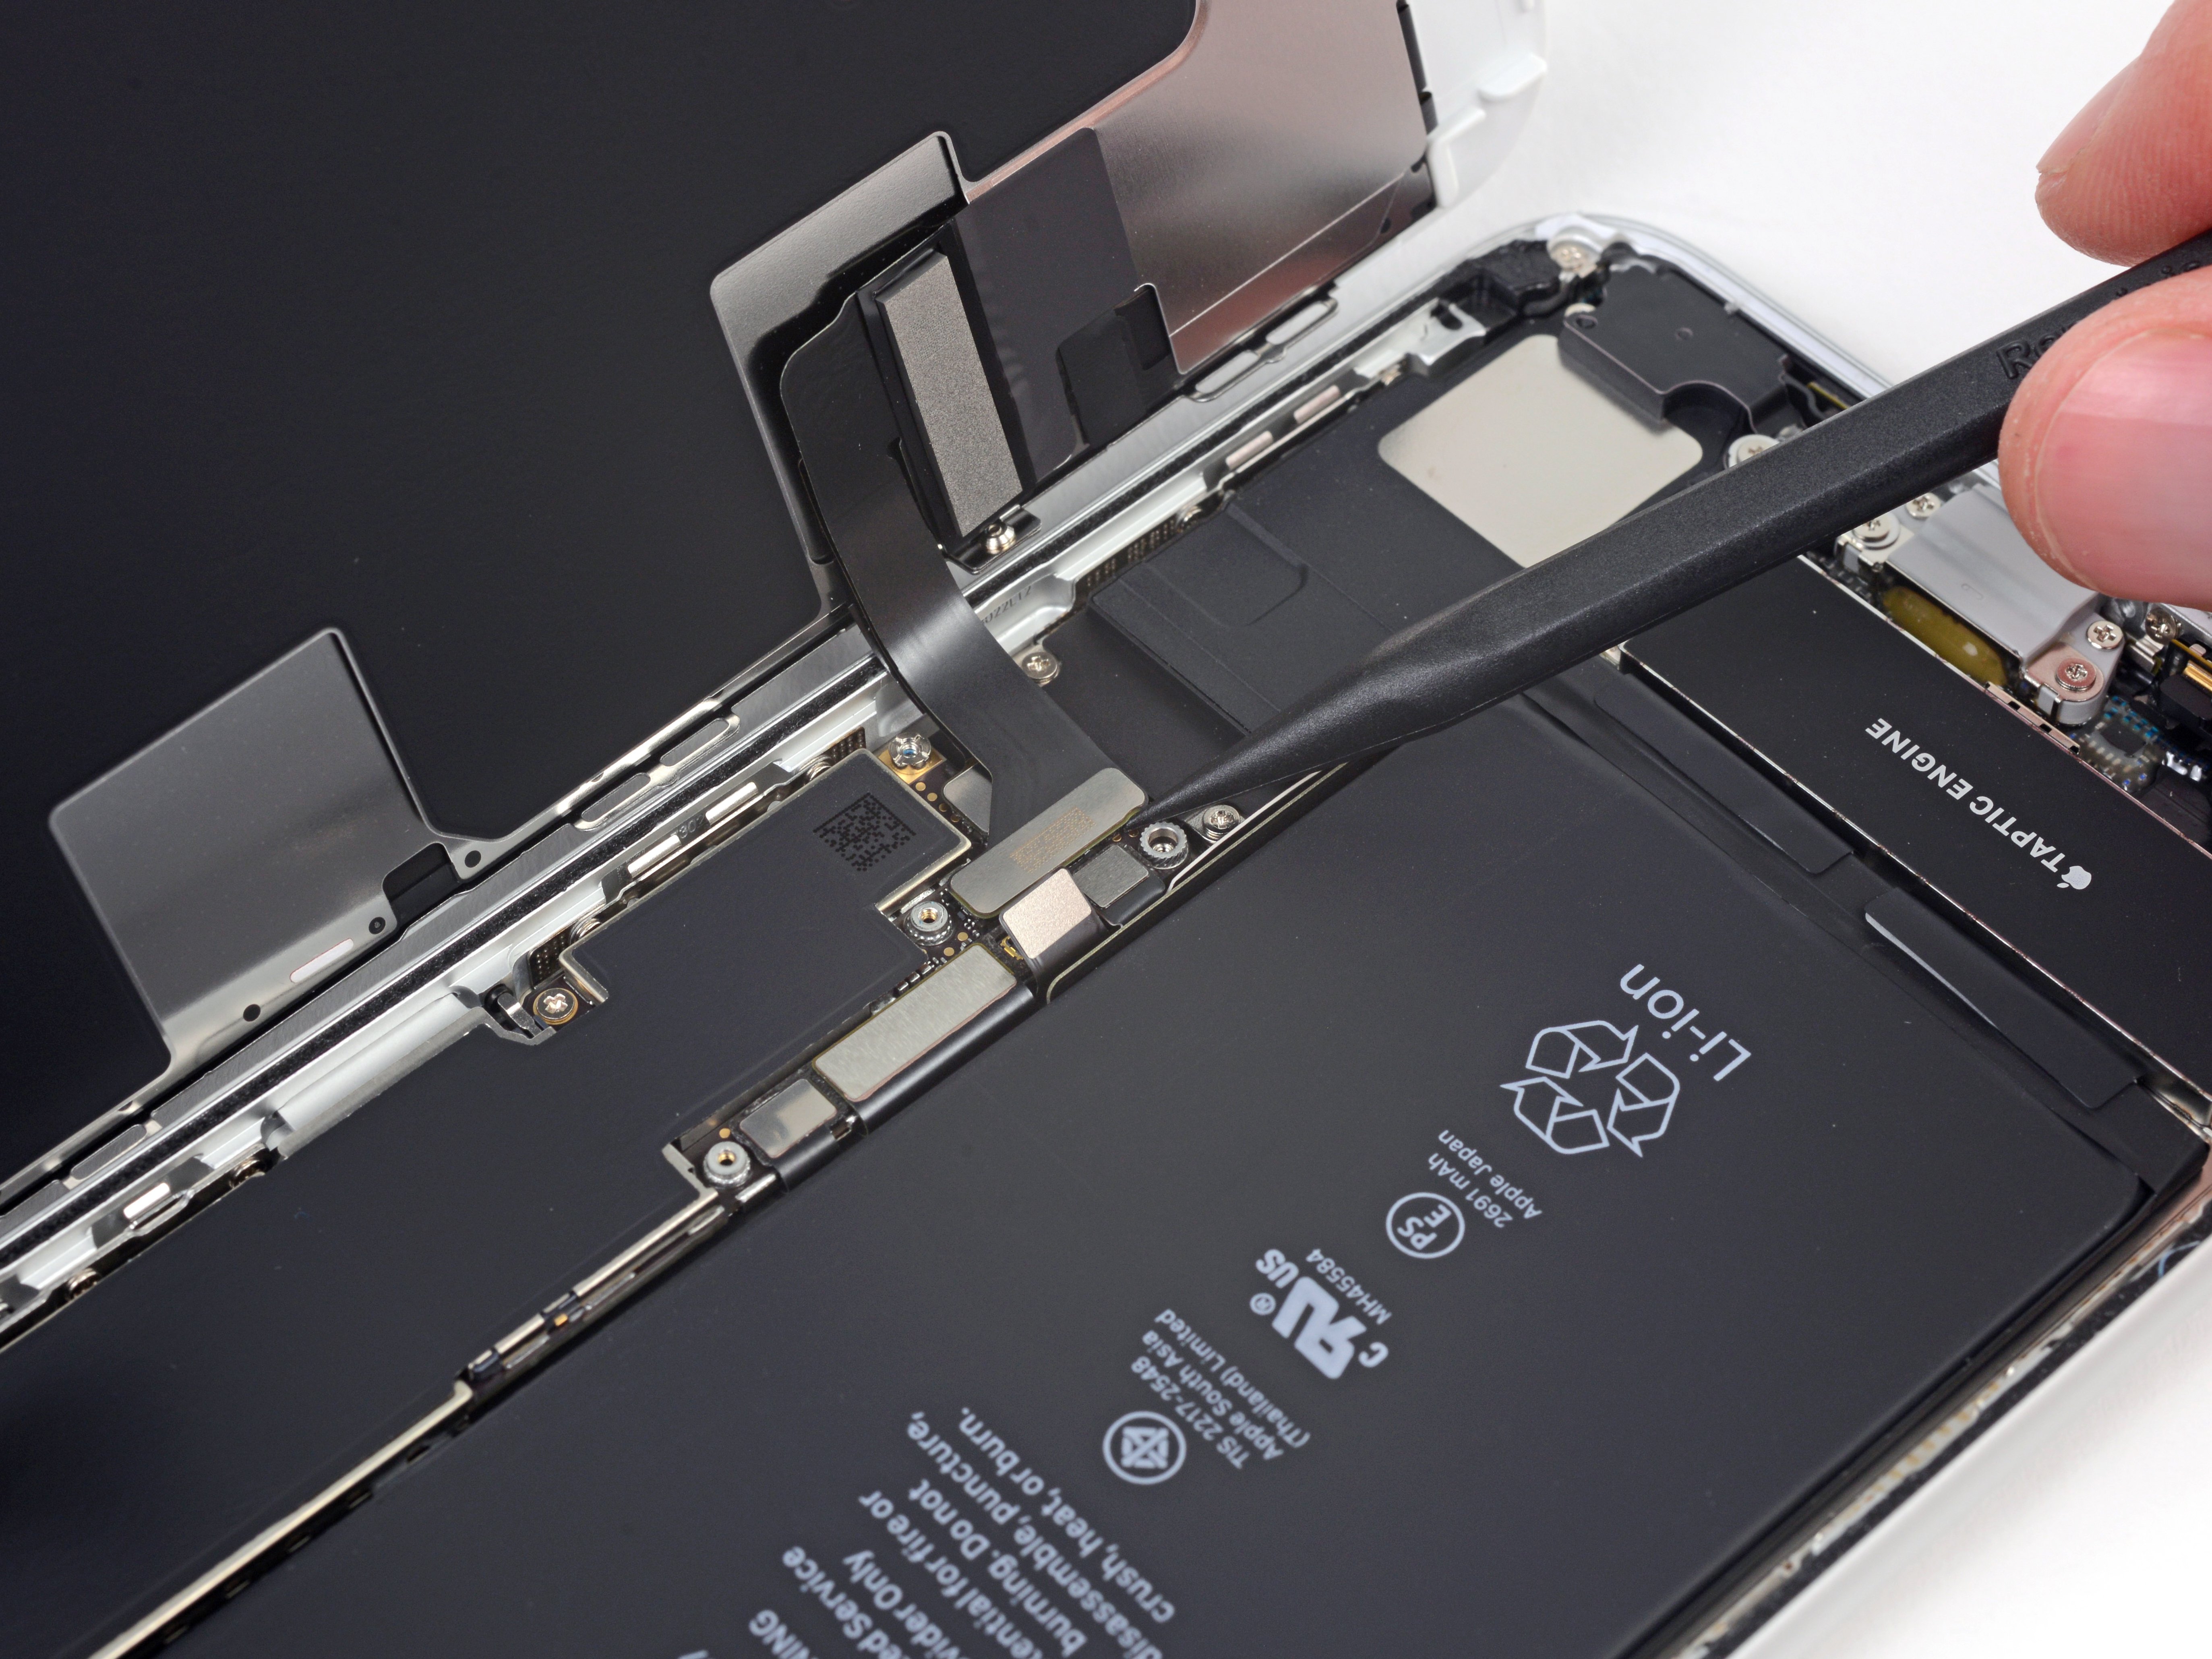
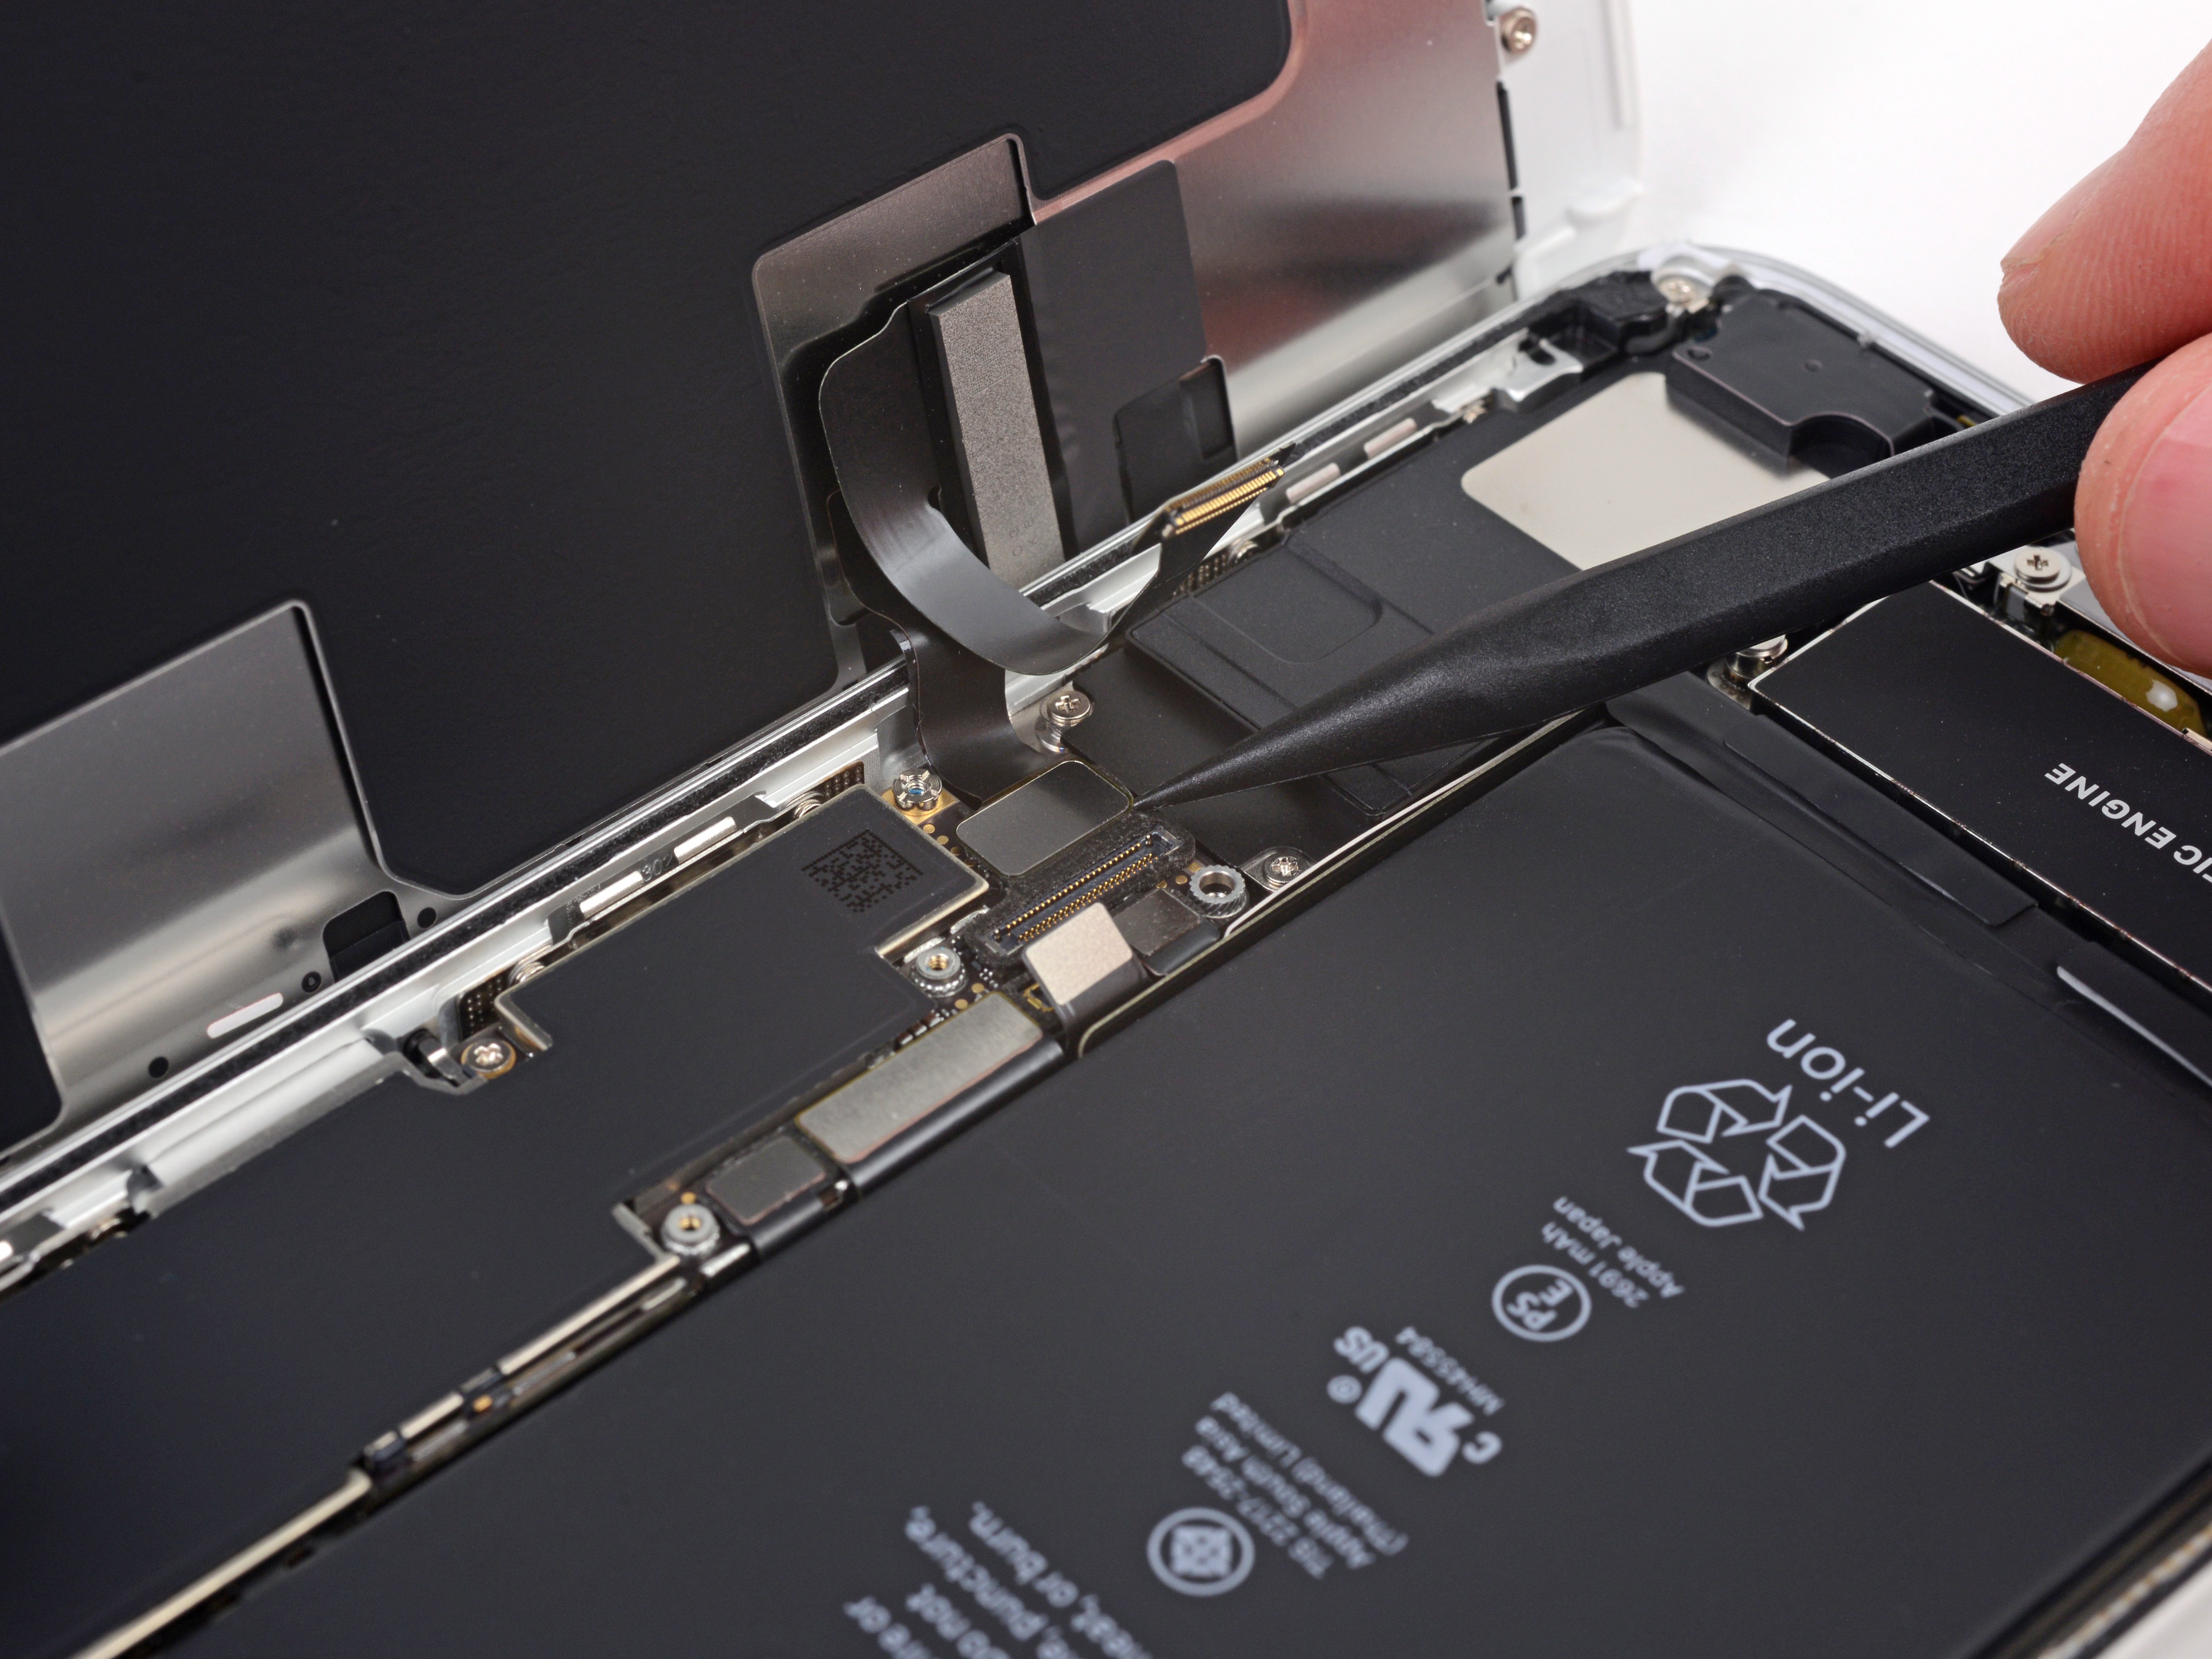
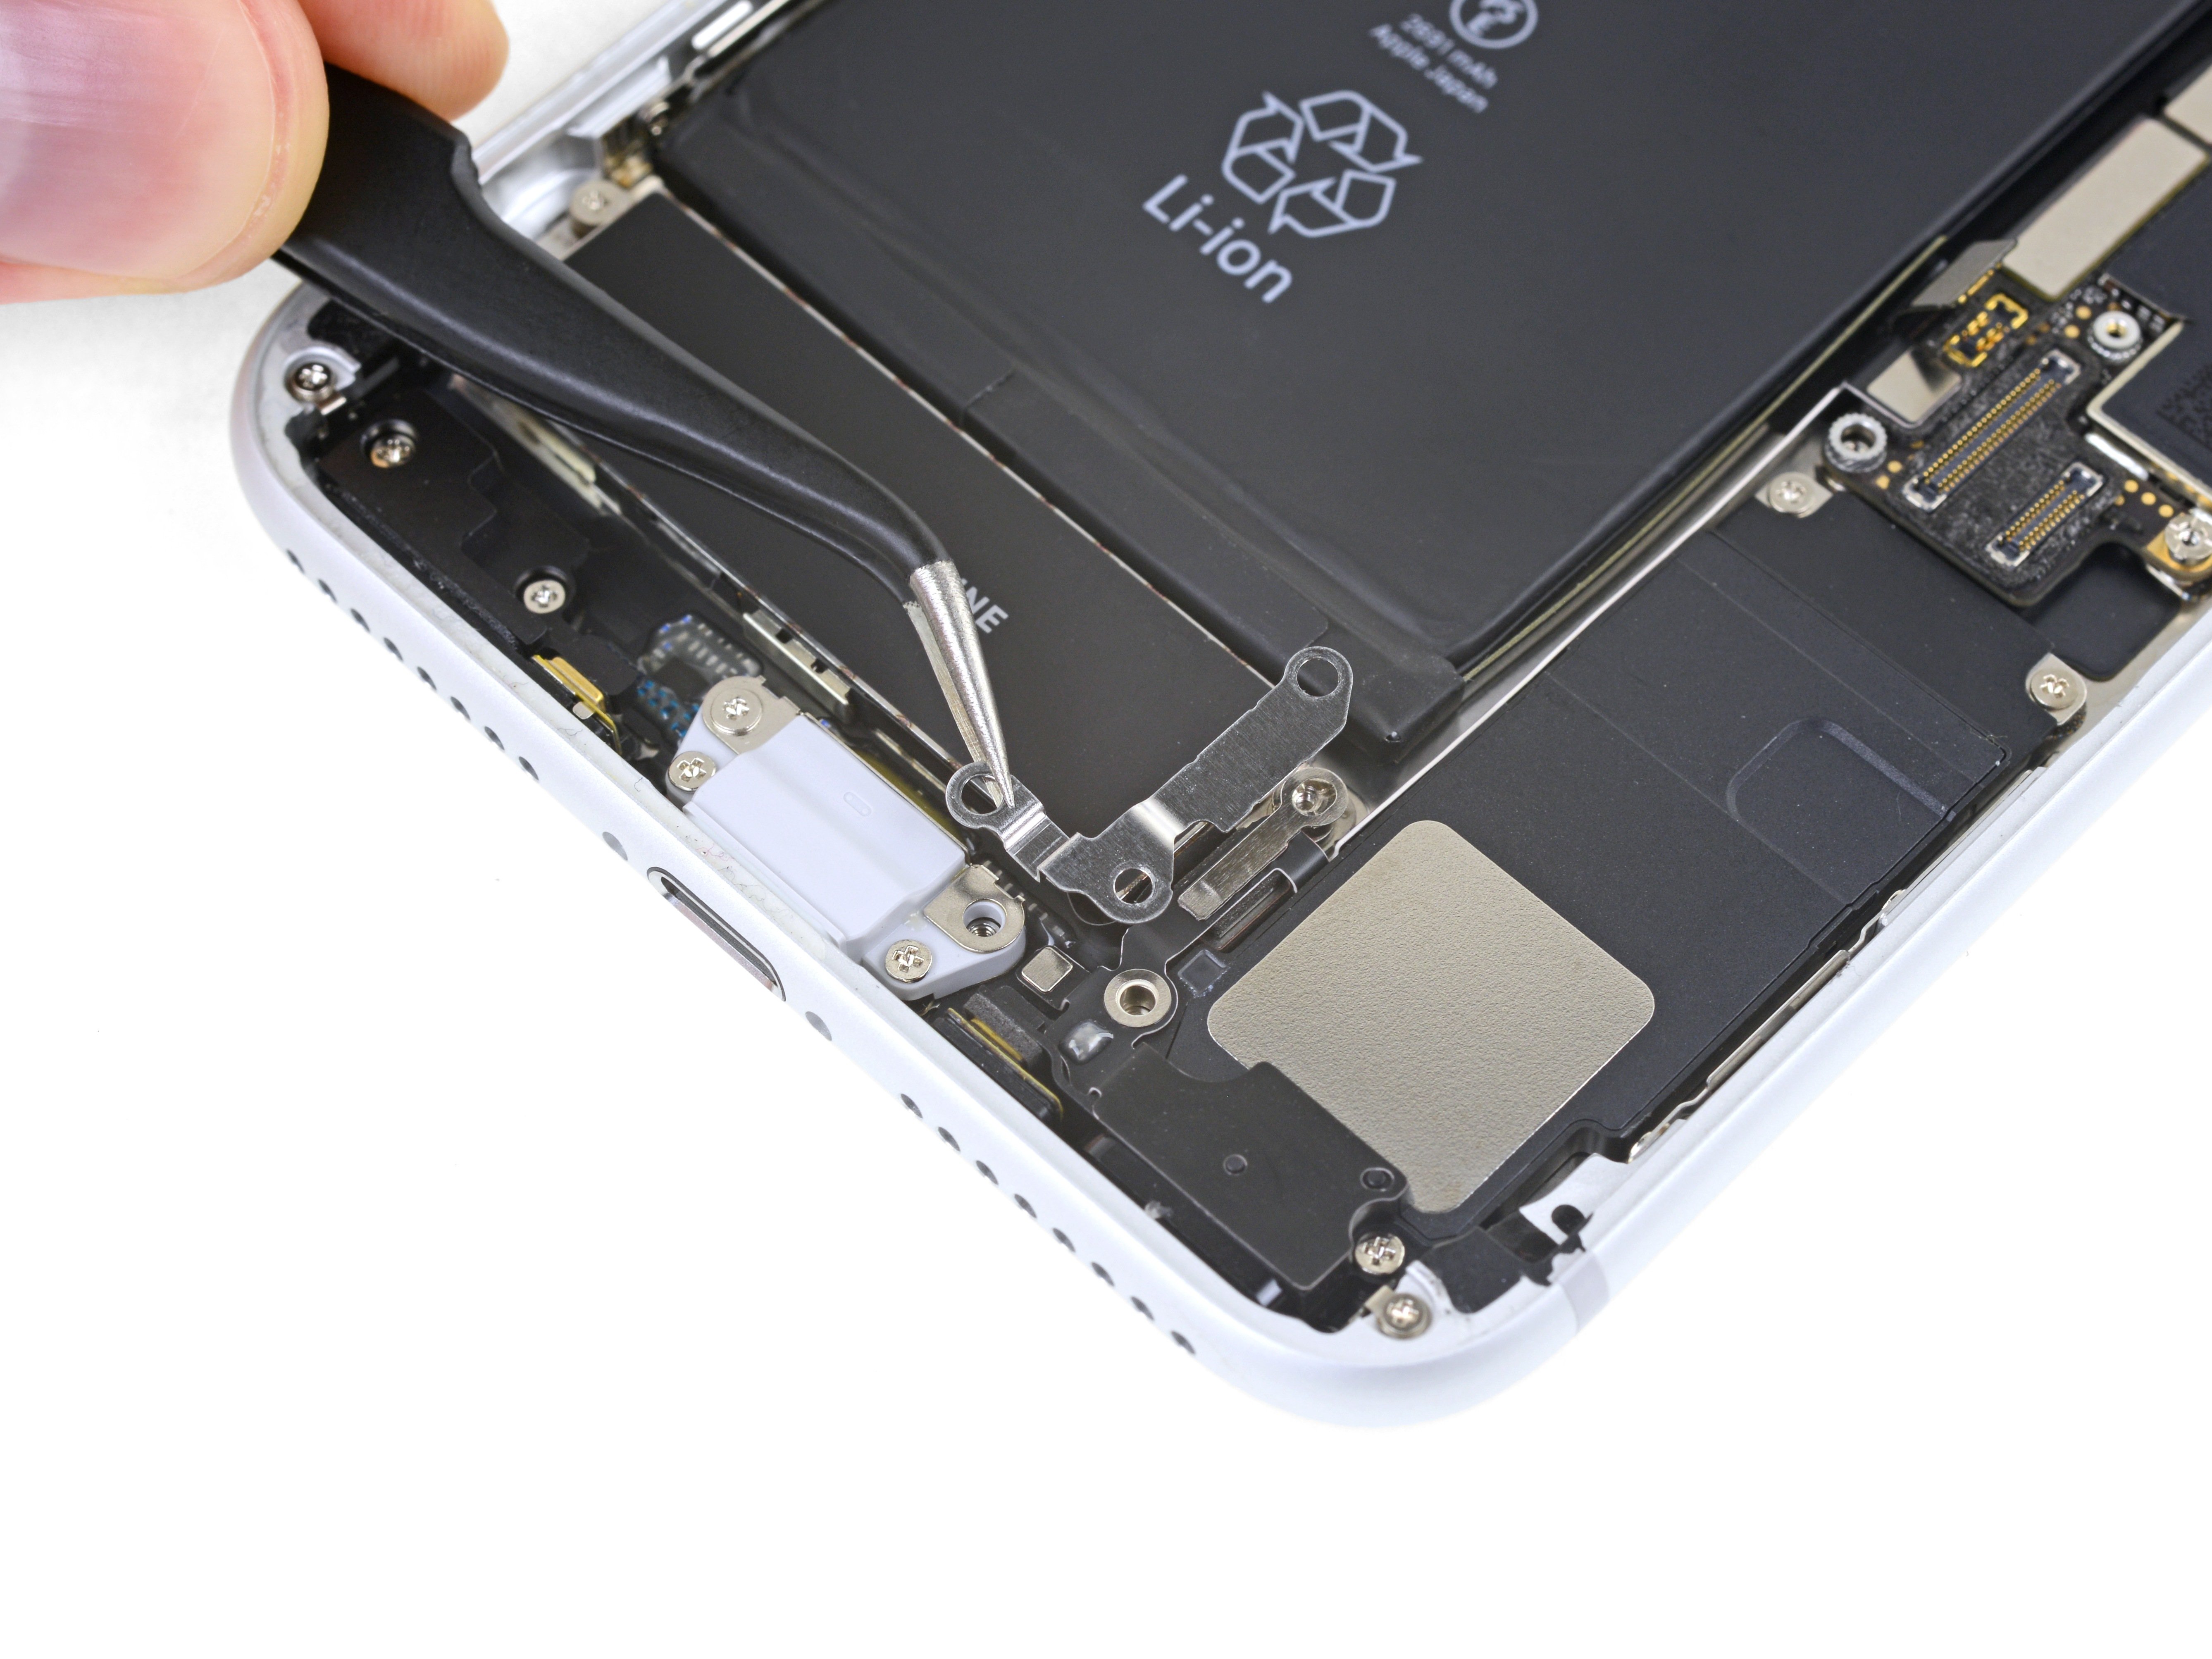
  • Use the point of your spudger to pry up and disconnect the other end of the antenna flex cable from its socket, next to the Lightning Port.
  • Reconnecting this cable can be tricky. Make it easier by using your tweezers to hold the flex cable so the connector aligns with its socket. Then, gently press down on the connector with the flat of your spudger until it clicks into place.
Step 43

Repair step

  • Remove the Wi-Fi diversity antenna.
Step 44

Repair step

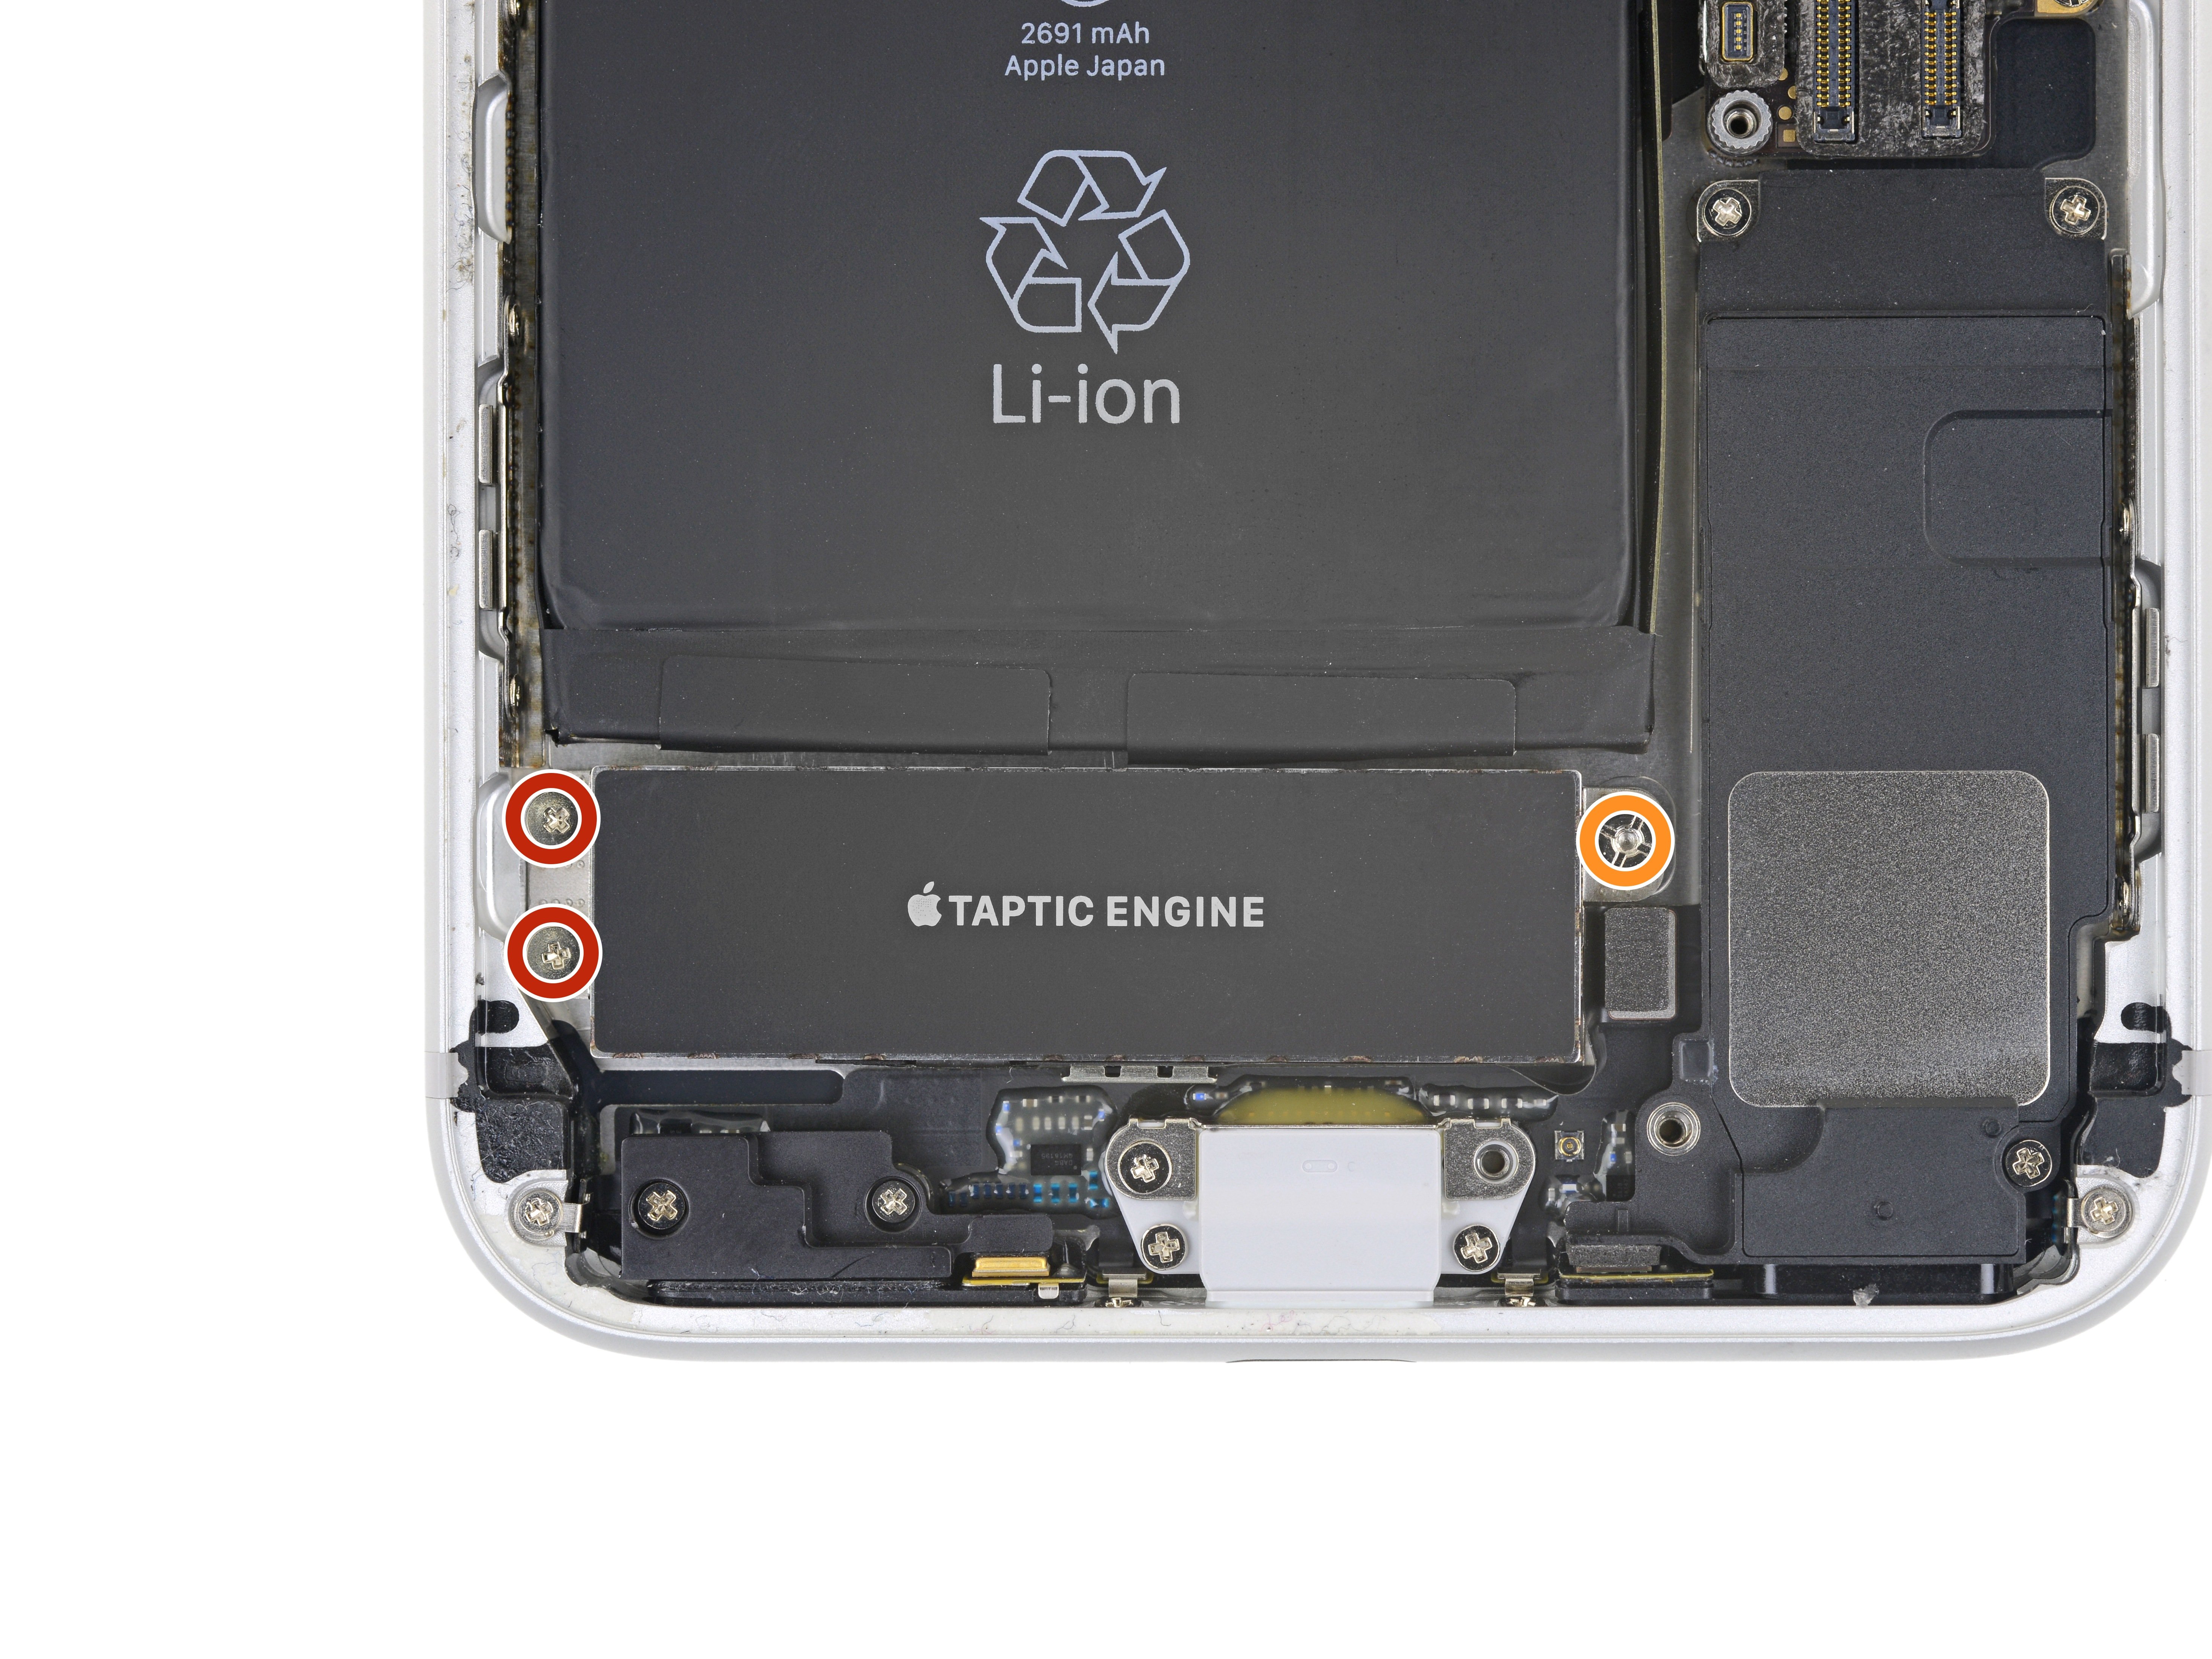
  • Remove the three screws securing the Taptic Engine:
  • Two 1.5 mm Phillips screws
  • One 2.4 mm standoff screw
  • Standoff screws are best removed using a standoff screwdriver or bit.
  • In a pinch, a small flathead screwdriver will do the job—but use extra caution to ensure it doesn't slip and damage surrounding components.
Step 45

Repair step

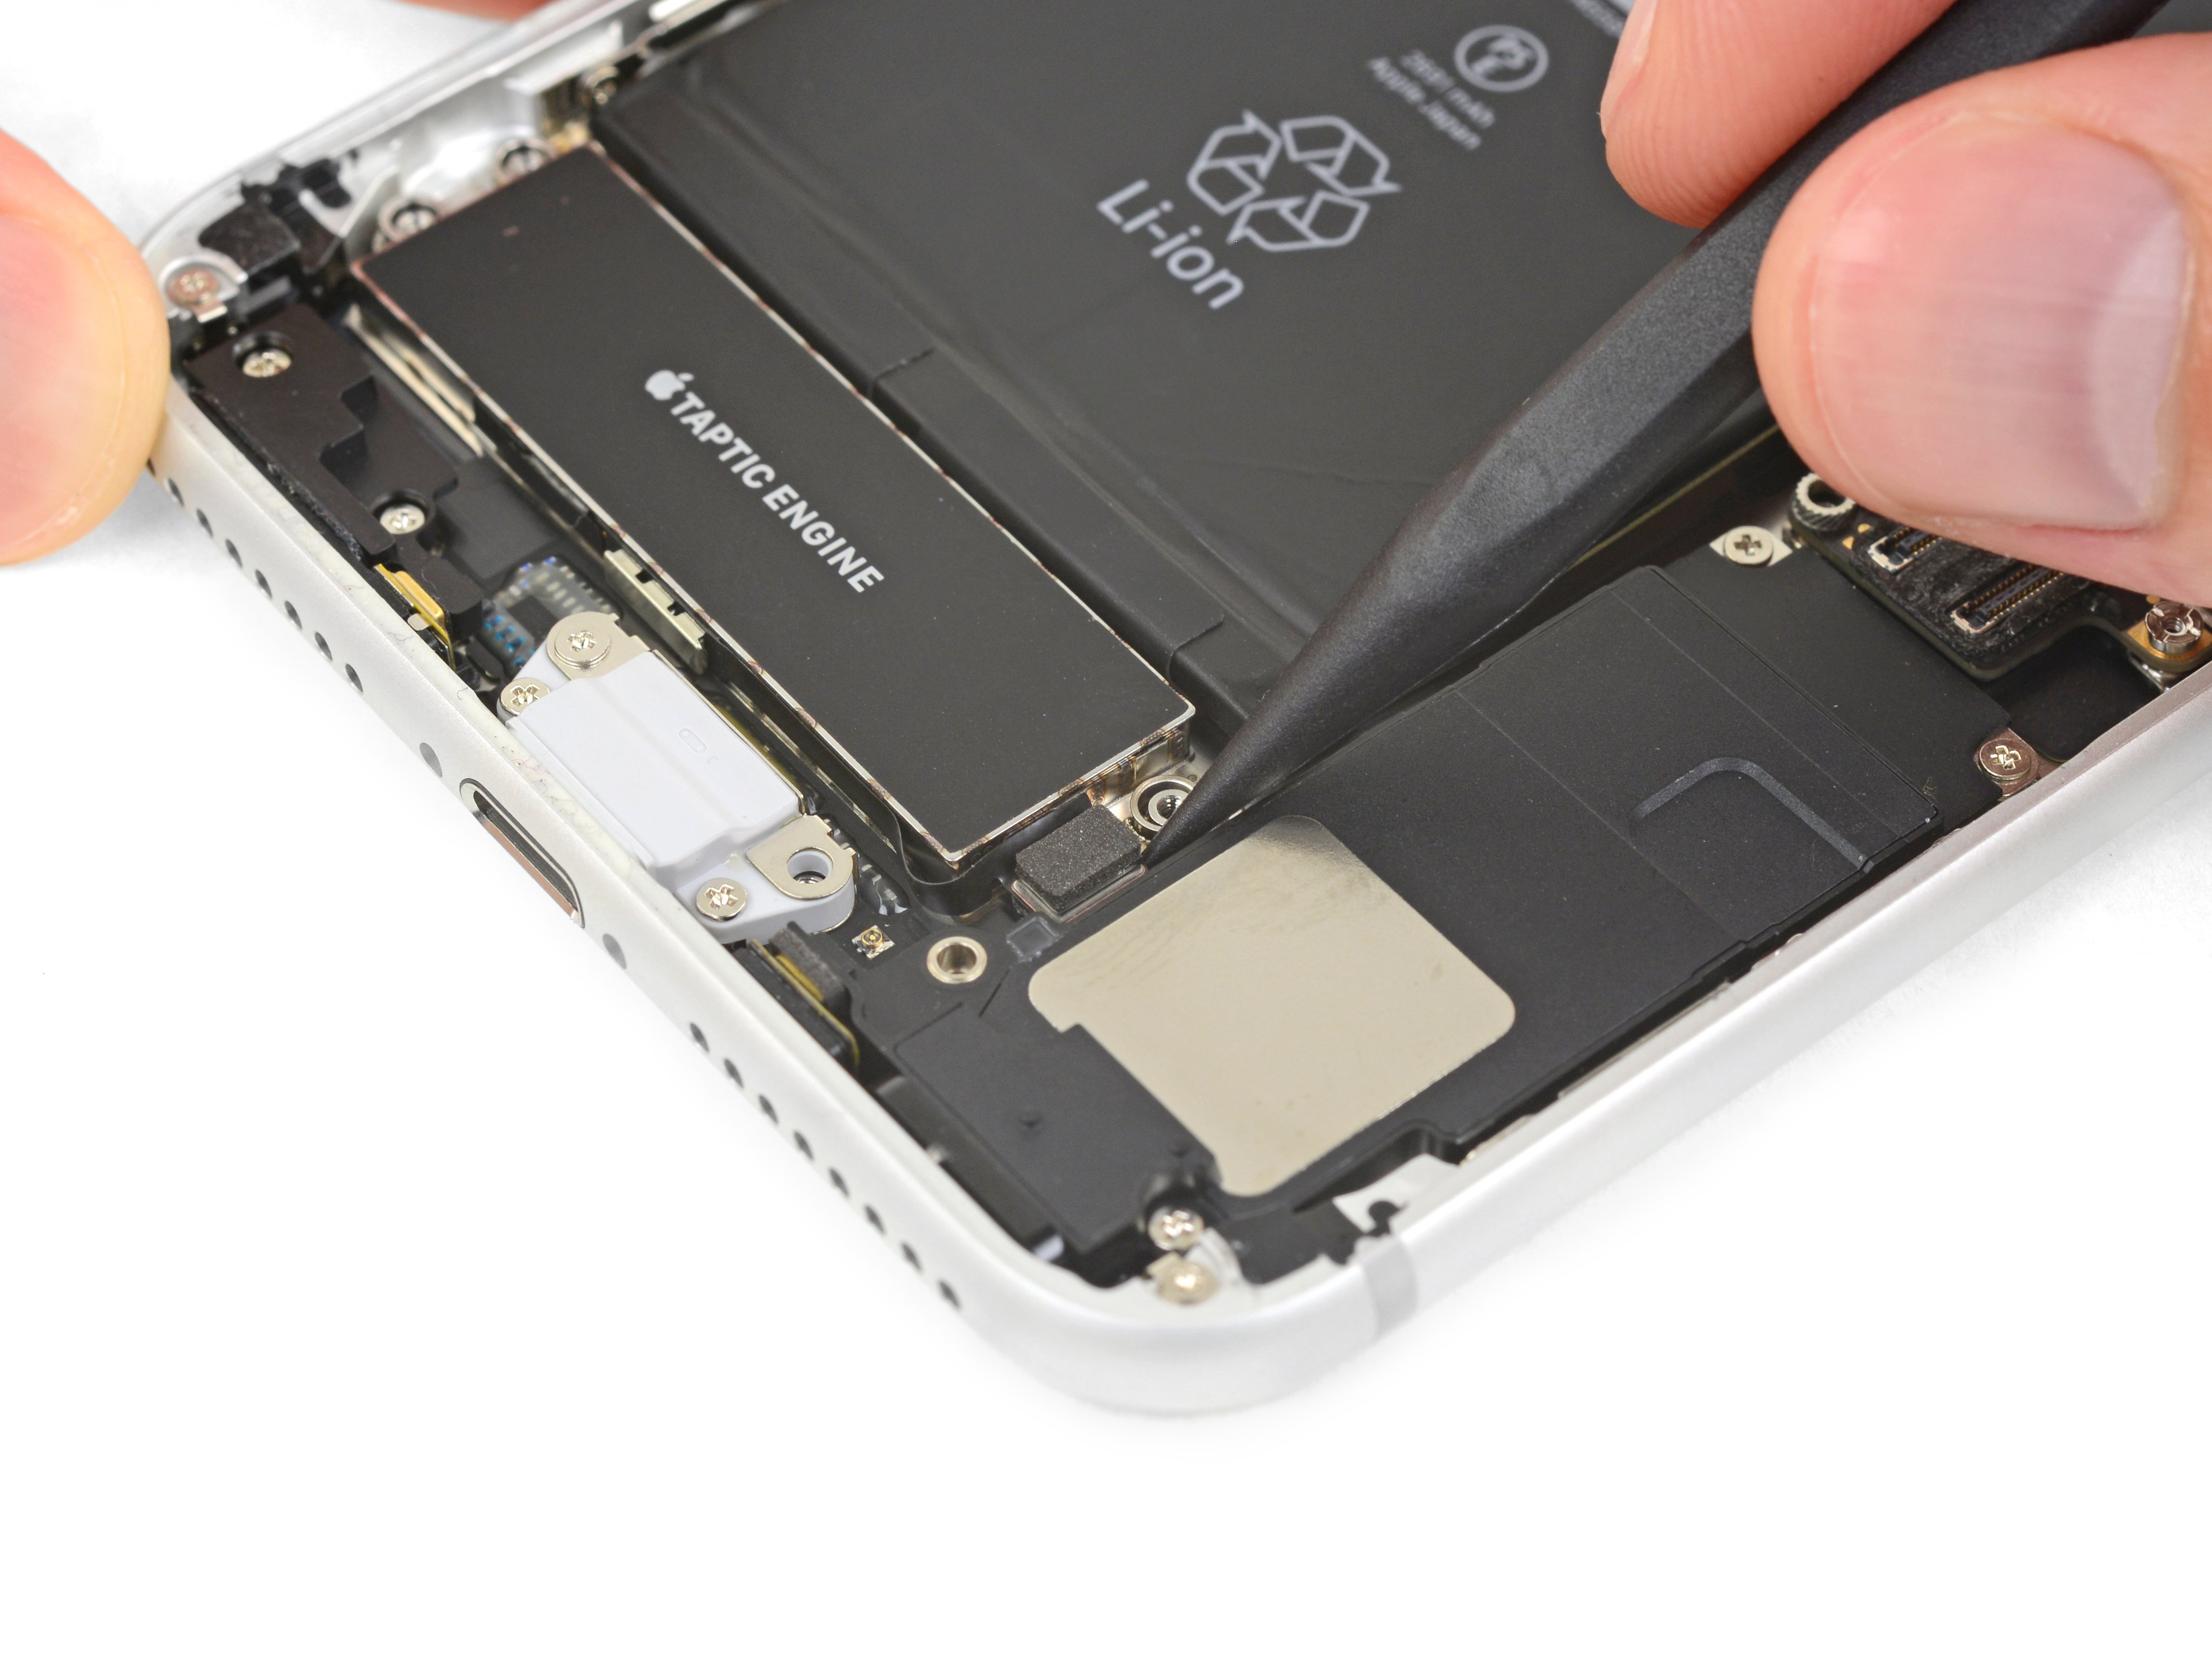
  • Use the point of your spudger to pry up and disconnect the Taptic Engine flex cable.
Step 46

Repair step

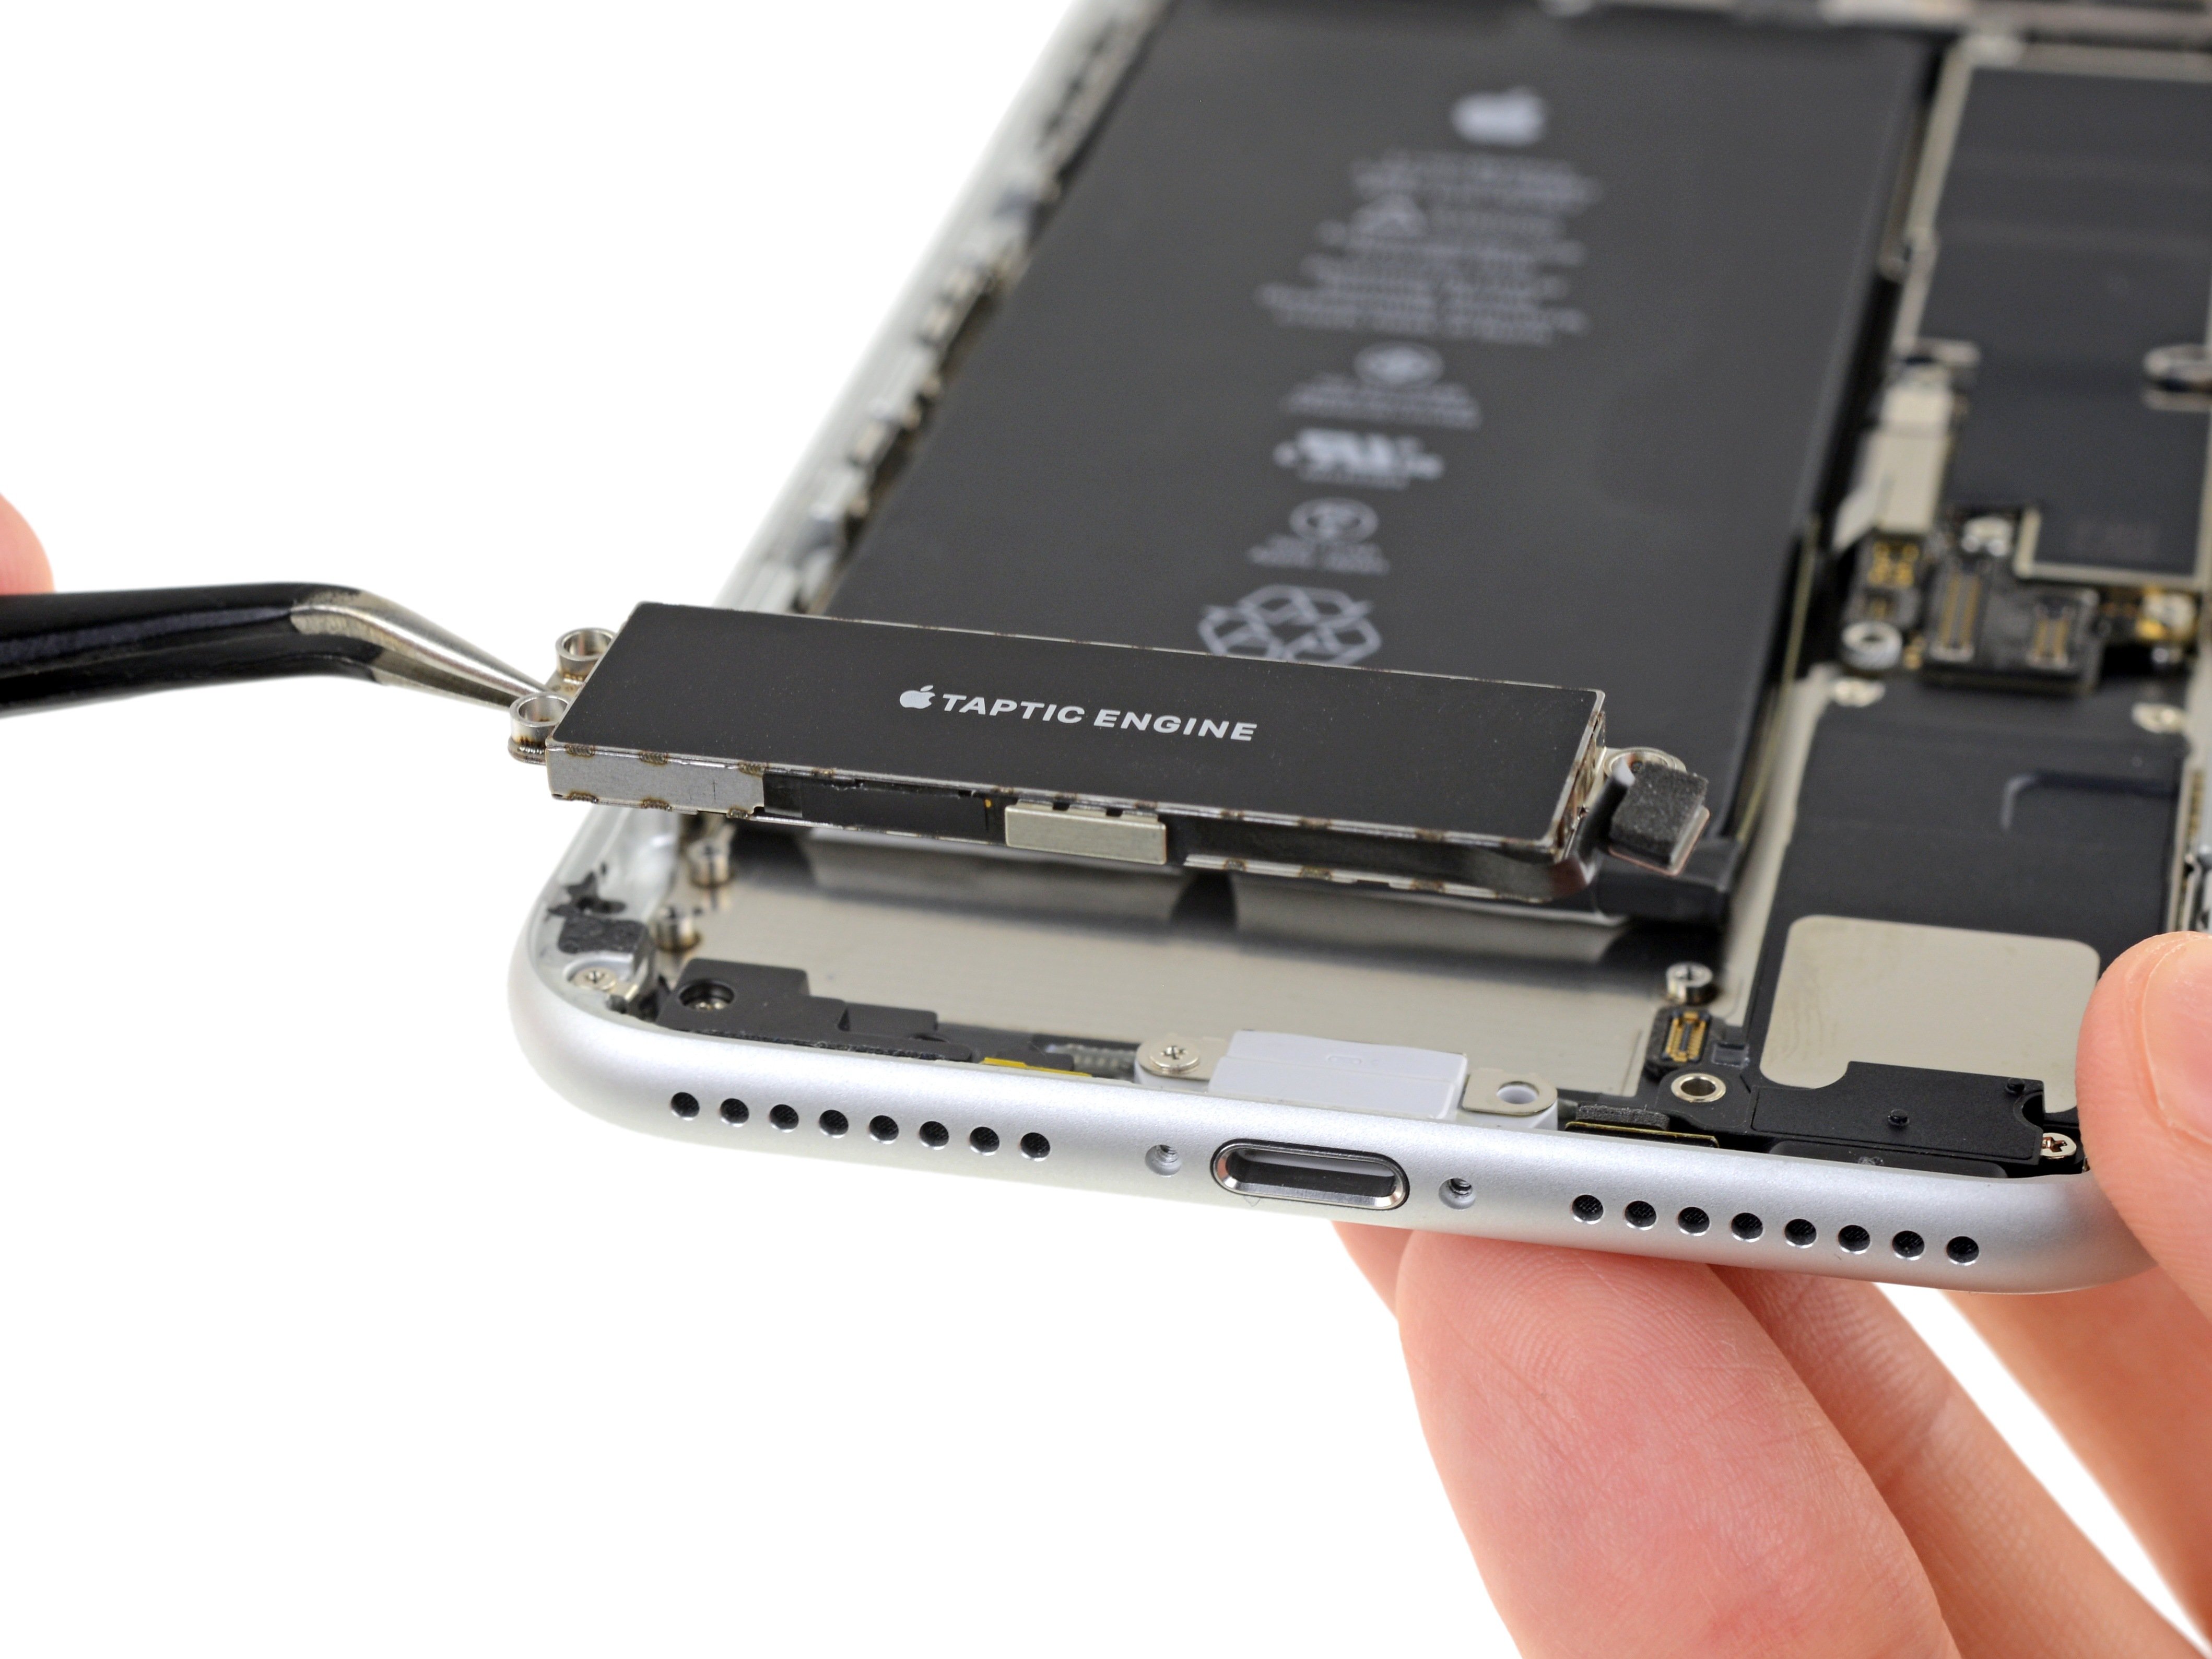
  • Remove the Taptic Engine.
Step 47

Repair step

  • Insert a SIM card eject tool or a paperclip into the small hole in the SIM card tray.
  • Press firmly to eject the tray.
Step 48

Repair step

  • Remove the SIM card tray from the iPhone.
  • The SIM card will fall out of the tray easily.
  • When reinserting the SIM card, ensure that it is in the proper orientation relative to the tray.
  • A thin rubber gasket around the SIM tray provides water and dust protection. If this gasket is damaged or missing, replace the gasket or the entire SIM tray to protect your iPhone's internal components.
Step 49

Repair step

  • Use the point of a spudger to push the SIM card eject plunger out of the logic board's way.
Step 50

Repair step

  • Remove two Phillips screws securing the bracket over the upper cable connector:
  • One 3.1 mm screw
  • One 1.3 mm screw
  • Remember, the longer screw goes on the left.
Step 51

Repair step

  • Remove the upper cable connector bracket.
Step 52

Repair step

  • Remove the two 1.2 mm Phillips screws securing the grounding clip at the top left edge of the logic board.
Step 53

Repair step

  • Remove the grounding clip.
Step 54

Repair step

  • Remove the 1.2 mm Phillips screw securing the antenna flex cable to the top edge of the iPhone's rear case.
Step 55

Repair step

  • Use a fingernail or the sharp end of an iFixit opening tool to pry up and disconnect the antenna flex cable connector from the logic board.
Step 56

Repair step

  • Slide the flat edge of a spudger underneath the antenna flex cable to separate the adhesive holding it in place.
Step 57

Repair step

  • The screw boss at the top of the antenna flex cable is tucked into a small recess in the top edge of the iPhone.
  • Tilt the antenna flex cable up toward the top of the iPhone.
  • Slide the screw boss down and out of its recess.
  • Remove the antenna flex cable.
Step 58

Repair step

  • Remove the three Phillips screws securing the lower speaker:
  • Two 1.4 mm screws
  • One 2.4 mm screw
  • During reassembly, press the speaker toward the bottom edge of the iPhone until the screw holes align, and hold it there while you install the screws.
Step 59

Repair step

  • Remove the lower speaker.
Step 60

Repair step

  • Prying from the top edge, use your fingernail or a spudger to pry up and disconnect the upper cable connector.
Step 61

Repair step

  • Use the point of a spudger to carefully pry up and disconnect the wireless charging coil's flex cable.
Step 62

Repair step

  • Use the point of a spudger to pry up and disconnect the Lightning connector assembly's flex cable from the logic board.
Step 63

Repair step

  • Remove the five screws securing the logic board:
  • Two 1.8 mm Phillips screws
  • One 2.3 mm standoff screw
  • One 2.4 mm standoff screw
  • One 2.7 mm standoff screw
  • Standoff screws are best removed using an [linked product missing or disabled: IF145-343] and driver handle.
  • In a pinch, a small flathead screwdriver will do the job—but use extra caution to ensure it doesn't slip and damage surrounding components.
Step 64

Repair step

  • Lift the logic board from the bottom edges and slide it toward the bottom of the iPhone to remove it.
  • Be careful not to snag the logic board on any cables.
  • During reassembly, note the position of the black grounding clip at the top right edge of the logic board, near the rear cameras. The logic board should slide underneath the clip.
Step 65

Repair step

  • Remove the two Phillips screws securing the barometric vent at the bottom left corner of the iPhone:
  • One 3.2 mm screw
  • One 1.8 mm screw
Step 66

Repair step

  • Gently push the barometric vent in the direction of the battery to separate the adhesive securing the vent to the bottom edge of the iPhone.
Step 67

Repair step

  • Remove the vent.
Step 68

Repair step

  • Remove the five Phillips screws securing the Lightning connector assembly to the rear case:
  • Two 1.2 mm screws
  • Two 2.4 mm screws
  • One 2.5 mm screw
Step 69

Repair step

  • Remove the two 1.3 mm Phillips screws securing the Lightning port to the bottom edge of the iPhone.
Step 70

Repair step

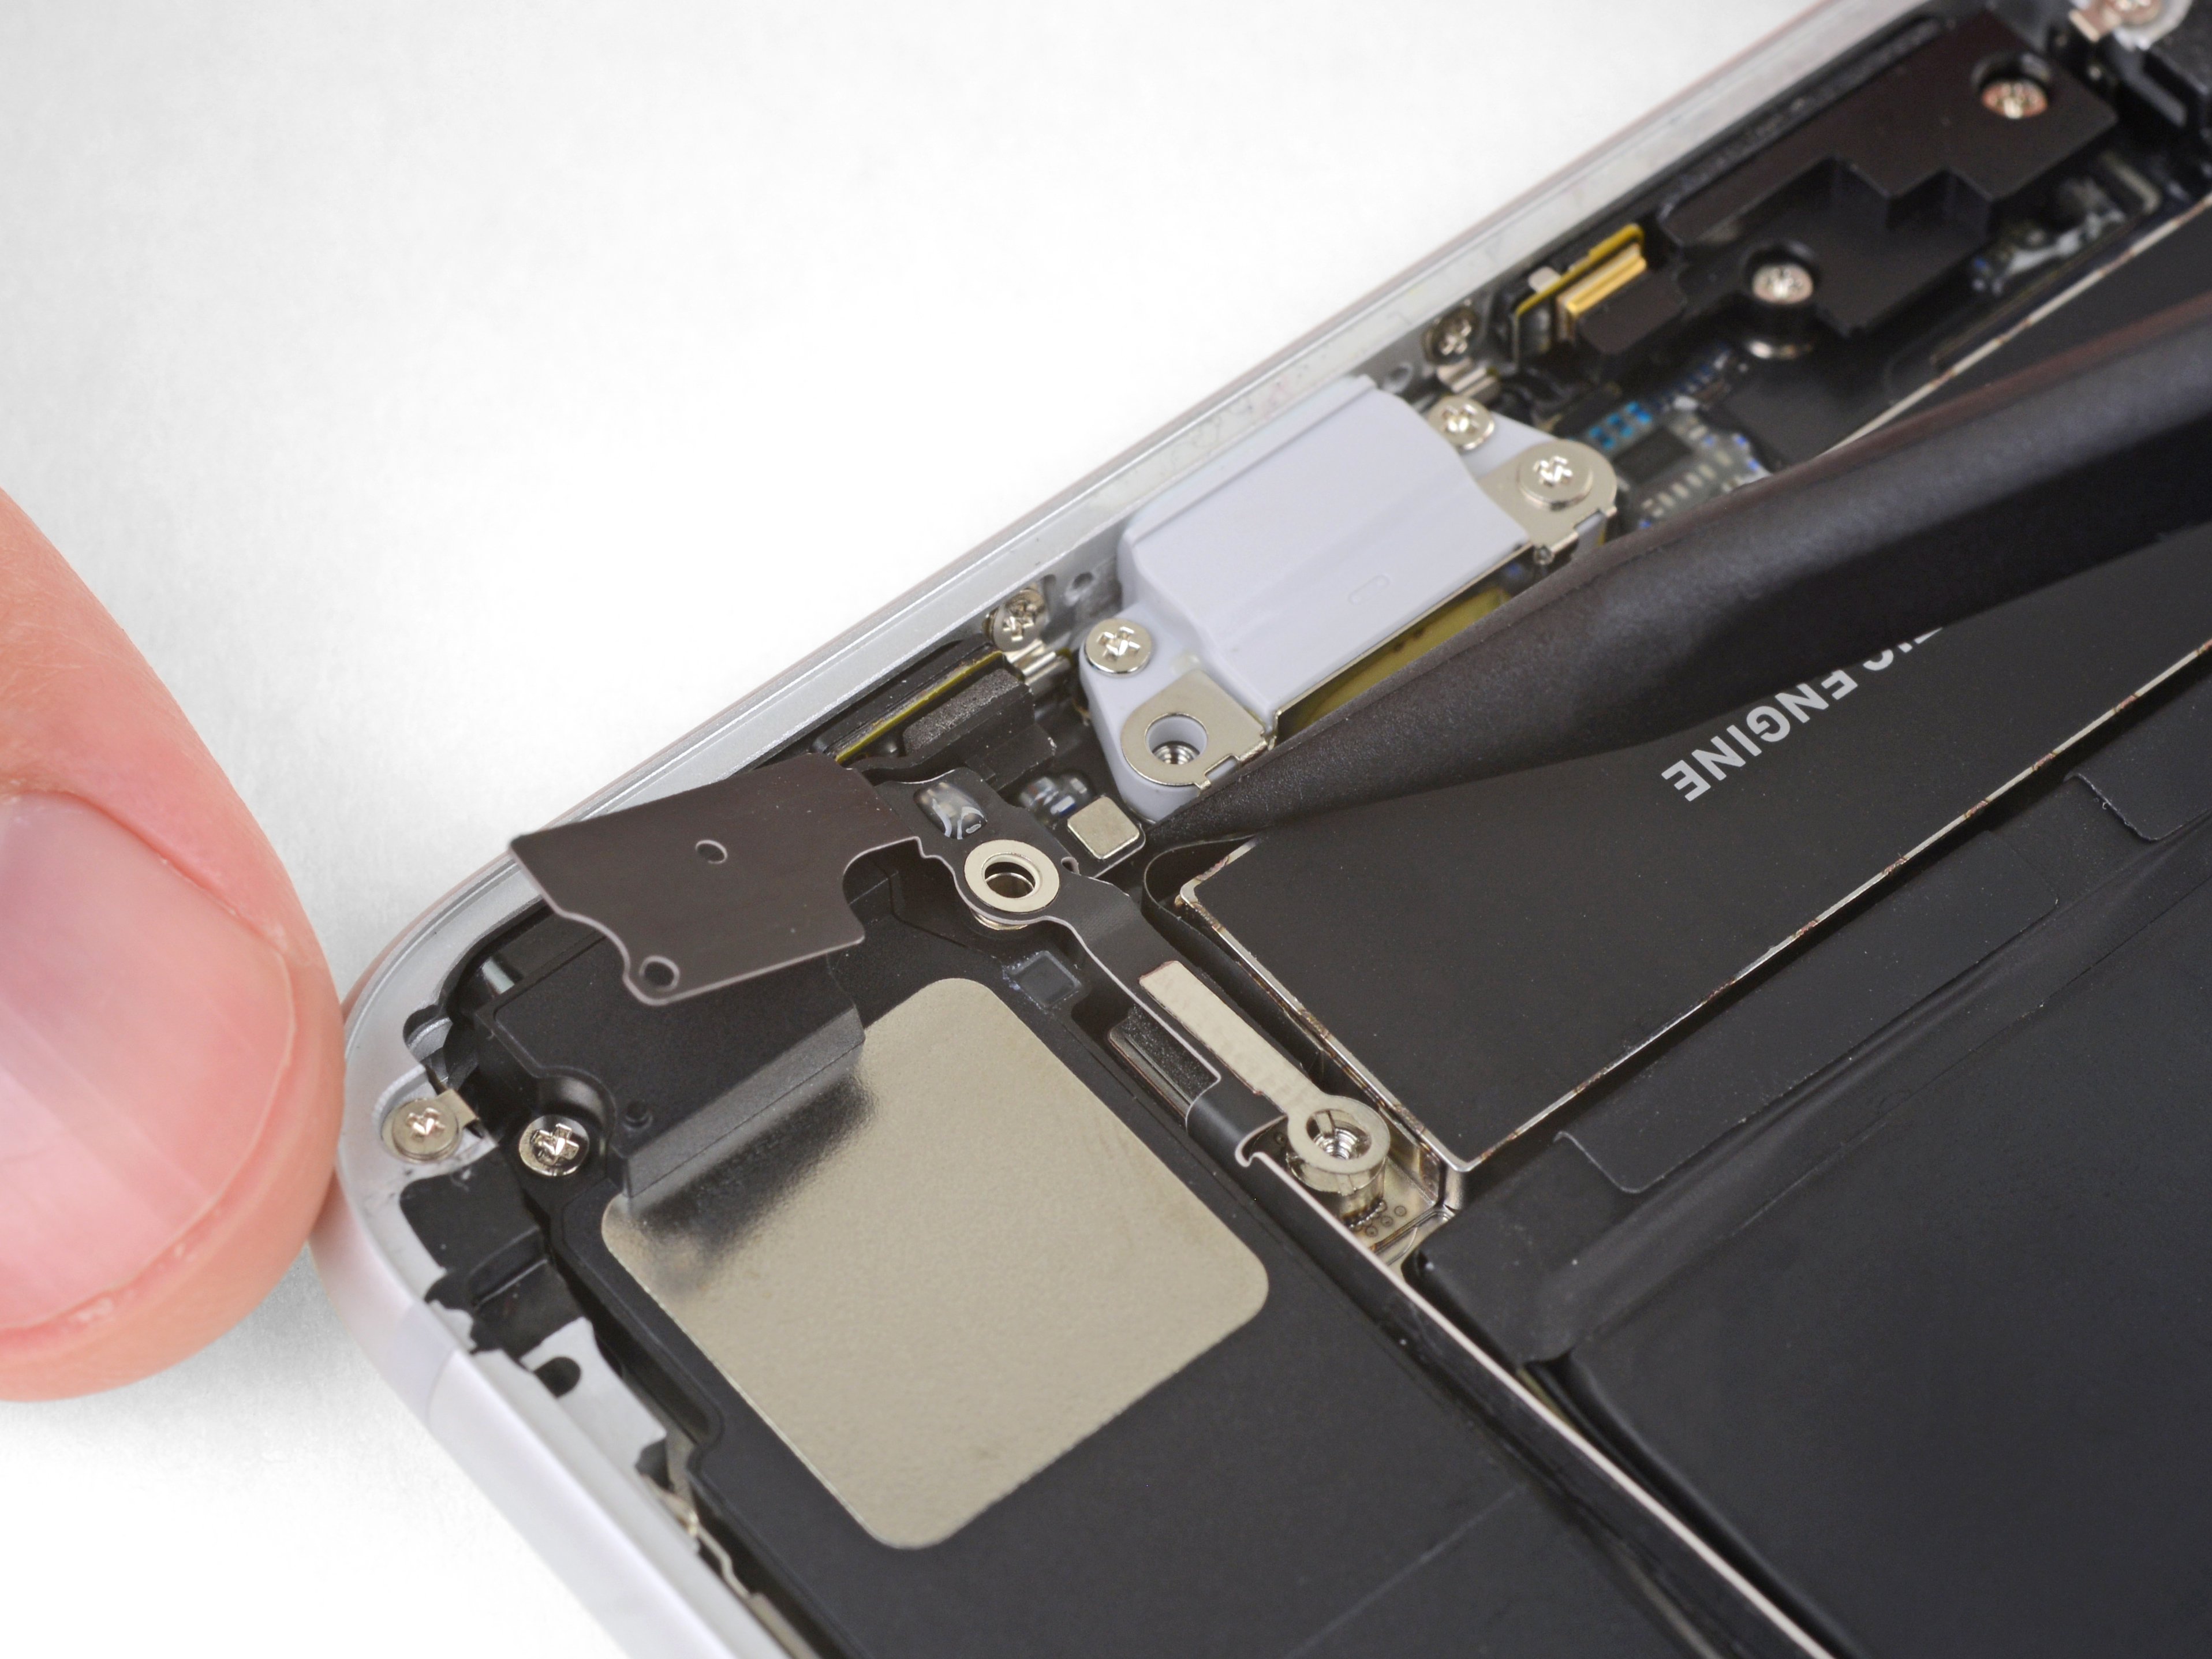
  • Use the sharp edge of an iFixit Opening Tool to pry the two microphones free from the adhesive securing them to the lower edge of the iPhone.
  • Don't try to completely remove the microphones; just separate the adhesive as shown.
Step 71

Repair step

  • Apply an iOpener or use a hair dryer to heat the rear case behind the Lightning connector flex cable. This will soften the adhesive securing the flex cable, making it easier to separate.
Step 72

Repair step

  • Use the flat edge of a spudger to gently fold the battery flex cable connector away from the upper portion of the Lightning connector assembly.
  • In the following steps, as you separate the Lightning connector assembly, be careful not to accidentally damage the battery flex cable.
Step 73

Repair step

  • Slide an opening pick or thin pry tool underneath the top portion of the Lightning connector assembly flex cable.
  • Gently slide the pick toward the outside edge of the iPhone (away from the battery).
  • Part of the wireless charging coil lies directly underneath this portion of the Lightning connector flex cable. Aggressive prying may damage the coil.
  • If needed, use your hair dryer or iOpener repeatedly to re-heat the area behind the Lightning connector assembly flex cable in order to make it easier to separate.
Step 74

Repair step

  • Continue separating the upper portion of the Lightning connector flex cable, being careful not to damage any other components along the way.
  • Keep the battery connector gently folded to the side so as not to damage it.
  • Be very careful not to damage the battery itself. A punctured battery can leak dangerous chemicals and/or catch fire.
Step 75

Repair step

  • Continue separating the Lightning connector assembly's flex cable until you pass the lower edge of the battery.
Step 76

Repair step

  • Carefully slide your pick from the corner of the battery to the corner of the iPhone to separate the portion of the flex cable adhered to the outer frame.
Step 77

Repair step

  • Slide your pick across the width of the iPhone to separate all the remaining areas of the Lightning connector assembly from the rear case.
Step 78

Repair step

  • Remove the Lightning connector assembly.
  • Before installing or replacing the Lightning connector assembly:
  • Use a plastic tool to scour any bits of adhesive residue from the rear case.
  • Thoroughly clean any remaining residue from the surface with isopropyl alcohol (90% concentration or greater) and a lint-free cloth. Wipe in one direction only, not back and forth.
Step 79

Repair step

  • A rubber gasket on the bottom of the Lightning connector protects your iPhone from liquid and dust intrusion. If you are installing a new Lightning connector assembly, you may need to carefully remove and transfer the gasket to the new part.
  • The small adhesive patch on the bottom of each microphone also protects your iPhone from liquid and dust intrusion. For best results, replace the two adhesive patches before installing your Lightning connector assembly.
  • Important: During installation, correctly position your new Lightning connector assembly so that the cutouts in the cable are exactly centered around the four screw bosses in the rear case. Otherwise, the flex cable will be misaligned and you won't be able to reconnect it to its socket on the logic board.