
FIXONIC
SellSavedMy Fixonic
Official iFixit API visual reference

1996-2000 Honda Civic Valve Cover Gasket Replacement

The valve cover gasket is normally replaced at...

iFixit Library 1996-2000 Honda Civic Easy 20 - 30 minutes Guide 140757
Open the authorised source
Licensed iFixit integration

This attributed iFixit guide is displayed through Fixonic's recorded commercial API permission. iFixit remains the independent source and author of the procedure.

Guide overview

Before you begin

The valve cover gasket is normally replaced at the recommendation 100,000 miles tune-up. In some cases, valve cover gasket failure may occur sooner and cause oil leaks which would require a replacement to fix the oil leak. Oil leaks will lead to engine oil starvation and will cause extensive damages to the engine. All models within the year 1996-2000 Honda Civic have the same valve cover gasket. This guide will illustrate the basics of an oil leak from a bad valve cover gasket and provide instructions on replacing the valve cover gasket.
Step 1

Repair step

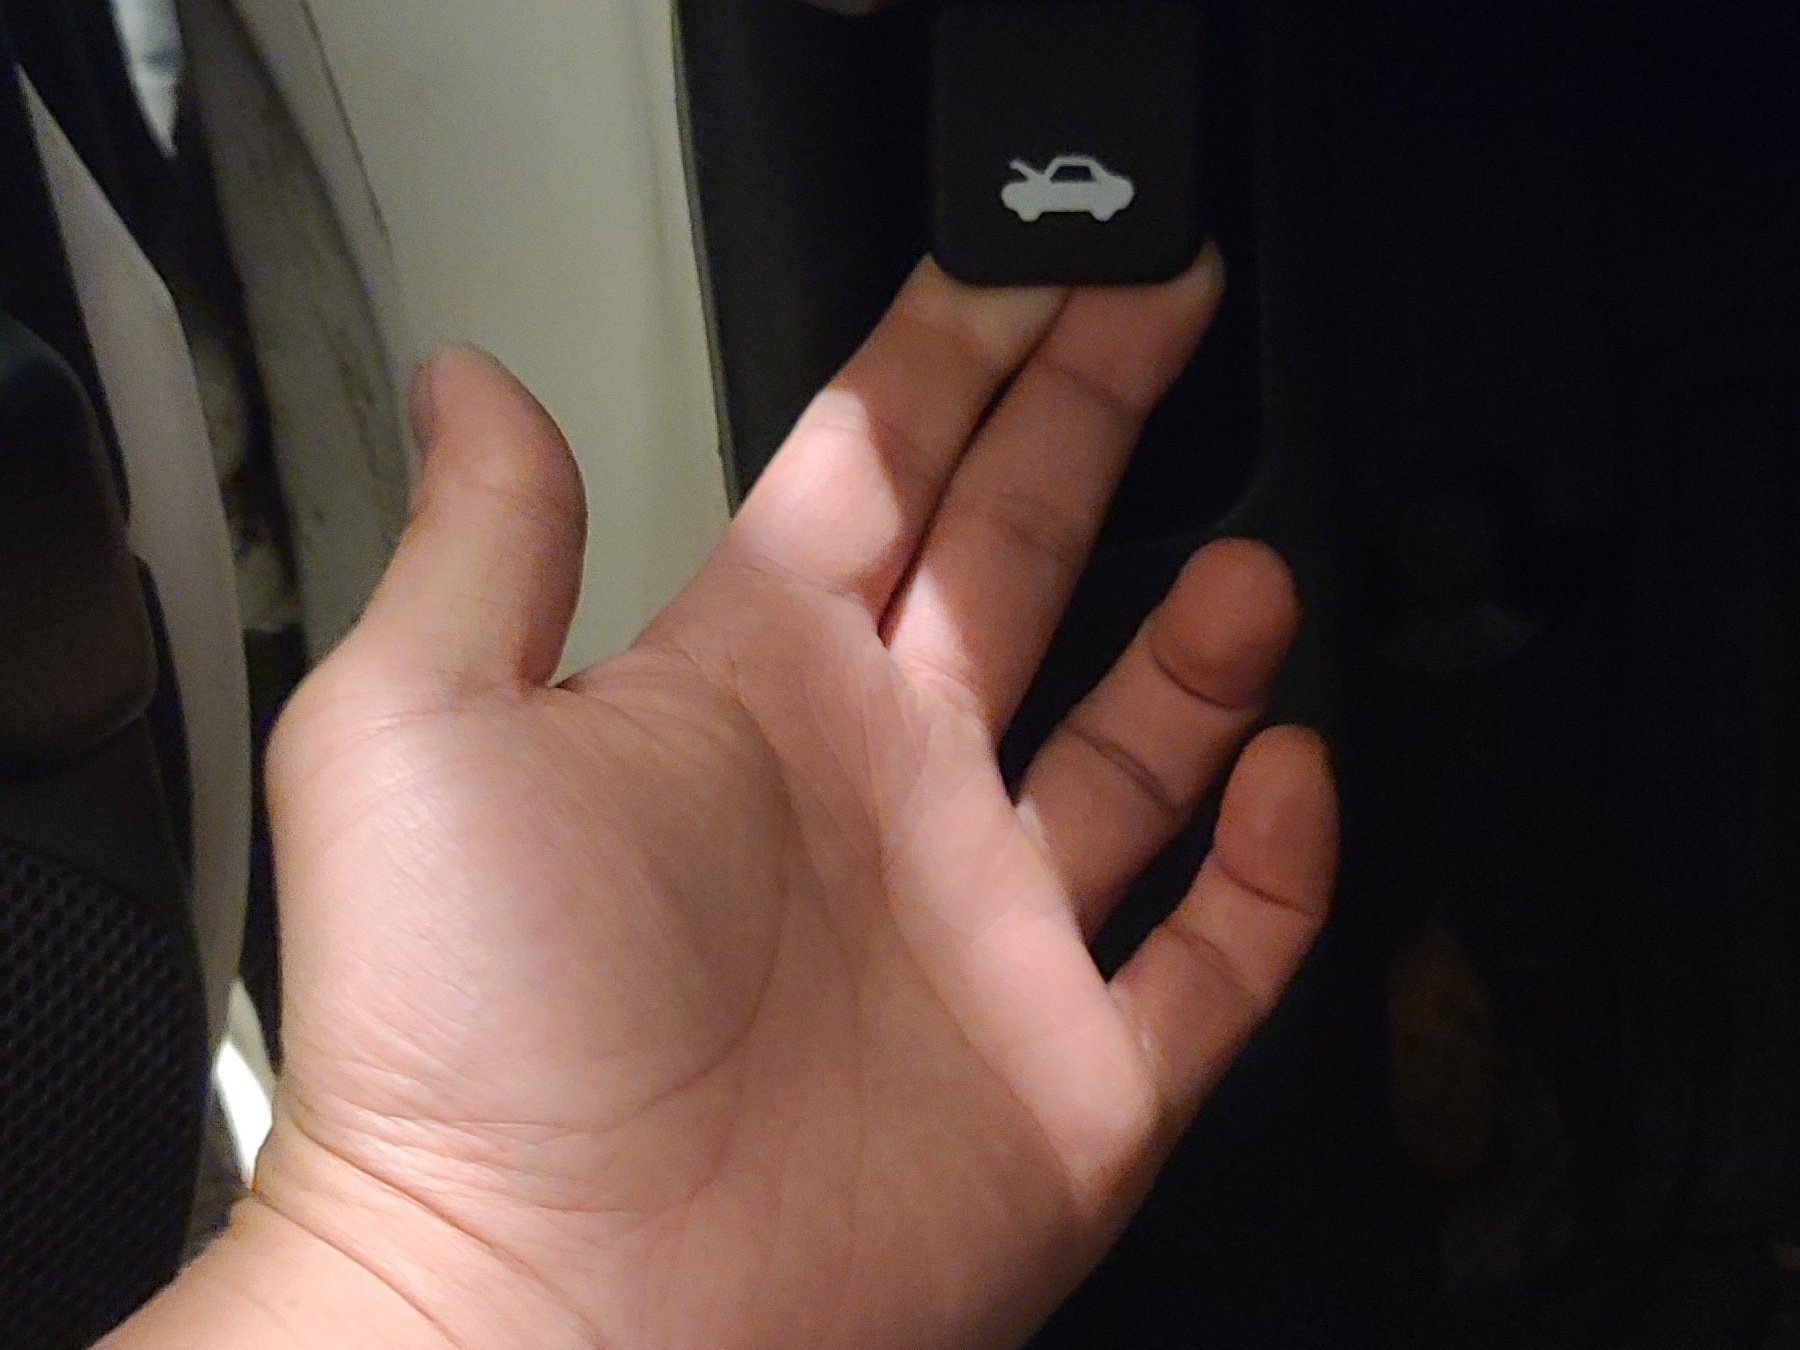
  • Pull the lever towards you to release the hood. You should hear a pop release coming from the front of the hood.
  • Push and hold the hood latch with the left hand and pull the hood up with your right hand to open.
  • Lock the hood stand into the two holes to keep the hood up located on the right-hand side of the hood.
  • Check the hood stand is secured and sturdy so that it doesn't collapse onto you.
Step 2

Repair step

  • Visually inspect for any burns or black spots are usually an indication of an oil leak caused by a bad valve cover gasket.
Step 3

Repair step

  • Disconnect the battery by using the ratchet with a 10 mm socket.
  • Rotate the ratchet counterclockwise to remove the bolts.
  • Place the positive and negative terminal cables away from any contact with the battery or metal components.
  • Avoid contacting the terminal leads; arching/shocking will occur if the two-terminal leads touch each other.
Step 4

Repair step

  • Use tape to label the spark plug wires numbers 1 thru 4.
  • Pull the spark plug wires up or towards your upper body to remove them from the engine valve cover.
  • Twist and pull the air intake breather tube to remove it from the valve cover.
Step 5

Repair step

  • Remove the single 10 mm bolt that is attached to the spark plug fixture mount.
  • Remove the three 10 mm bolts in the front and the two 10mm bolts from the back of the valve cover in a counterclockwise motion.
  • Pull the valve cover up to remove it from the engine and place it aside.
Step 6

Repair step

  • Wipe and clean off the cylinder head surface using a shop towel.
  • Use a flat head screwdriver to help scrape in between areas that are difficult to reach.
Step 7

Repair step

  • Grip the square tab with your fingers and pull up to remove the valve cover gasket.
  • Install the new gasket with the square tab located to the lower right of the valve cover.
Step 8

Repair step

  • Install the valve cover back onto the engine.
  • Bolts will shear if over-tightened.
  • Install the five 10mm bolts onto the valve cover starting with the middle first follow by the outer bolts in an X-pattern fashion.
  • Install the single 10mm bolt with the spark plug wire fixture mount.
  • Install the spark plug wires back into the valve cover in numeric order that it was removed.
  • Install the air intake breather tube.
Step 9

Repair step

  • Reconnect the battery cables starting with the black negative cable then the red positive cable.
  • Remove all tapes from spark plug wires.
  • Verify all bolts are installed and secured, then close the hood.