FIXONIC
SellSavedMy Fixonic
Official iFixit API visual reference

2005 Toyota Sequoia 2005 Liftgate Latch/Back Lock Sub-Assembly Replacement

This guide will show you how to replace the...

iFixit Library Toyota Sequoia Moderate 1 - 2 hours Guide 142539
Open the authorised source
Licensed iFixit integration

This attributed iFixit guide is displayed through Fixonic's recorded commercial API permission. iFixit remains the independent source and author of the procedure.

Guide overview

Before you begin

This guide will show you how to replace the faulty liftgate latch/back lock sub-assembly and how to open a stuck trunk door for a 2005 Toyota Sequoia. The Toyota Sequoia has a well-known fault that results in the trunk door remaining locked or unable to close properly. This can either make accessing the trunk more difficult or may potentially cause a hazardous situation where the trunk opens while driving. This is because the liftgate latch may have gotten jammed or cracked the fragile actuator motor it is attached to.

Step 1

Repair step

  • Open the trunk door if you are able to do so.
  • Opening the trunk door will allow you to more easily remove the trim and access other components.
  • If you cannot open the trunk, ignore this step. The guide will show you later on how to open a stuck truck door.
Step 2

Repair step

  • Pull upwards on the plastic covering the trunk strap to remove it.
Step 3

Repair step

  • Using a Phillips screwdriver, remove the screw holding the trunk strap.
Step 4

Repair step

  • Use a plastic trim kit to start removing the trim on the trunk door.
  • You may have to use your hands and pull if you have difficulties removing the trim.
Step 5

Repair step

  • Use a 10 mm socket wrench or ratchet and remove the 8 screws located on the edge of the metal trunk cover.
  • Don't worry about the metal trunk cover falling off; there are plastic discs holding it in place.
Step 6

Repair step

  • Use a spudger to partially pry open the plastic discs holding the metal trunk cover and push the trunk cover off the discs.
Step 7

Repair step

  • Use a flashlight to follow the black cable that leads to a plastic covering which hides door latch cable.
  • Use your fingers to pull down on the plastic covering and remove it.
Step 8

Repair step

  • Use your hand to pull the cable downwards to release the bottom half of the cable.
  • Push the cable towards the metal ball and push downwards to release the cable fully.
Step 9

Repair step

  • Use a spudger to pry open the plastic holder and take the cable halfway out.
  • If you were unable to open the trunk door on the first step, you can now open it by pulling the metal ball on the black cable. This will open the trunk.
Step 10

Repair step

  • Use a spudger to pry off the plastic covering the trunk latch.
  • Use a 10mm socket wrench or ratchet to remove the three screws.
  • Push upwards and in on the trunk latch.
Step 11

Repair step

  • Using your fingers or a spudger, squeeze both sides and push in.
Step 12

Repair step

  • Use a flashlight and your hands to squeeze to remove white plastic plug connected to the trunk latch.
Step 13

Repair step

  • Using your hands, slide the trunk latch to the right side of the trunk and remove.
Step 14

Repair step

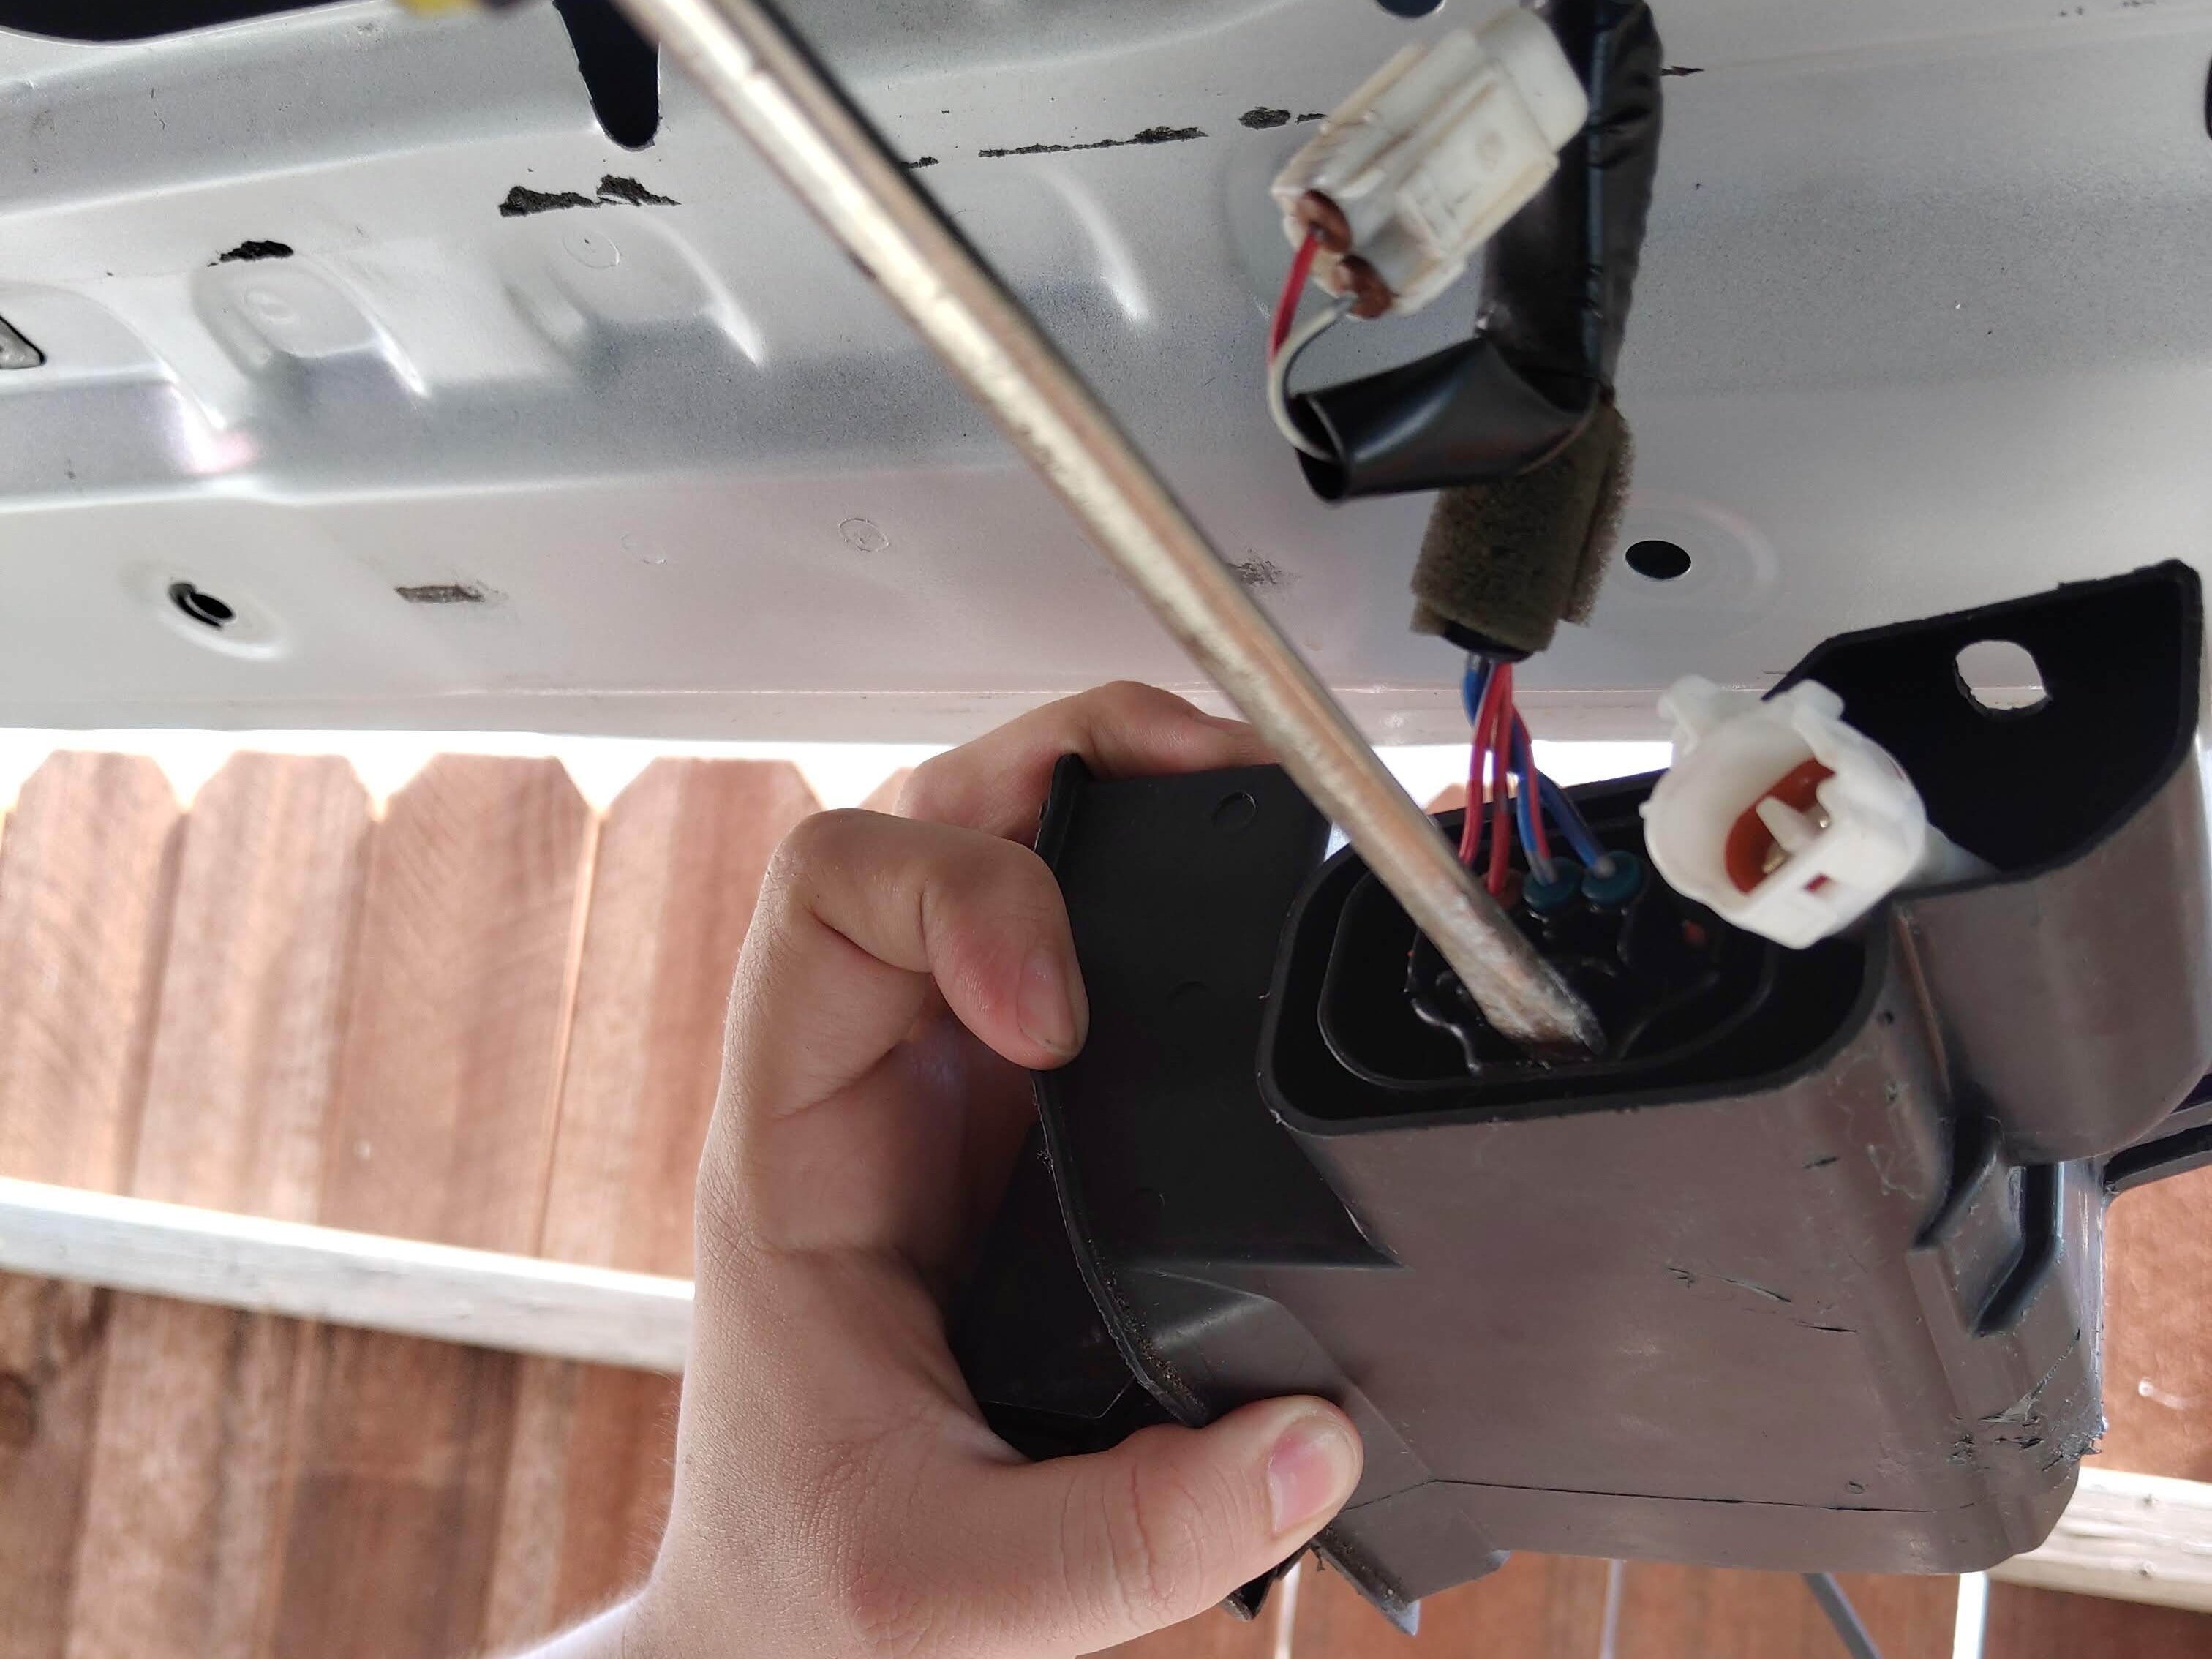
  • Use a spudger or your hands to squeeze and remove the black plug.
Step 15

Repair step

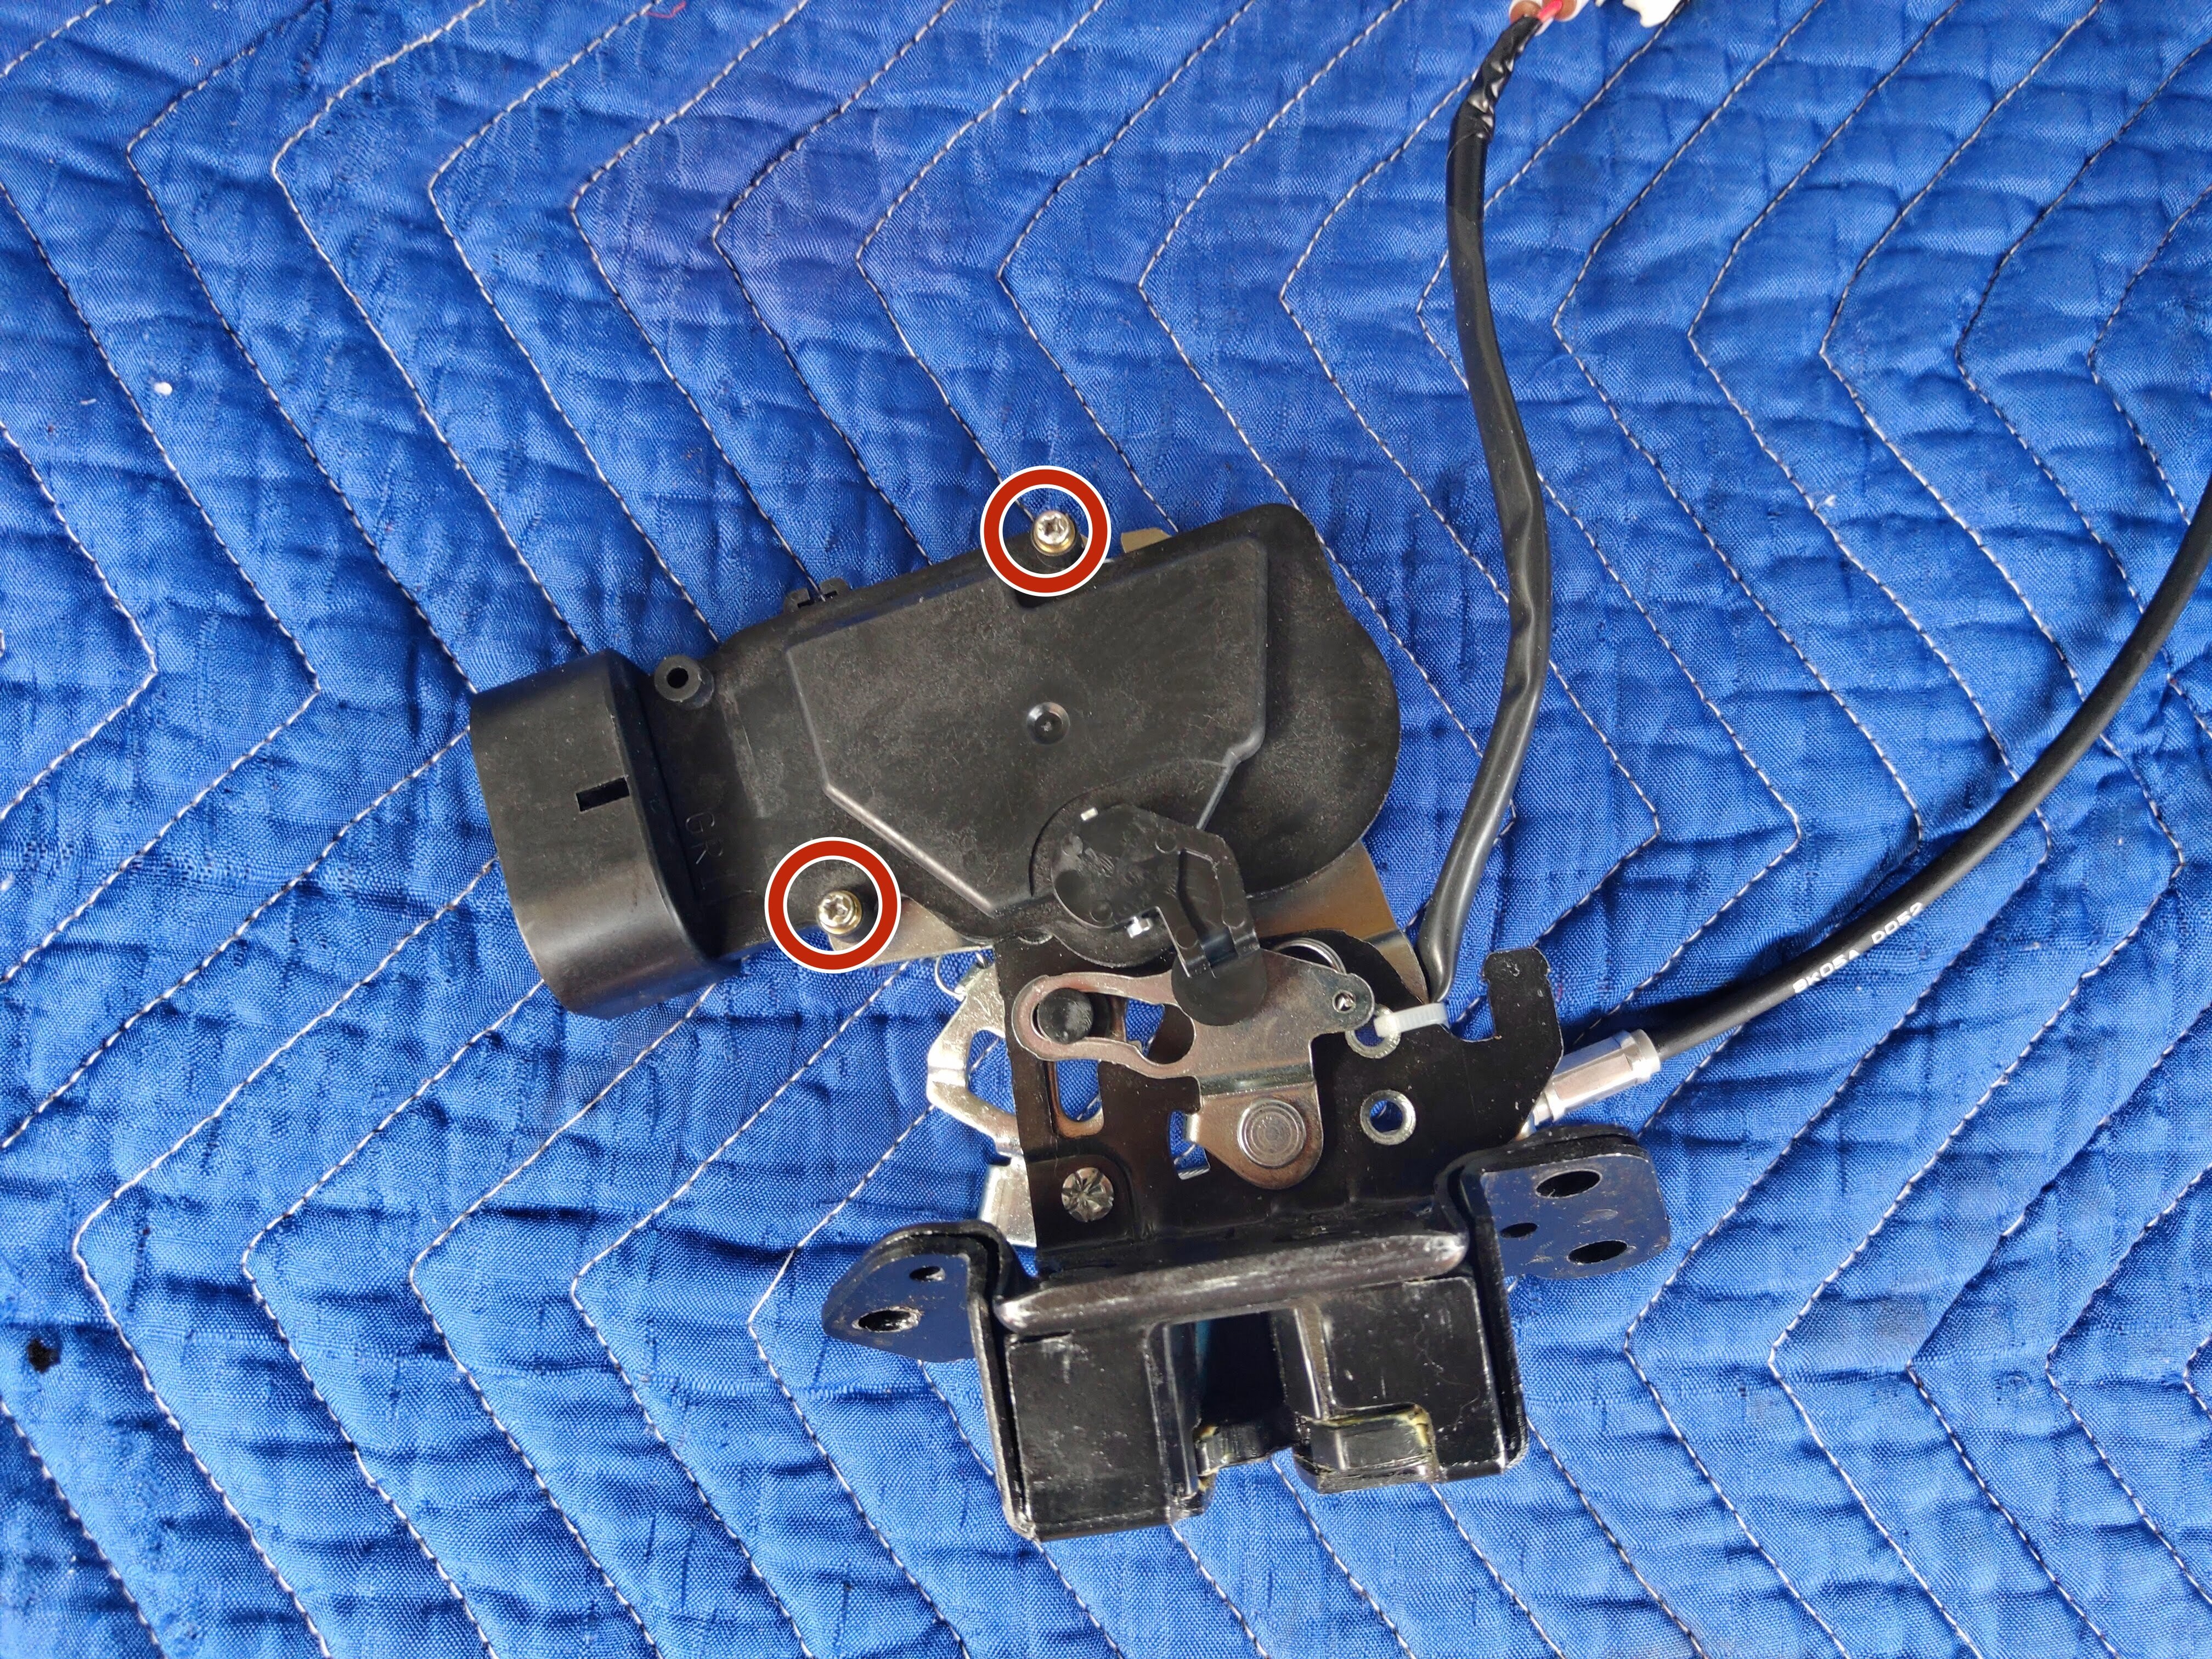
  • Use a Phillips screwdriver to remove the two screws holding the plastic trunk latch cover.
Step 16

Repair step

  • Use your hands to pull downwards on the black cable to expose more of the trunk latch from the plastic covering.
  • Remove the plastic covering by pulling it clockwise from the trunk latch.
Step 17

Repair step

  • Use a Phillips screwdriver to remove the two screws holding the actuator motor to the trunk latch.
Step 18

Repair step

  • You can now reuse or replace your old actuator motor and attach it to a new liftgate latch.