FIXONIC
SellSavedMy Fixonic
Official iFixit API visual reference

2015-2019 Dodge Charger Tail Light Replacement

This guide details the process of removing and...

iFixit Library 2011-Present Dodge Charger Moderate 25 - 35 minutes Guide 147484
Open the authorised source
Licensed iFixit integration

This attributed iFixit guide is displayed through Fixonic's recorded commercial API permission. iFixit remains the independent source and author of the procedure.

Guide overview

Before you begin

This guide details the process of removing and replacing the tail lights for a 2015-2019 Dodge Charger. The tail lights are a major safety aspect to vehicles. To ensure everyone’s safety on public roads, it is the driver’s responsibility to replace the tail lights when malfunctioning or worn out. If your 2015-2019 Dodge Charger tail lights are in need of a replacement due to damage or aesthetic purposes, this guide will provide you with all the necessary steps to replace your taillights with ease. NOTE: Perform the procedures after the vehicle has been turned off for at least 30 minutes. Make sure to turn off the ignition and engage the parking brake before you begin.

Step 1

Repair step

  • Remove the rear plastic panel cover located inside the trunk by pushing the panel towards the center of the car.
Step 2

Repair step

  • Remove the plastic screw securing the inner lining of the trunk by pulling outwards.
  • Do not use excess force as it can damage the screw.
Step 3

Repair step

  • Remove the plastic pin by prying it outwards using a pry bar to free the inner lining.
  • Pull back the inner lining to gain access to the screws securing the tail lights in place.
Step 4

Repair step

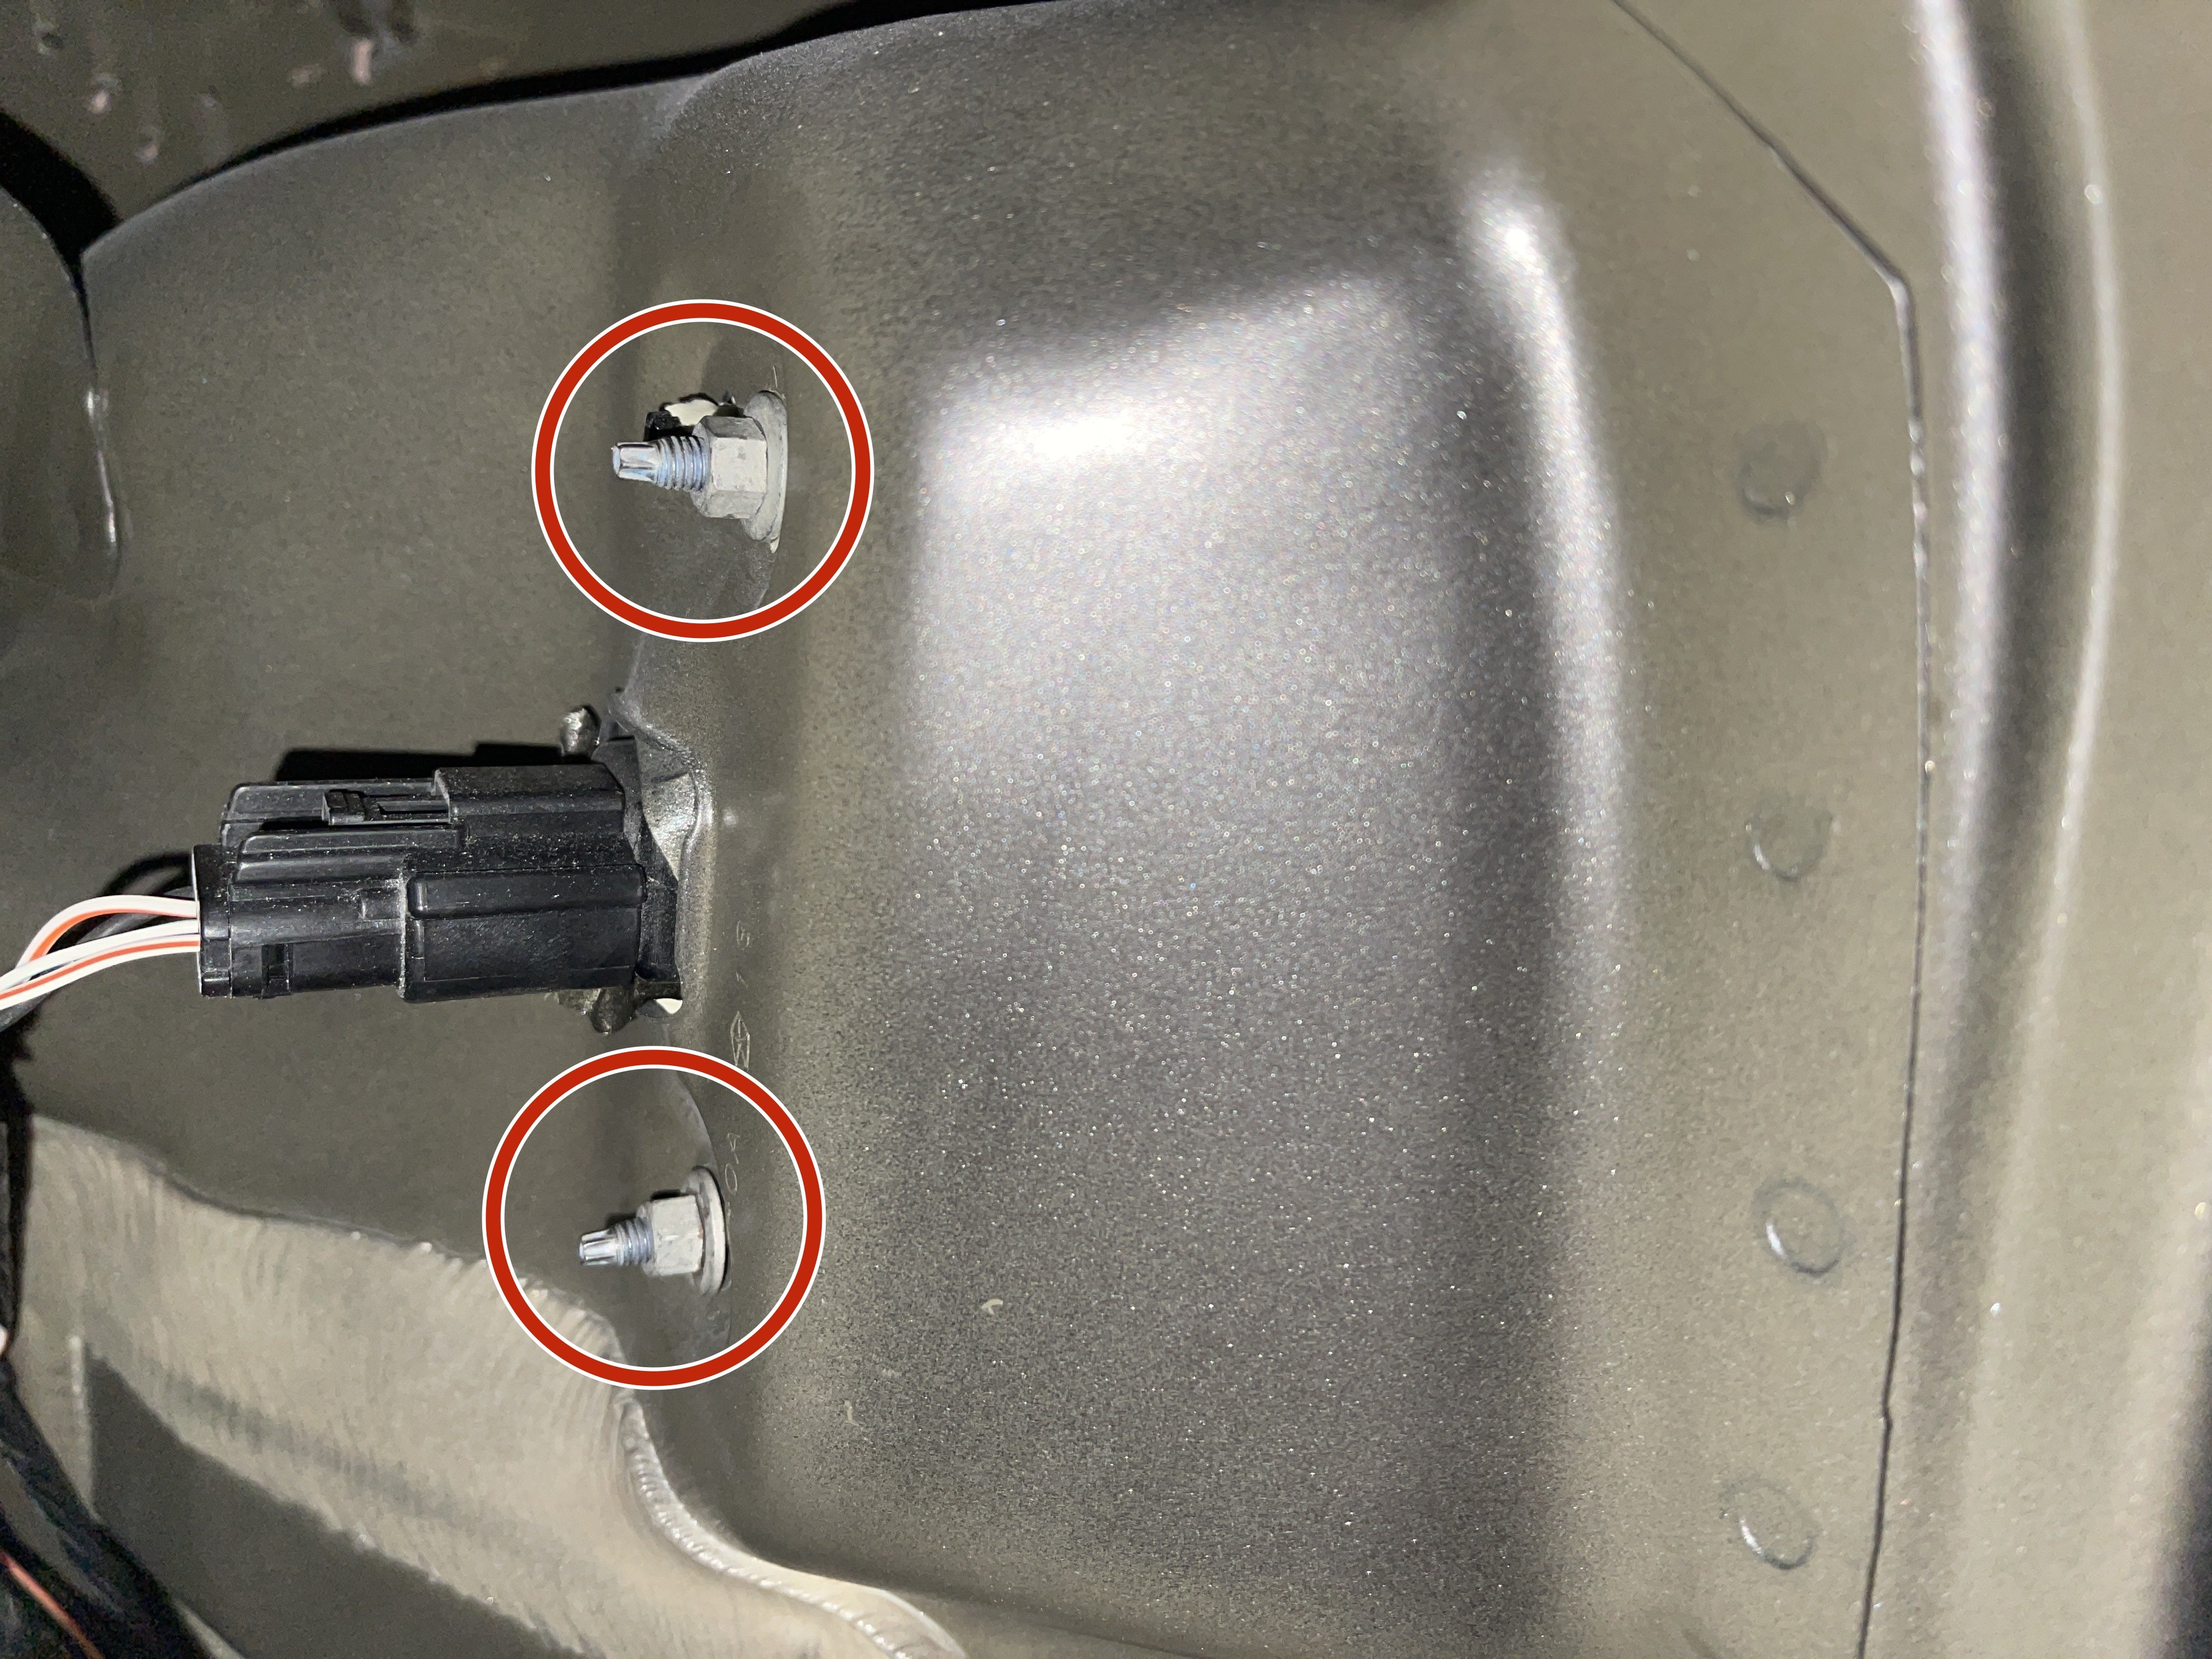
  • Remove both 8 mm nuts securing the tail lights in place using an 8 mm wrench.
  • Remove the nuts carefully as they may fall between the gaps which can be difficult to reach.
Step 5

Repair step

  • Remove the connector by squeezing both sides and pulling outwards.
Step 6

Repair step

  • Remove the plastic cover by pulling outwards so that the tail light can slide out.
Step 7

Repair step

  • Grab both sides of the tail light firmly and pull it out.
Step 8

Repair step

  • Slide the replacement tail light back in firmly.
Step 9

Repair step

  • Insert the connector back to the tail light.
  • Screw the 8 mm nuts onto the bolts by hand before tightening with a 8 mm wrench.
Step 10

Repair step

  • Push the plastic pin back into the hole to secure the side inner lining.
  • Push the plastic screw back into the hole to secure the bottom inner lining.
  • Push the rear plastic panel cover back on.
Step 11

Repair step

  • Start the vehicle to test if the tail light works.