FIXONIC
SellSavedMy Fixonic
Official iFixit API visual reference

2005 GMC Sierra SLT 1500 Rear Passenger Side Window Motor Replacement

This guide is specifically for the rear...

iFixit Library 2005 GMC Sierra SLT 1500 Moderate 30 - 45 minutes Guide 149090
Open the authorised source
Licensed iFixit integration

This attributed iFixit guide is displayed through Fixonic's recorded commercial API permission. iFixit remains the independent source and author of the procedure.

Guide overview

Before you begin

This guide is specifically for the rear passenger side door window motor. However, this guide will also apply for the rear driver side door window motor. Aside from some minor differences when removing the door panels, this guide will also apply for the front door window motors. This guide is specifically for the 2005 model. However, this guide will apply for models from 2003-2006.

Step 1

Removing the Door Handle Cover

  • Using a flat head screwdriver to pry around the edges until the door handle cover pops off, remove the door handle cover from behind the door handle.
Step 2

Unbolting the Door Panel

  • Remove the (2) 7mm bolts from the door panel.
  • One is at the bottom left of the door panel and another is behind the arm rest.
Step 3

Separating the Door Panel from the Door

  • After grabbing the armrest and the bottom of the door panel, pull straight up to separate the door panel from the door.
Step 4

Unplugging the Window Switch

  • Using a flat head screwdriver to push in the clip, pull the plug from the window switch to unplug the window switch.
Step 5

Unbolting the Speaker

  • Remove the (3) 10mm bolts from the speaker.
Step 6

Separating the Speaker from the Door

  • Pull the speaker out to separate it from the door.
Step 7

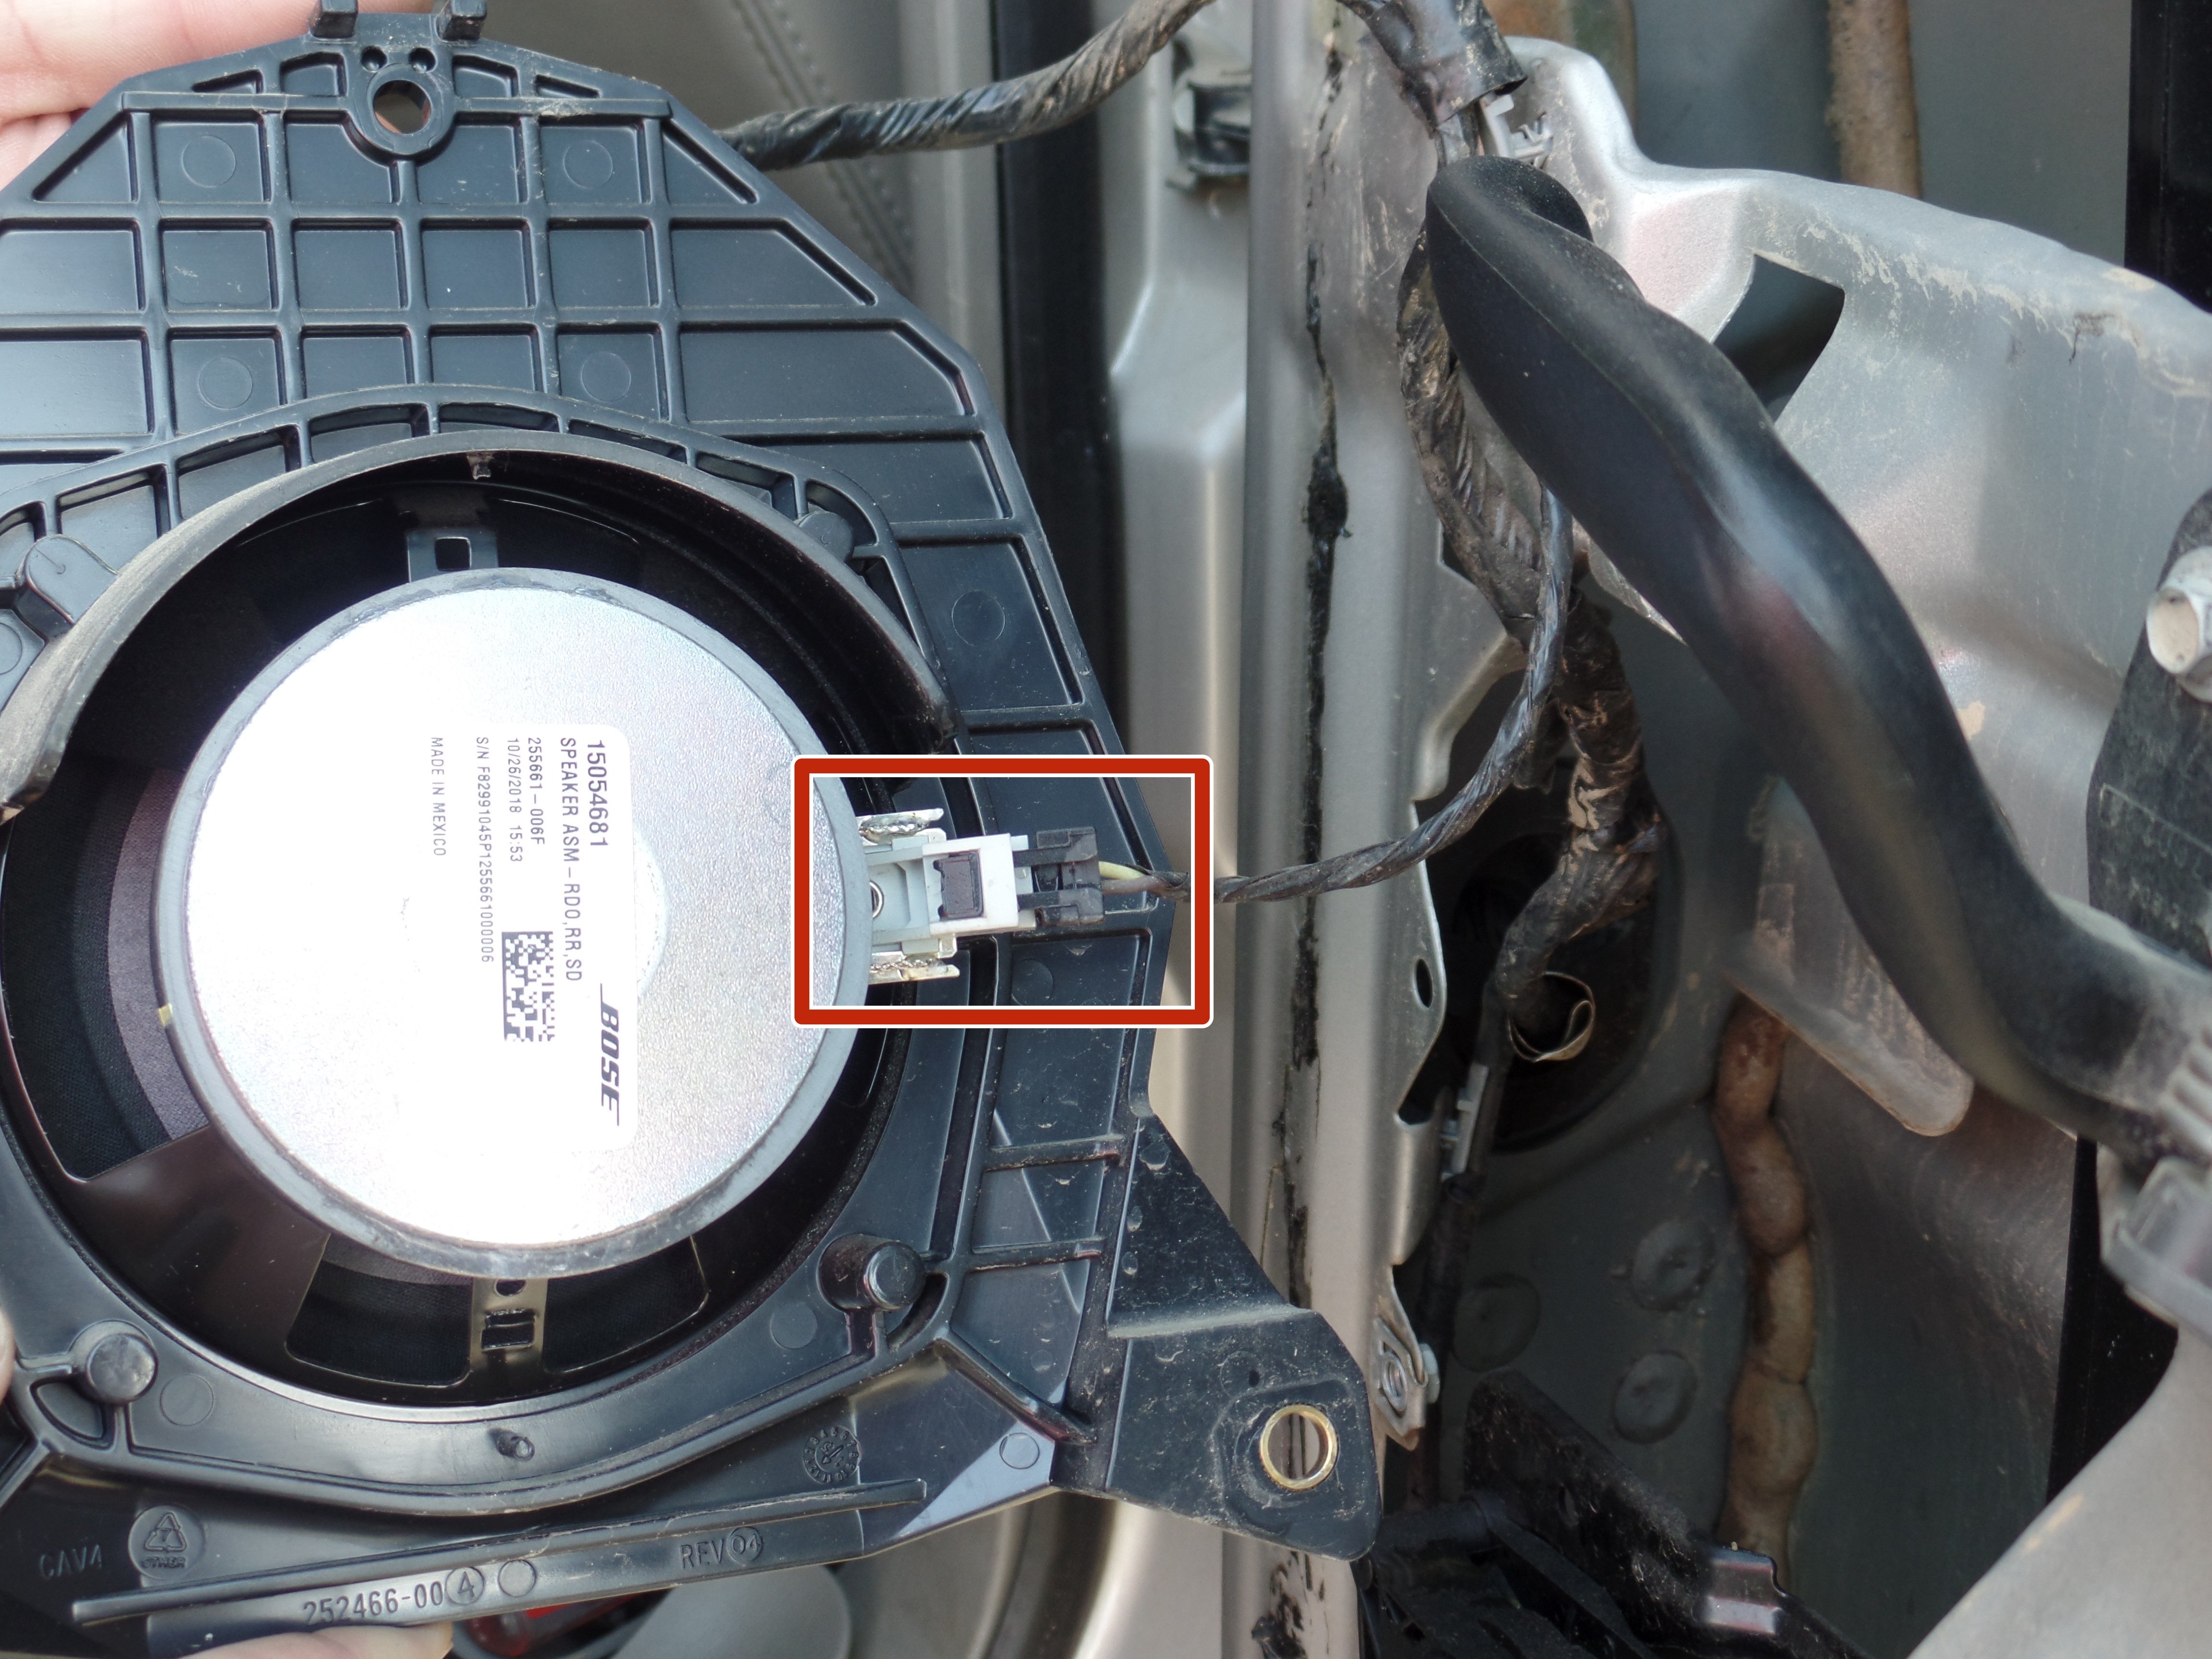
Unplugging the Speaker

  • Using a flat head screwdriver to push in the clip, pull the plug from the speaker to unplug the speaker.
Step 8

Unbolting the Old Window Motor

  • Remove the (3) 8mm mounting bolts from the old window motor.
  • The bolts are inside the door, on the backside of the old window motor.
Step 9

Removing the Old Window Motor

  • Gently remove the old window motor from the pulley housing.
Step 10

Unplugging The Old Window Motor

  • Pushing in the clip, pull the plug from the old window motor to unplug the old window motor.
Step 11

Plugging in the New Window Motor

  • Attach the plug to the new window motor to plug in the new window motor.
Step 12

Placing the New Window Motor

  • Gently place the new window motor into the pulley housing.
Step 13

Placing the Bolts into the New Window Motor

  • Place the (3) 8mm bolts into the new window motor.
  • The bolts go inside the door, on the backside of the new window motor.
Step 14

Bolting the New Window Motor

  • Tighten the (3) 8mm bolts to secure the new window motor.
Step 15

(Optional) Testing the New Window Motor

  • To test the new window motor, follow Steps 16 through 21 before proceeding to Step 22.
  • Otherwise, skip ahead to Step 22.
Step 16

(Optional) Removing the Window Switch

  • By pushing out the window switch from the backside of the door panel, remove the window switch from the door panel.
Step 17

(Optional) Plugging in the Window Switch

  • Attach the plug to the window switch to plug in the window switch.
Step 18

(Optional) Applying Power

  • Turn the truck key to the "on" position to apply power.
Step 19

(Optional) Operating the Window Switch

  • By operating the window switch, test that the new window motor works correctly.
Step 20

(Optional) Unplugging the Window Switch

  • Pushing in the clip, pull the plug from the window switch to unplug the window switch.
Step 21

(Optional) Placing the Window Switch

  • Place the window switch back into the frontside of the door panel.
Step 22

Plugging in the Speaker

  • Attach the plug to the speaker to plug back in the speaker.
Step 23

Placing the Speaker

  • Place the speaker in its spot against the door.
Step 24

Placing the Bolts into the Speaker

  • Place the (3) 10mm bolts back into the speaker.
Step 25

Bolting the Speaker

  • Tighten the (3) 10mm bolts to secure the speaker.
Step 26

Plugging in the Window Switch

  • Attach the plug to the window switch to plug in the window switch.
Step 27

Repositioning the Door Panel

  • After lining up the hooks on the door panel with the correct holes in the door, place the door panel against the door.
Step 28

Reattaching the Door Panel

  • Gently push the door panel in and down.
  • If the door panel does not easily fall into place, remove the door panel and ensure that there are no obstructions in the door before lining the door panel up again.
Step 29

Placing the Bolts into the Door Panel

  • Place the (2) 7mm bolts back into the door panel.
  • One goes behind the armrest and the other goes at the bottom left of the door panel.
Step 30

Bolting the Door Panel

  • Tighten the (2) 7mm bolts to secure the door panel.
Step 31

Placing the Door Handle Cover

  • Place the door handle cover back behind the door handle.