
FIXONIC
SellSavedMy Fixonic
Official iFixit API visual reference

1980 International Harvester Scout 2 Headlight Bulb Replacement

This guide will demonstrate how to replace the...

iFixit Library 1980 Scout International Harvester Scout 2 Easy 10 minutes Guide 167427
Open the authorised source
Licensed iFixit integration

This attributed iFixit guide is displayed through Fixonic's recorded commercial API permission. iFixit remains the independent source and author of the procedure.

Guide overview

Before you begin

This guide will demonstrate how to replace the left light bulb on a classic 1980 International Scout. This replacement is important for visibility during night time driving, whether you're using the high beam or low beam. The process of replacing a headlight is easy and only takes a few minutes! Make sure you have the necessary requirements for the fix, including purchasing a headlight bulb that comes with the necessary bulb and a screwdriver.
Step 1

Repair step

  • Before starting, ensure that the car is turned off and that the brakes are engaged.
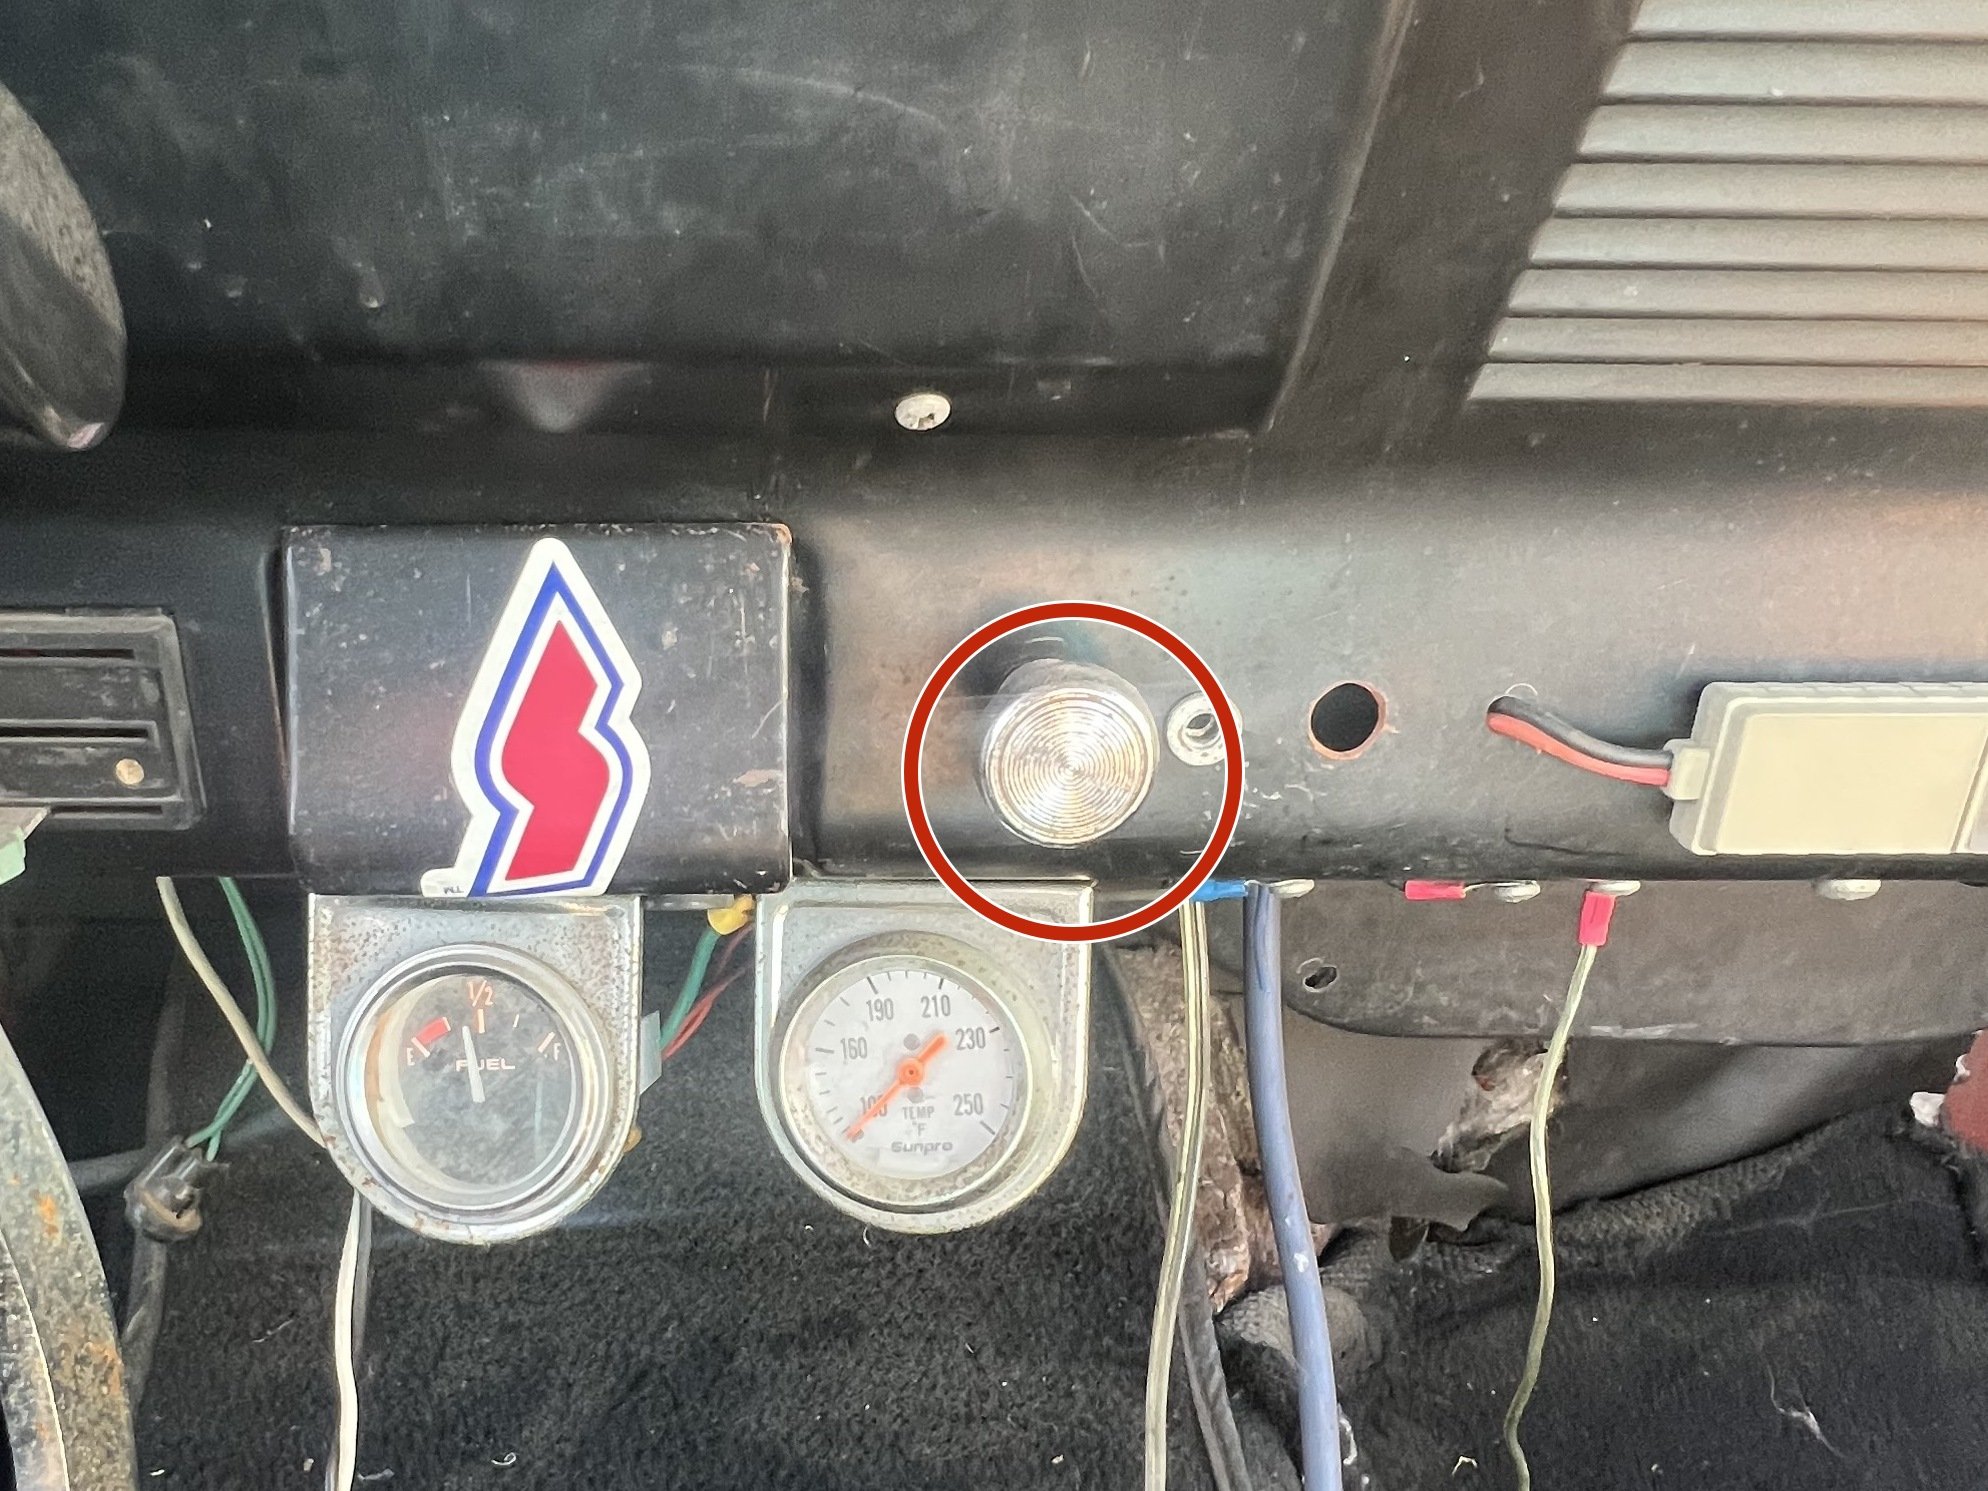
  • Find the hood release inside the International Scout car. The silver knob is positioned near and above the speedometer and gas gauge.
  • Using one or two hands, pull the silver knob forward.
  • Listen for a click; this indicates the hood release has been activated.
Step 2

Repair step

  • Be mindful that the car components, including the hood, are made of steel and can be heavy when opened.
  • Use one or both hands to lift the hood upward.
  • The Scout lacks hood struts, so grab a broom handle or a similar object to keep the hood propped open.
Step 3

Repair step

  • If you're unfamiliar with relays and fusibles, it's advisable to research online to understand their functions.
  • Head to the right corner of the engine bay to find the relay and fusible components.
  • Identify the relay and fusible components in this area.
Step 4

Repair step

  • Ensure the relay and fusible are free from damage. Replace any damaged components to prevent electrical malfunctions.
  • Verify that the relay and fuse blade are undamaged.
  • After confirming the relay and fuse blade is undamaged, securely close the lid.
Step 5

Repair step

  • Using a Phillips screwdriver, remove the seven screws around the headlight bezels of the left headlight (passenger side).
Step 6

Repair step

  • Use both hands to carefully remove the headlight to prevent it from falling.
Step 7

Repair step

  • If you're unsure about the serial number or size, check the top of the glass; for this car, it should be 2B1.
  • After removing the headlight, take a look at the inside of the sealed beam headlight.
Step 8

Repair step

  • Locate two wires with different colors: blue and black.
  • Remove the blue wire from the middle prong and the black wire from the left side.
  • For a 2B1 headlight, the middle prong serves as ground, the right side is high beam, and the left side is low beam.
Step 9

Repair step

  • Take your new headlight, and reinsert the two wires to their original positions.
  • Insert the blue wire onto the middle prong and the black wire onto the low beam side.
  • Briefly turn on the car to ensure the lights are working properly.
Step 10

Repair step

  • When ready to reinsert the headlight, use both hands and position the bezel to prevent any falls.
  • Replace all seven screws from Step 5 with a screwdriver. Tighten them clockwise (to the right).
Step 11

Repair step

  • Hold the bezel in place while screwing back the screws.
  • Everything is now back to its original state.
Step 12

Repair step

  • Check if your lights are working. If they are, everything is in working order, and you're all set!