FIXONIC
SellSavedMy Fixonic
Official iFixit API visual reference

iPhone 17 Pro Front Sensors Removal

This guide shows how to remove the front...

Apple iPhone 17 Pro Moderate No estimate Guide 199455
Open the authorised source
Licensed iFixit integration

This attributed iFixit guide is displayed through Fixonic's recorded commercial API permission. iFixit remains the independent source and author of the procedure.

Guide overview

Before you begin

This guide shows how to remove the front sensors for an iPhone 17 Pro.

Step 1

Remove the front sensors screws

  • If your replacement screen doesn't have front sensors installed, follow the next five steps to remove them—they'll need to be transferred to your replacement screen.
  • Use a tri‑point Y000 screwdriver to remove the two 1.0 mm‑long front sensors screws.
Step 2

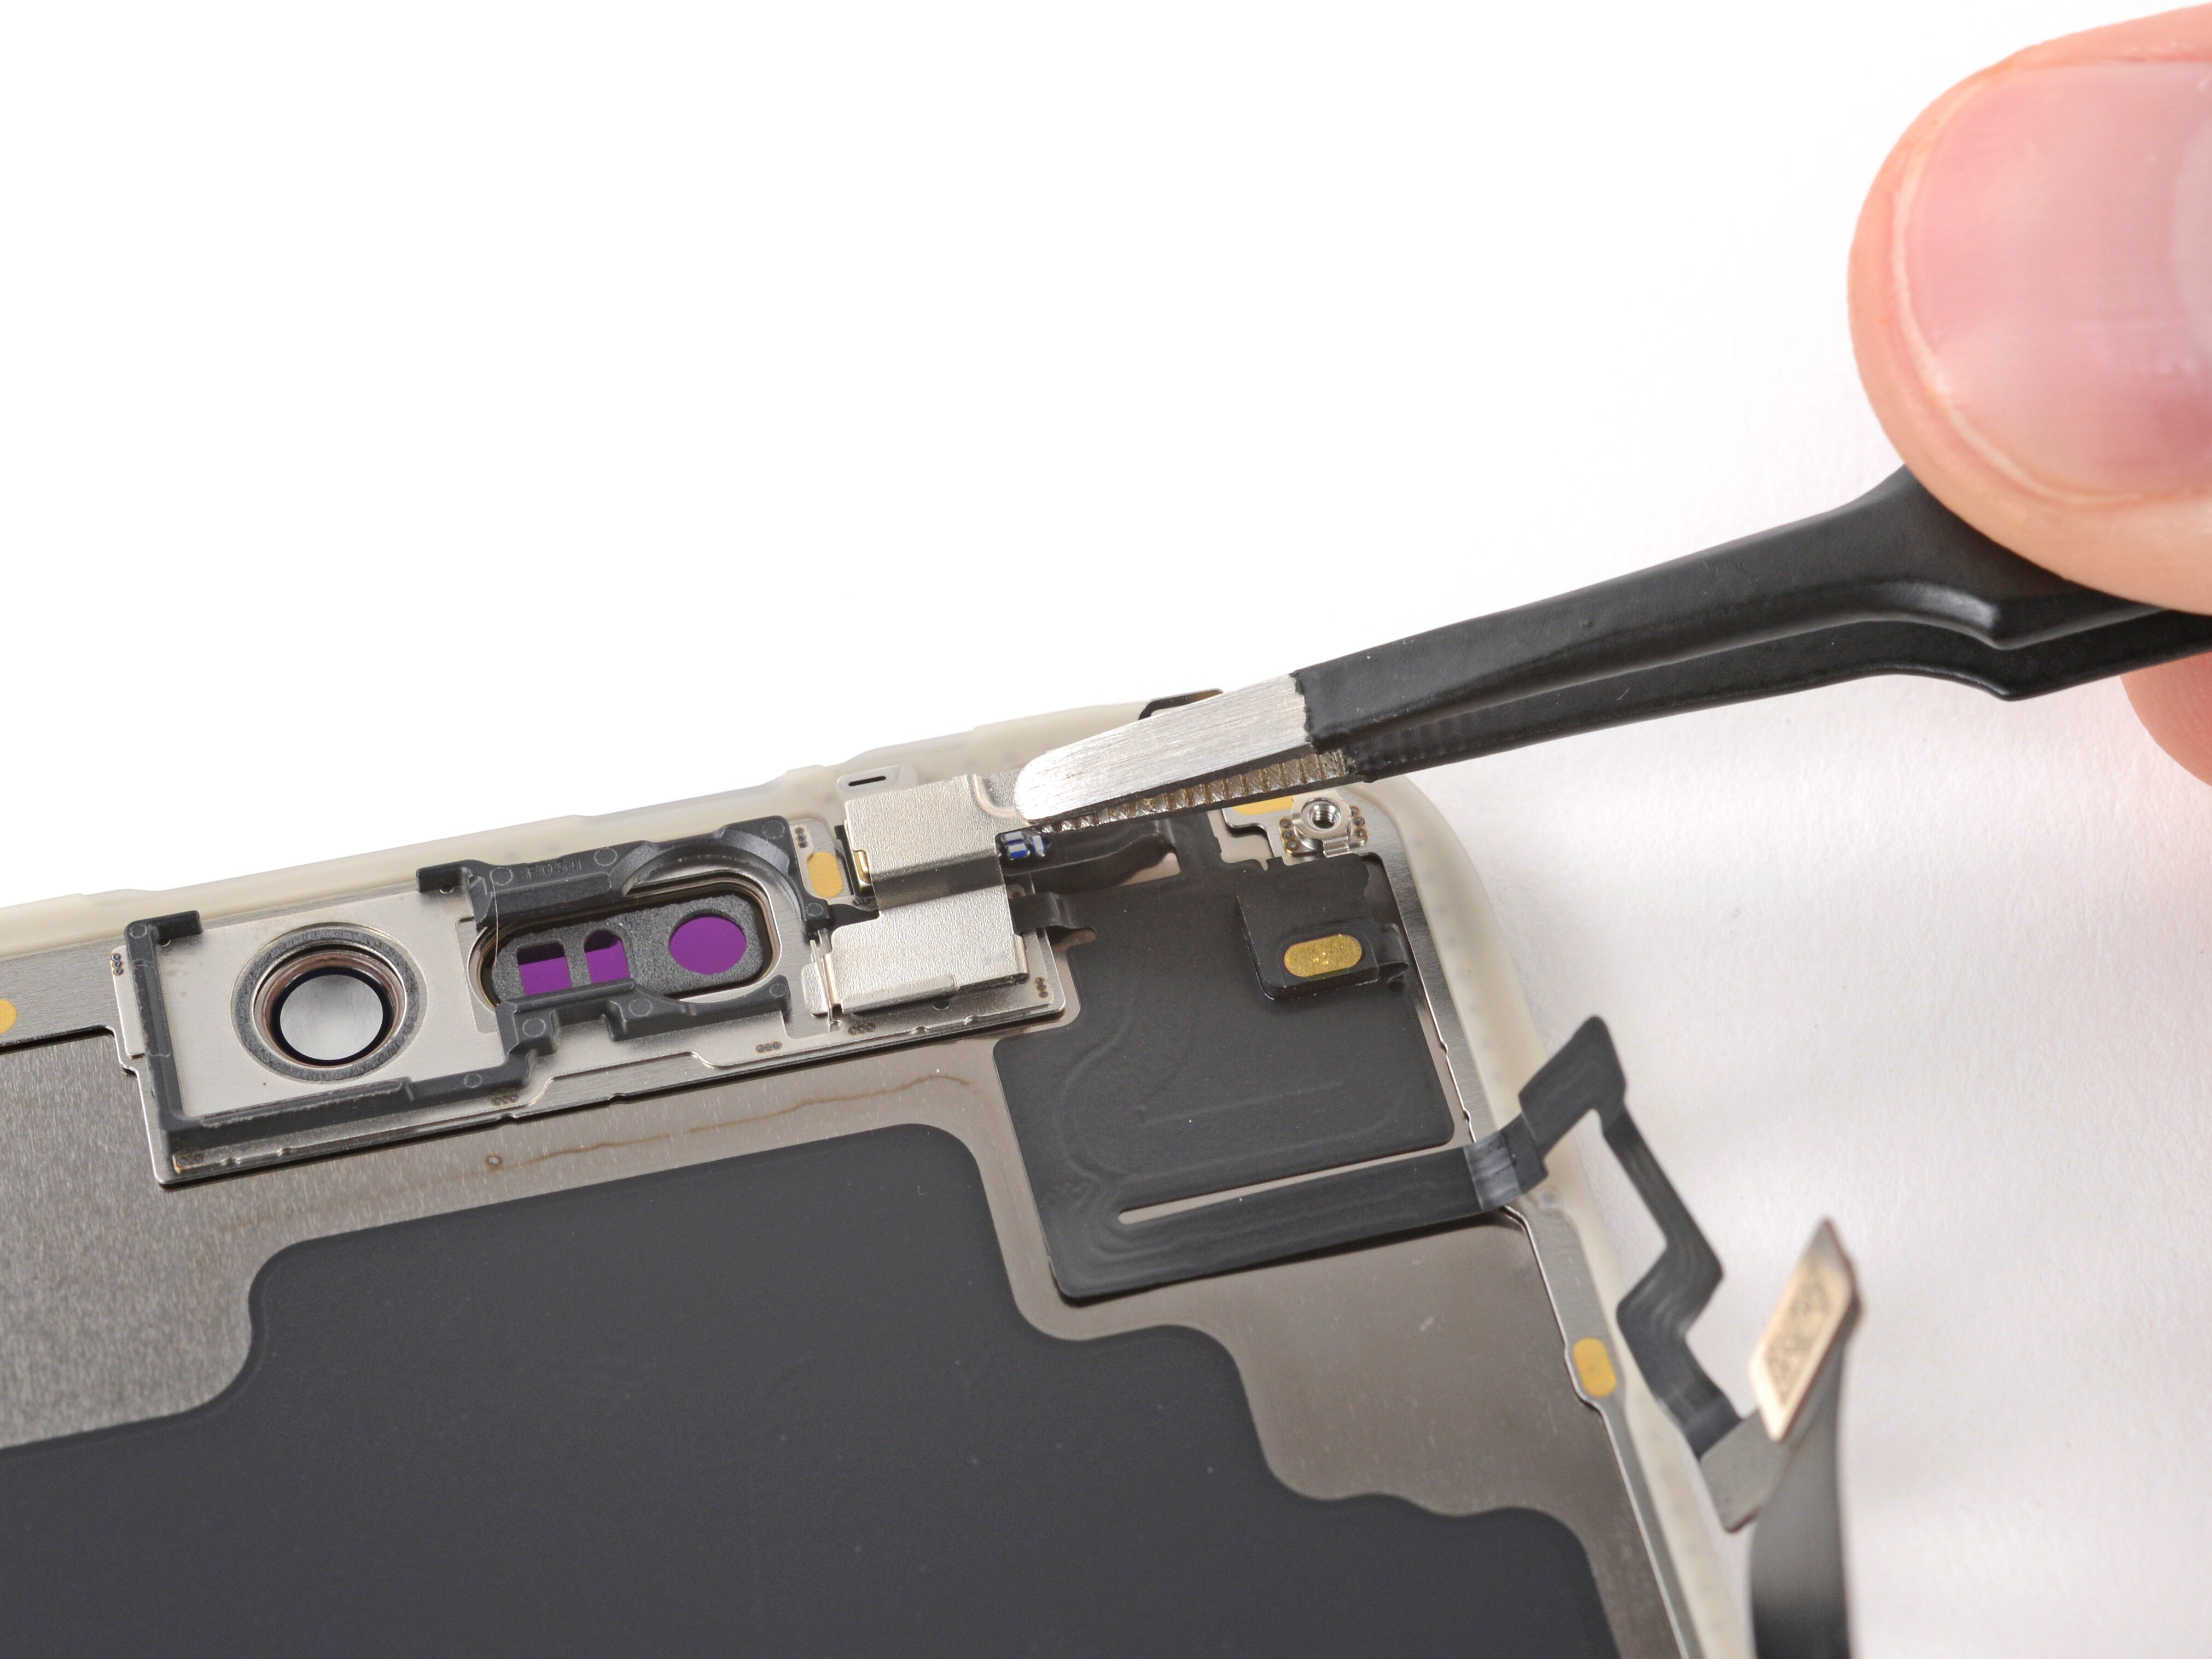
Remove the bracket

  • Remove the front sensors bracket.
Step 3

Heat the front sensors

  • Use a hair dryer or heat gun to heat the front sensors.
  • You can heat the sensor directly, or heat its corresponding spot on the front of the screen.
Step 4

Pry up the sensors

  • The front sensors are very fragile and can easily rip—be very gentle while removing them. If you're having trouble, apply more heat and try again.
  • Use the point of a spudger to pry up both front sensors.
  • Pry on the tab under the sensors—not the sensors themselves—or you may damage them.
Step 5

Remove the sensors

  • Insert the tip of an opening pick under the top right corner of the front sensors large, glued-down cable.
  • Slowly slide the pick under the cable and lift until you can grip it with your fingers.
  • Use your fingers to peel up the cable and remove the sensors.
  • You can now transfer the sensors to your replacement screen.