FIXONIC
SellSavedMy Fixonic
Official iFixit API visual reference

2014-Present Kia Sedona Cargo Lamp Assembly Replacement

This guide shows how to remove and replace the...

iFixit Library 2025-Present Kia Carnival MPV Moderate 5 - 20 minutes Guide 205028
Open the authorised source
Licensed iFixit integration

This attributed iFixit guide is displayed through Fixonic's recorded commercial API permission. iFixit remains the independent source and author of the procedure.

Guide overview

Before you begin

This guide shows how to remove and replace the cargo lamp assembly in a Kia Carnival. The assembly includes the bulb holder and the switch. Don't do this repair with the car parked on a slope! The ceiling clips may roll into an irretrievable area during the repair if you do. The guide is written with a 2025 Kia Carnival SX Hybrid.

Step 1

Remove the lens cover

  • The lens cover has six plastic tabs that hold it in place.
  • The two rear tabs are larger and harder to unclip.
Step 2

Repair step

  • These tabs are very stiff. Take your time and be careful not to scratch the plastic. You may need to use a bit of force to unclip these.
  • Insert a metal spudger or a small flathead screwdriver into the front seam near the toggle switch.
  • Pry to release the front tabs.
  • Use a spudger or Jimmy to pry and release the side tabs.
  • Tilt and wiggle the lens cover until the rear tabs release.
  • Remove the lens cover and the gray cover plate behind it.
Step 3

Remove the lamp assembly

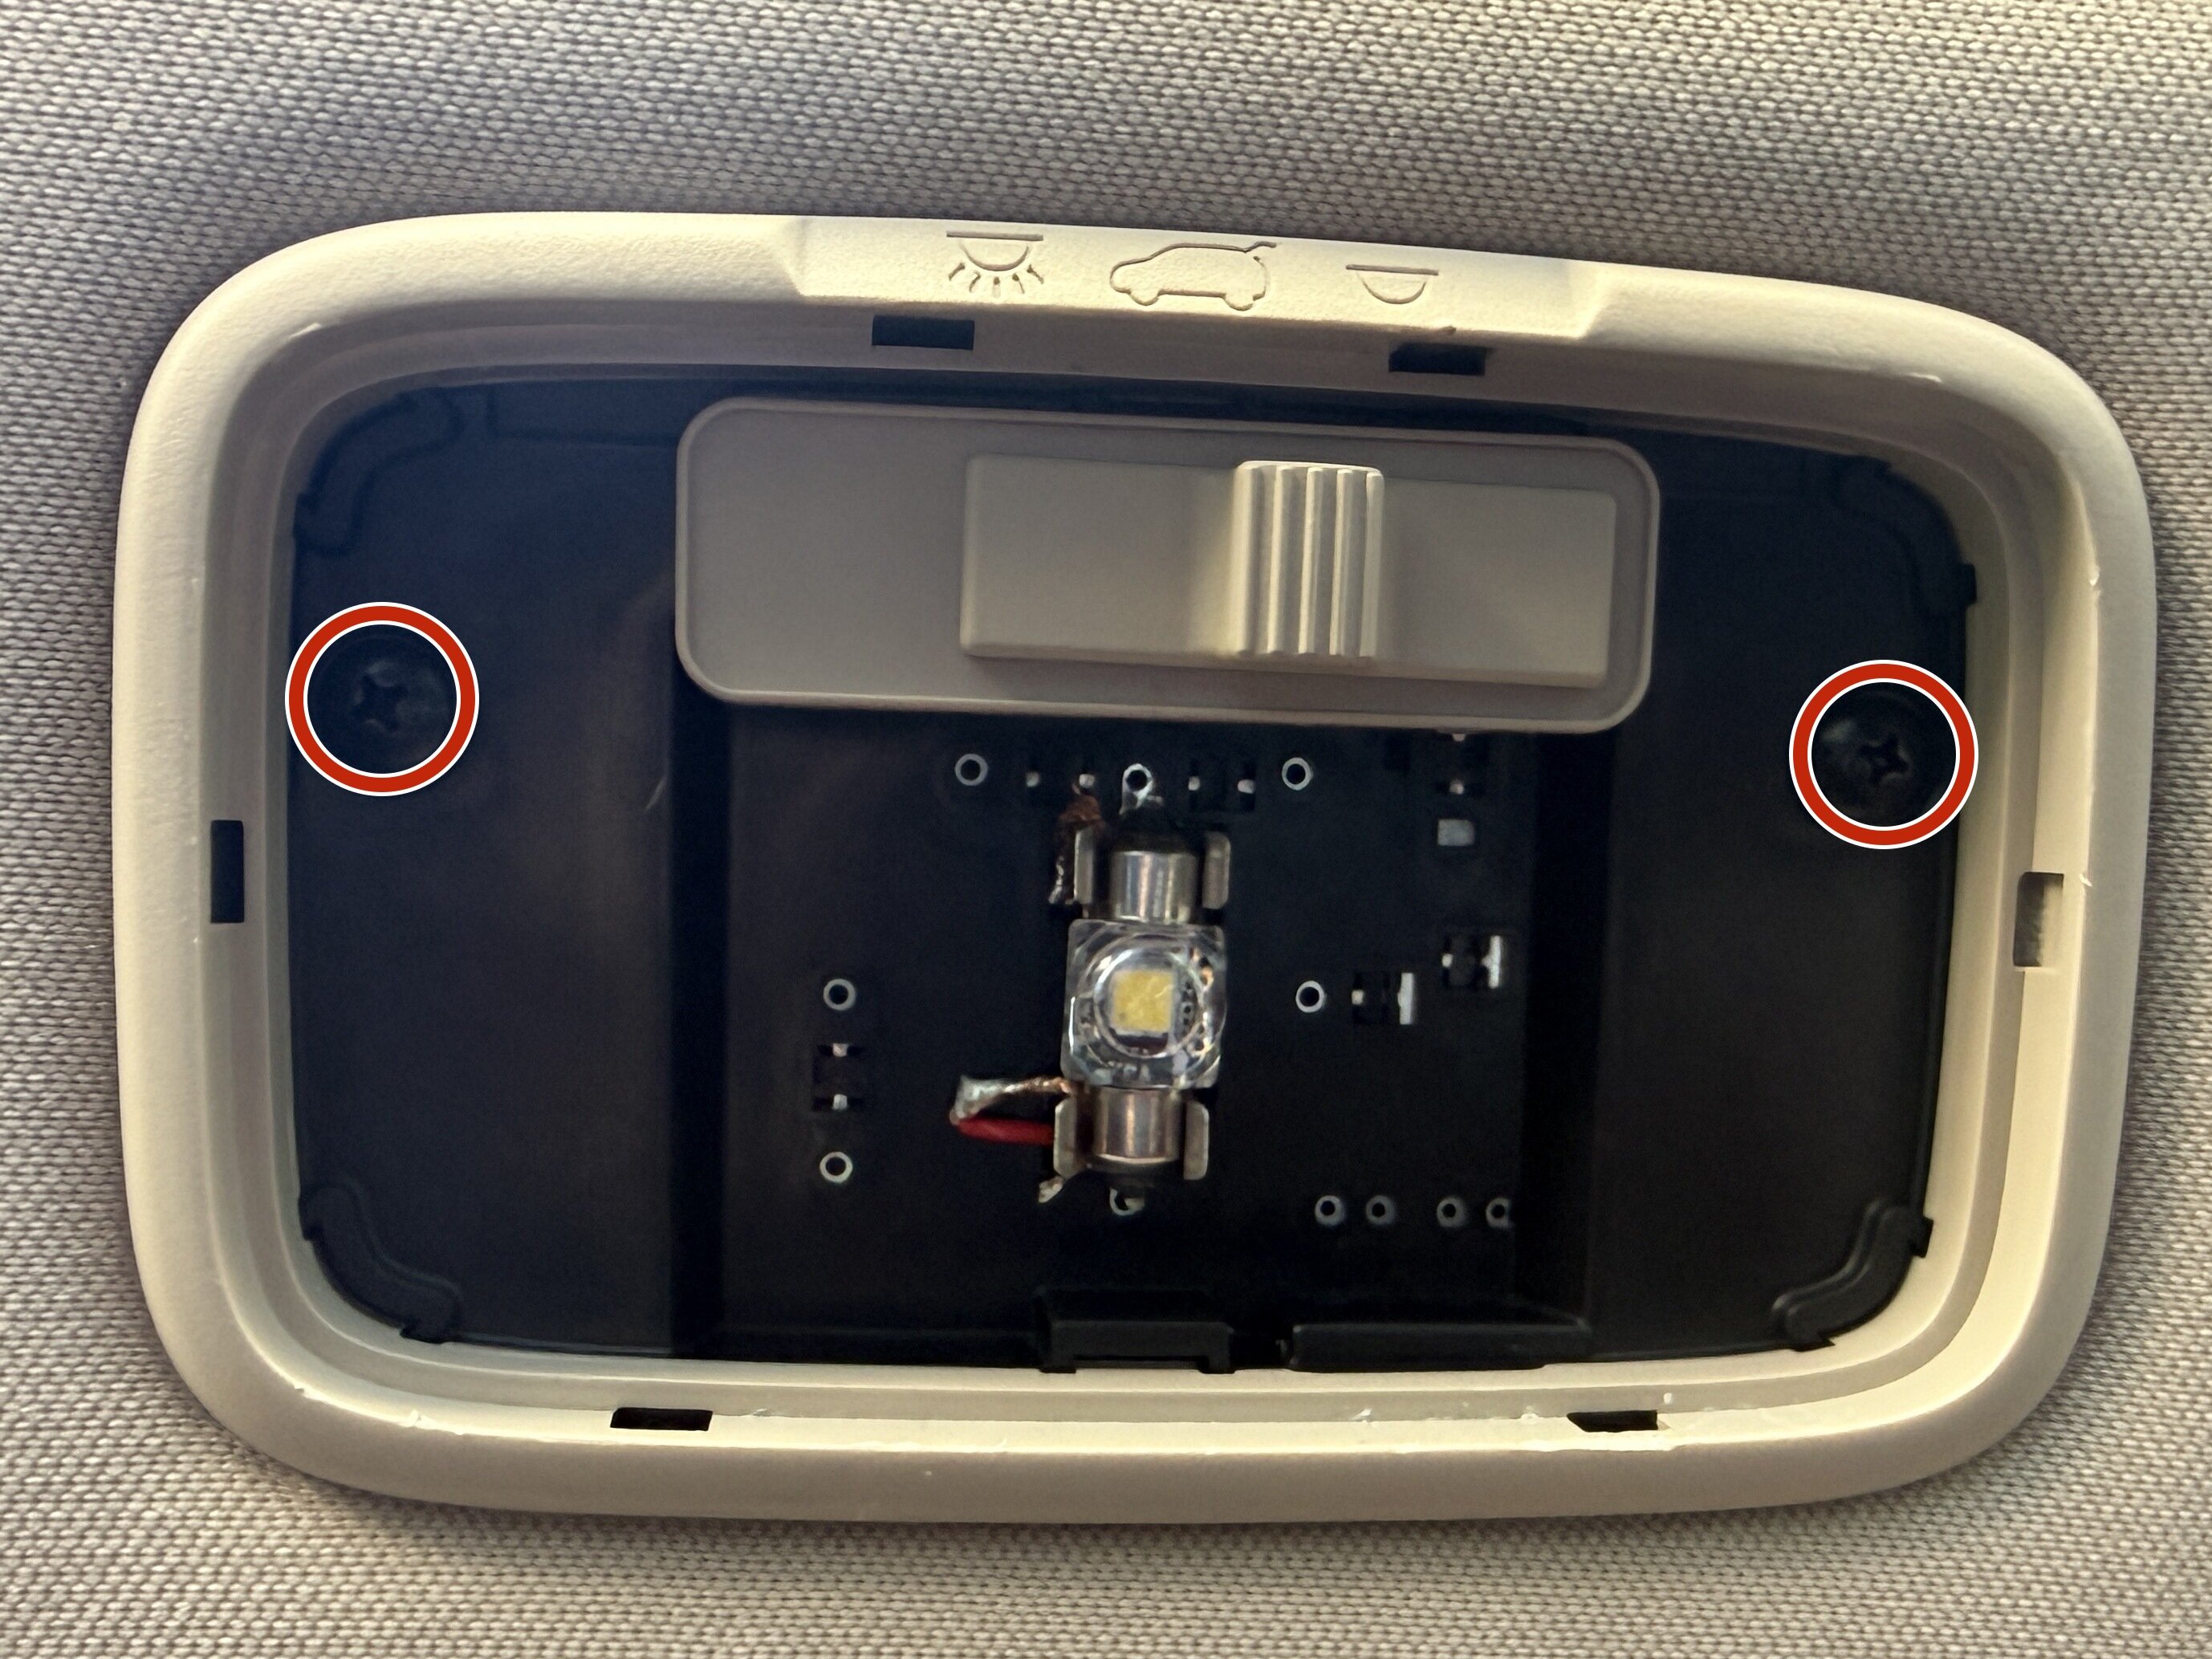
  • Use a Phillips screwdriver to remove the two screws securing the lamp assembly.
Step 4

Repair step

  • Grab the front edge of the assembly and pull downwards to unclip the edge.
  • Pull the entire assembly towards you to release the rear tabs.
  • Squeeze and disconnect the wire harness from the lamp assembly.
  • Remove the lamp assembly.
Step 5

Repair step

  • Use tweezers to carefully recover the two plastic clips from the ceiling cutouts.
Step 6

Install the cargo lamp assembly

  • The remaining steps show how to install the cargo lamp assembly.
  • Place the two loose clips in place on the underside of the lamp assembly.
  • Use a Phillips screwdriver to install the two screws to secure the clips onto the lamp assembly.
Step 7

Repair step

  • Slide the lamp assembly's rear tabs into their cutouts in the ceiling.
  • Press the lamp assembly into the ceiling until all clips click into place.
Step 8

Reinstall the lens cover

  • Align and stack the lens cover and gray cover plate together
  • Insert the two larger rear tabs into their recesses.
  • Press the covers into place until all tabs click into place.