FIXONIC
SellSavedMy Fixonic
Official iFixit API visual reference

1995-1999 BMW 3 Series (E36) Onboard Computer (OBC) Light Bulb Replacement

1995-1999 BMW 3 Series (E36) BMW 318i, 318ti,...

iFixit Library 1992-1999 BMW 3 Series Moderate 15 minutes Guide 206892
Open the authorised source
Licensed iFixit integration

This attributed iFixit guide is displayed through Fixonic's recorded commercial API permission. iFixit remains the independent source and author of the procedure.

Guide overview

Before you begin

1995-1999 BMW 3 Series (E36) BMW 318i, 318ti, 323i, 325is, 328i, M3 Over time lightbulbs on the OBC of an E36 burn out, and finding a tutorial on how to properly replace it can be difficult and confusing. The light bulbs provide backlighting to the OBC allowing the user to read the text on the screen. When there are portions of the OBC that are unreadable, the culprit is likely a light bulb. There are two sizes of bulbs that show up when searching for them, you need the shorter size as the larger size wont fit upon reinstall. Link to the bulbs from FCP Euro Make sure to disconnect the battery for the entirety of the guide in order to prevent damage to the OBC.

Step 1

Repair step

  • In the trunk of the vehicle on the front right side, remove the battery cover by firmly pulling up.
Step 2

Repair step

  • Disconnect the battery of the vehicle by removing the negative (black) terminal on the battery using a 10mm socket or wrench and turning counterclockwise until loose.
  • DO NOT allow any conductive item (such as your wrench) to touch both terminals of the battery simultaneously.
Step 3

Repair step

  • Firmly remove the negative terminal of the battery, preventing it from coming into contact with the post of the terminal for the remainder of the guide.
Step 4

Repair step

  • Put the vehicle in 2nd or 4th gear if the vehicle is a manual car or in second gear if the vehicle is automatic to give more working space.
Step 5

Repair step

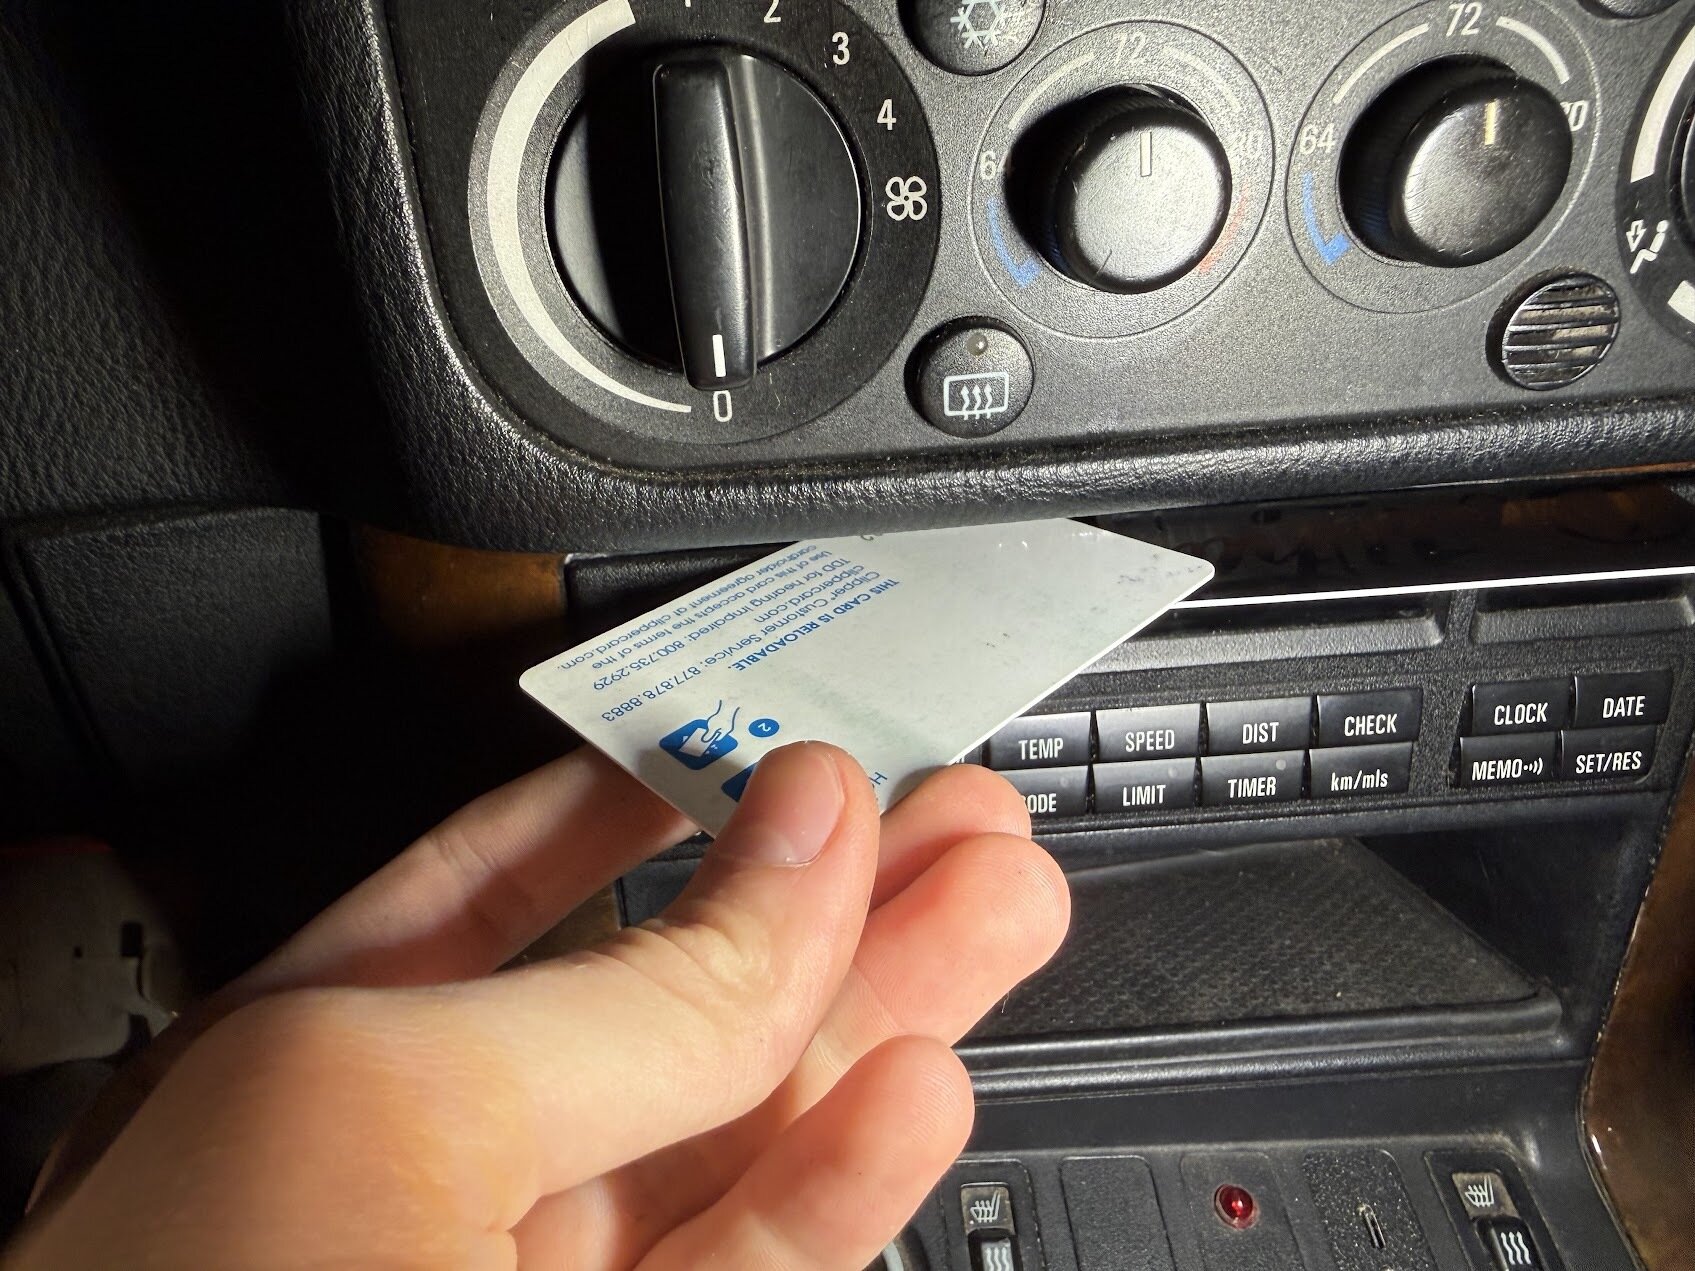
  • Insert one credit card into the side of the top of the OBC and rotate outwards towards the sides of the OBC, leaving the card in when done.
Step 6

Repair step

  • Insert the second credit card into the other side of the top of the OBC and rotate inwards towards the center of the OBC, leaving the cards in when done.
Step 7

Repair step

  • Insert a finger into the center top of the sunglasses tray and feel for the long rectangular clip, firmly depressing it.
  • It is a large, thick clip as shown in the picture and firm pressure must be used.
Step 8

Repair step

  • Gently but firmly pull towards you pushing the OBC with your finger through the hole in the sunglasses tray until the OBC comes out.
Step 9

Repair step

  • Push the top of the plug down to depress the lock retainer, then slide the locking clip until it rests flat on the back of the OBC.
Step 10

Repair step

  • Firmly remove the plug from the OBC.
Step 11

Repair step

  • Repeat for the other plug.
Step 12

Repair step

  • Insert a 1/8 (3mm) flathead into the top of the bulb housing and rotate counter-clockwise until loose.
Step 13

Repair step

  • Remove bulb and replace.
  • DO NOT touch new bulb glass with fingers, it will burn out far more quickly!
  • If there are oils on the new bulb, cleaning with isopropyl alcohol is advised.