FIXONIC
SellSavedMy Fixonic
Official iFixit API visual reference

2005-2012 Nissan Pathfinder Upstream O2 Sensor (Bank 1, Sensor 1) Replacement

If your Nissan Pathfinder 2011 Check Engine...

iFixit Library 2005-2012 Nissan Pathfinder Moderate 1 - 2 hours Guide 215653
Open the authorised source
Licensed iFixit integration

This attributed iFixit guide is displayed through Fixonic's recorded commercial API permission. iFixit remains the independent source and author of the procedure.

Guide overview

Before you begin

If your Nissan Pathfinder 2011 Check Engine light has come on and a mechanic has pointed to a faulty oxygen sensor, don't worry. This is one of the most common car repairs out there, and the good news is that you don't need to be a seasoned mechanic to fix it yourself! The replacement process is more straightforward than it sounds. If you have a basic set of tools and can set aside an hour or two, you can absolutely handle this at home and save yourself a significant amount in labor costs! In this guide, we'll walk through every step in plain, simple language, no mechanical background required. We'll cover what tools and parts you'll need, how to safely get to the part, and exactly how to swap out the old sensor for a new one. Just take it one step at a time, and you'll have it done before you know it. Let's get started!

Step 1

Repair step

  • Before starting making sure that the vehicle is on a level surface and that the engine is completely cool/
  • Disconnect the battery's negative terminal to prevent electrical shocks and reset the ECU.
Step 2

Repair step

  • Safely jack the vehicle and remove the front-right wheel and well liner.
Step 3

Repair step

  • Trace the sensor wire.
Step 4

Repair step

  • Depress the locking tab on the electrical connector and unplug it from the harness.
Step 5

Repair step

  • Place an oxygen sensor socket over the sensor. Use a ratchet and extension to turn the sensor counter-clockwise until it is free from the exhaust pipe.
  • If it is not easily coming off Spray the base of the sensor with penetrating oil (e.g., PB Blaster). Allow it to soak for at least 15 minutes to loosen rust and prevent thread damage.
Step 6

Repair step

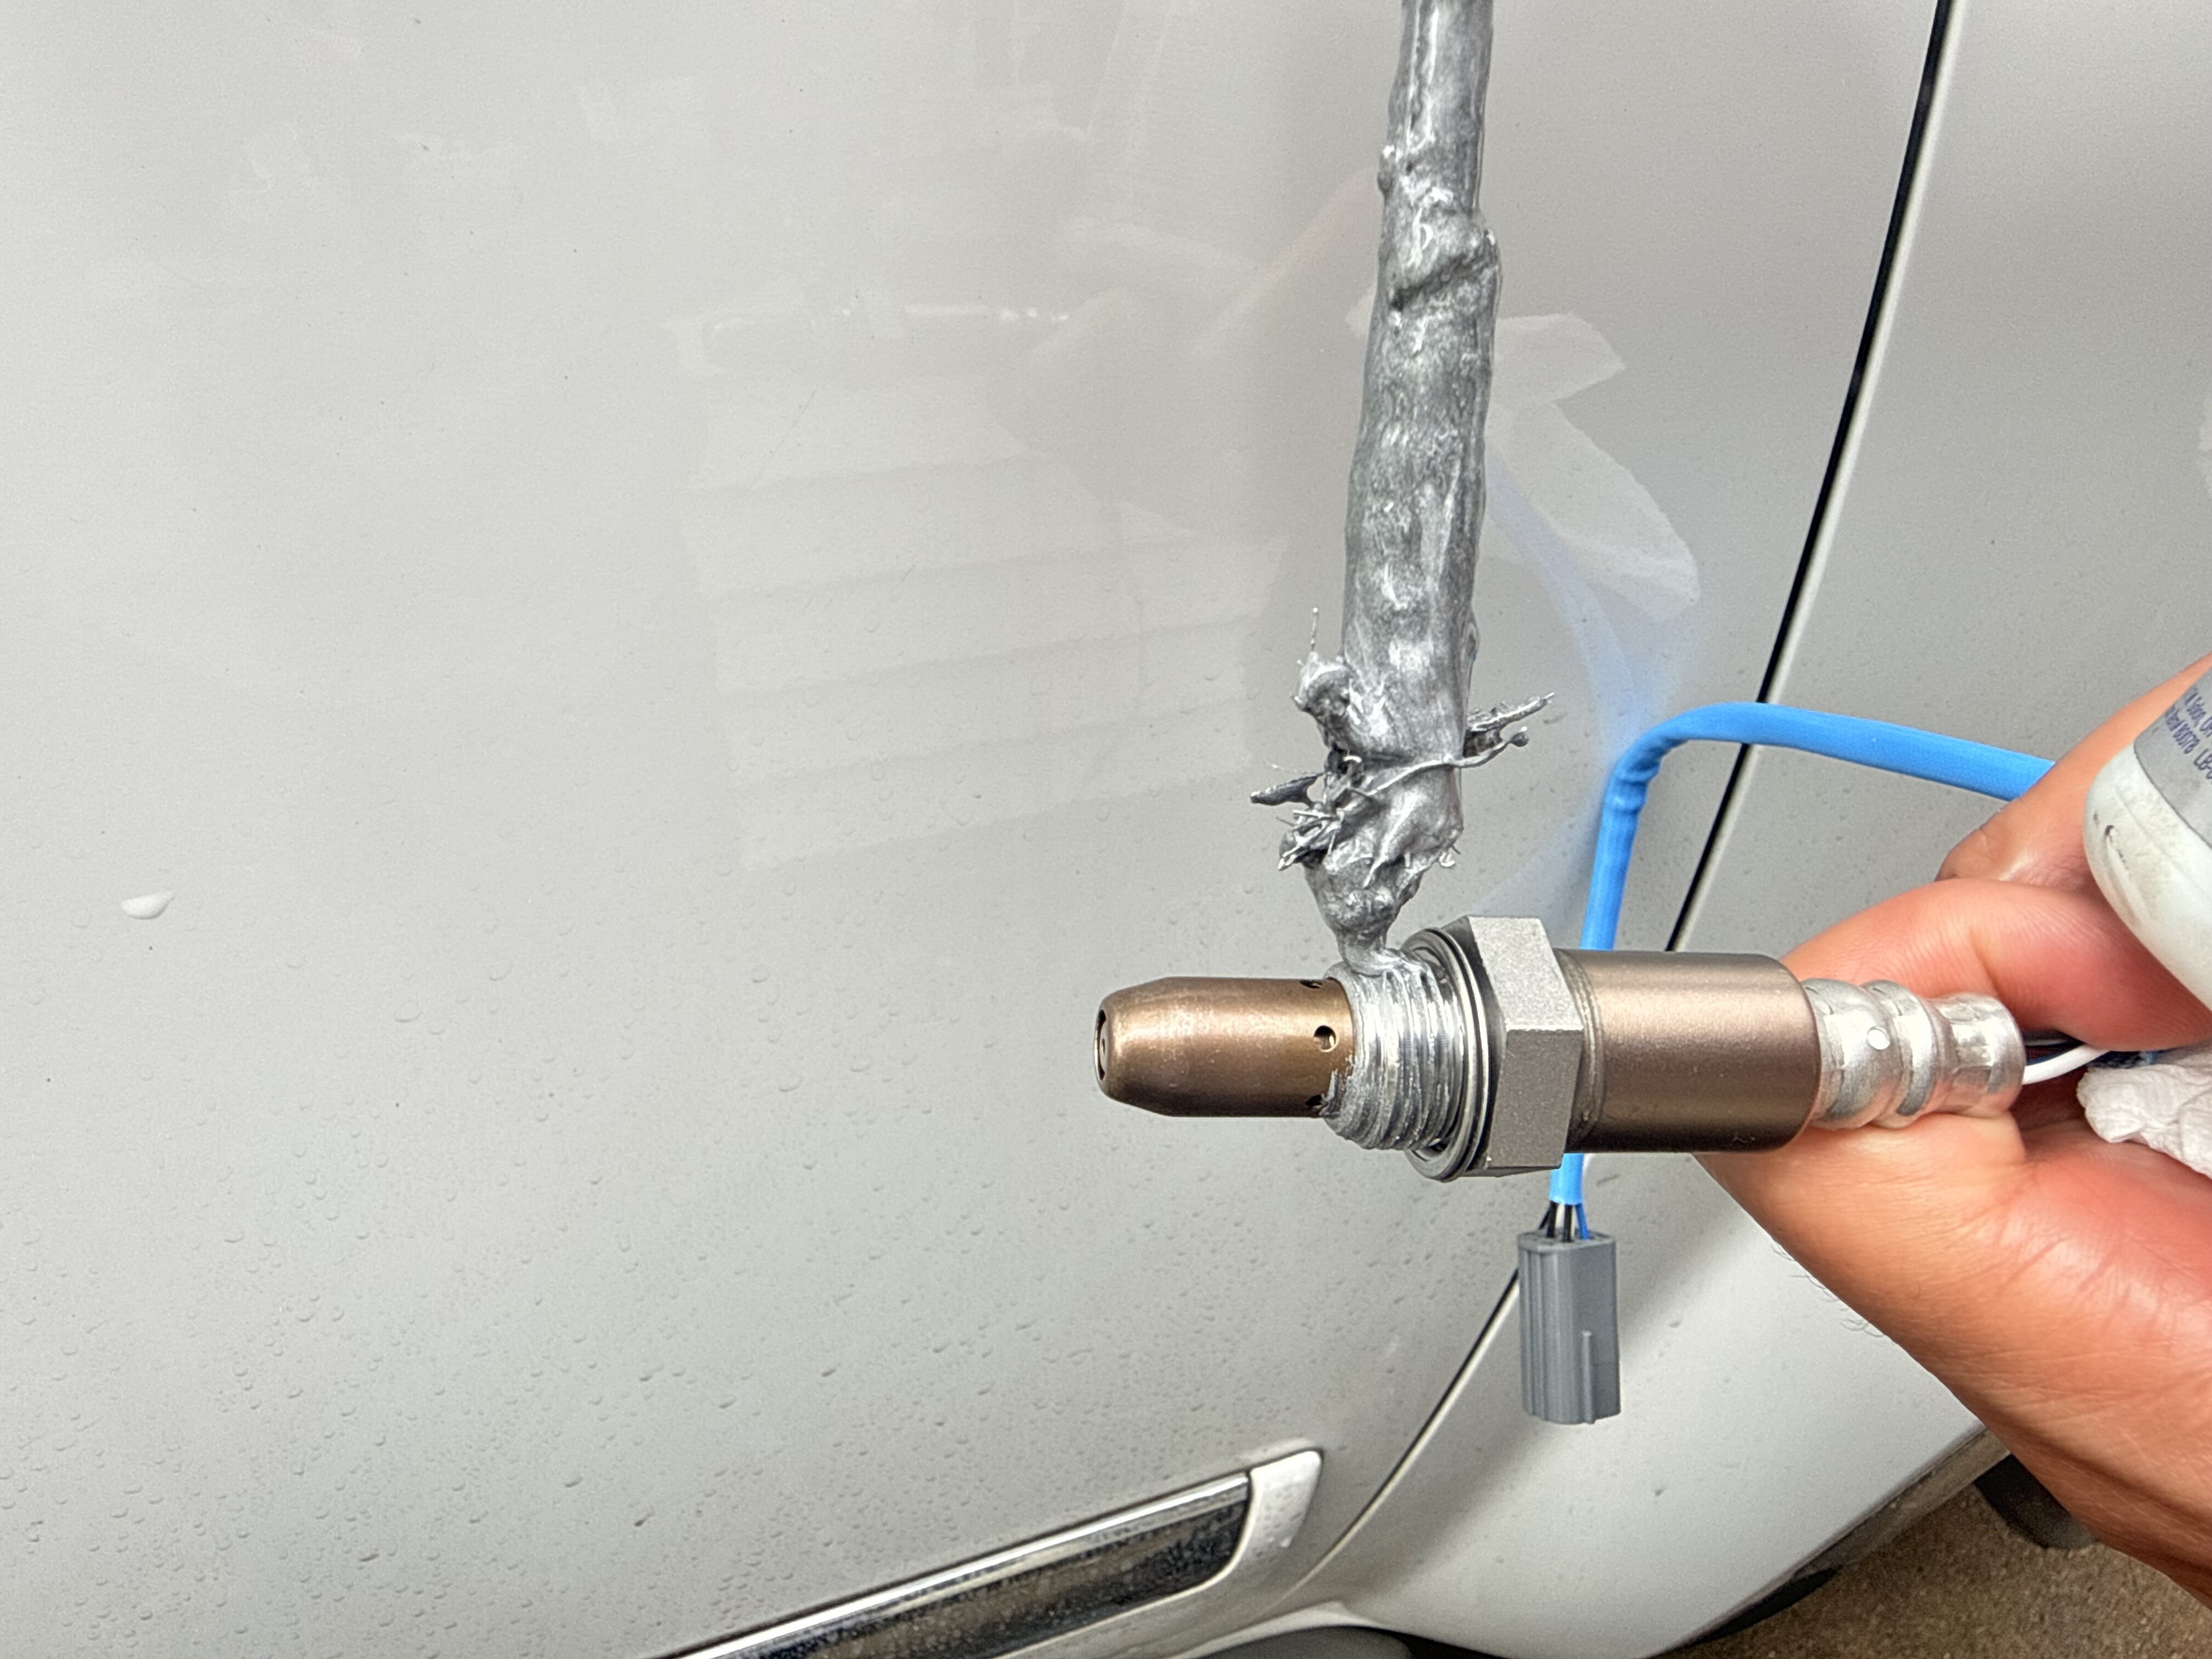
  • Apply a thin layer of high-temp anti-seize lubricant to the threads of the new sensor.
  • Do not allow any lubricant to touch the sensor tip (the perforated metal end). Some new sensors already come with anti seize on the threads which you can identify as it is of a different color than the O2 sensor threads.
Step 7

Repair step

  • Thread the new sensor into the exhaust pipe by hand to avoid cross-threading.
  • Once snug, use the O2 sensor socket and a torque wrench to tighten it to approximately 45Nm. *You can verify the exact torque specs in the manual.
Step 8

Repair step

  • Plug the electrical connector back into the vehicle harness until it clicks
Step 9

Repair step

  • Reinsert the wheel liner and wheel.
  • Reconnect the battery.
  • Lower the car off the jack and you're done!