FIXONIC
SellSavedMy Fixonic
Official iFixit API visual reference

2011 Lexus CT Aircon blower fan replacement Replacement

Here Is the Steps to a simple quick fix to the...

iFixit Library 2011 Lexus CT Very easy 1 hour Guide 219403
Open the authorised source
Licensed iFixit integration

This attributed iFixit guide is displayed through Fixonic's recorded commercial API permission. iFixit remains the independent source and author of the procedure.

Guide overview

Before you begin

Here Is the Steps to a simple quick fix to the aircon blower noise when switching up the aircon speed , also occur intermitendly when system set to auto and it trigger higher speed .

Step 1

Removing the Inner Cabin Panel

  • The blower fan is located below the cabin filter on the front passenger foot area secured by 3 self tapping 8mm screw Step #1 - In order to access the blower fan , you need to look for the bottom panel cover which there is a LED cabin light .
  • New line.
Step 2

Removing the Panel

  • Step#2 - the cover is hold by the inner hooks and toward the passenger the panel is hold quick release clip , locate the "center push tap" ( see photos) and give it a light push and pull gently the panel , it will pop open
Step 3

Disconnecting the LED wire

  • Step#3- on the panel , there is a quick connector connecting to LED cabin light , push light the tab or use a small flat driver to push out the connector
Step 4

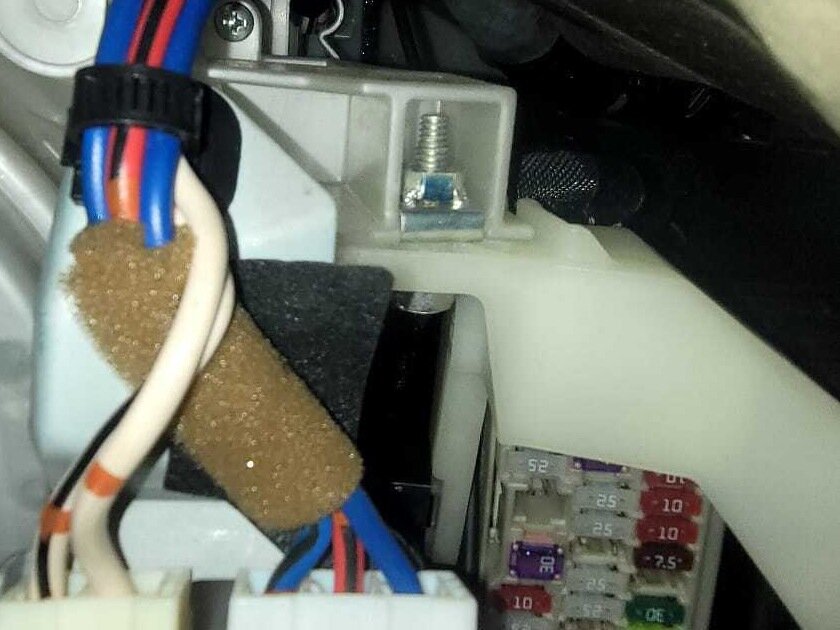
Getting the Double Harness Holder out of the way

  • Step#4- one the left passenger facing access screw to the blower fan is blocked by a double harness holder mounting , in order to get it out of the way , it hold in place by a single self tapping #2 phillips screw , it masked by a black termal wire tape, peel a side off , and it be able to see the screw , then use a short driver to unscrew it
Step 5

Releasing the blower fan

  • Step#5 - once the harness mount is out of the way , as the space is tight from floor board, long screwdriver is hard to reach , better to use the 8mm 1/4inch socket with ratchet to unscrew the 3 x self tapping screw to release the blower fan
Step 6

Check the Part

  • Step#6 - after removing the current blower fan , check the part you have is matching
Step 7

Installing the new blower

  • Step#7 - after making sure the connector are matching , using the 3x self tapping M8 screw , and the ratchet . position and align the blower "mouth" with the housing and screw in clockwise , remember not to overtighten , it only handtight strength
Step 8

Put Back the Harness Holder

  • Step#8 - Now is the last second step - is to put back the hardness mounting by screwing back the single self tapping screw, to do so align the fixating dots with the holder (some figiting need) then screw back
Step 9

Putting Back the Panel

  • Step#9 - align the two hooks with the female squarish holes on the housing and align the two front quick clip tabs then gently snug the panel back , that "bingo" that all folks