
FIXONIC
SellSavedMy Fixonic
Official iFixit API visual reference

1st Generation Nespresso Coffee Maker: What components are inside an old Nespresso machine?

Attributed iFixit repair guide for Nespresso.

iFixit Library Nespresso Moderate 1 hour Guide 237875
Open the authorised source
Licensed iFixit integration

This attributed iFixit guide is displayed through Fixonic's recorded commercial API permission. iFixit remains the independent source and author of the procedure.

Step 1

Repair step

  • First-generation Nespresso coffee machine, now vintage, from when machines were almost 100% repairable, unlike today where the materials are of quite poor quality. We can see it here with the side covers and the upper housing removed.
  • What usually fails on this PCB? The large rectangular 470 nF / 275V capacitor (marked in photo 3). It loses its capacitance, causing the machine's LEDs to flash or appear "dim," preventing the water from heating up and rendering the machine inoperable.
  • On this PCB, for example, on the right we can see the typical remains indicating that there has been a cockroach inside the machine; "the board is stained." Black arrows.
Step 2

Repair step

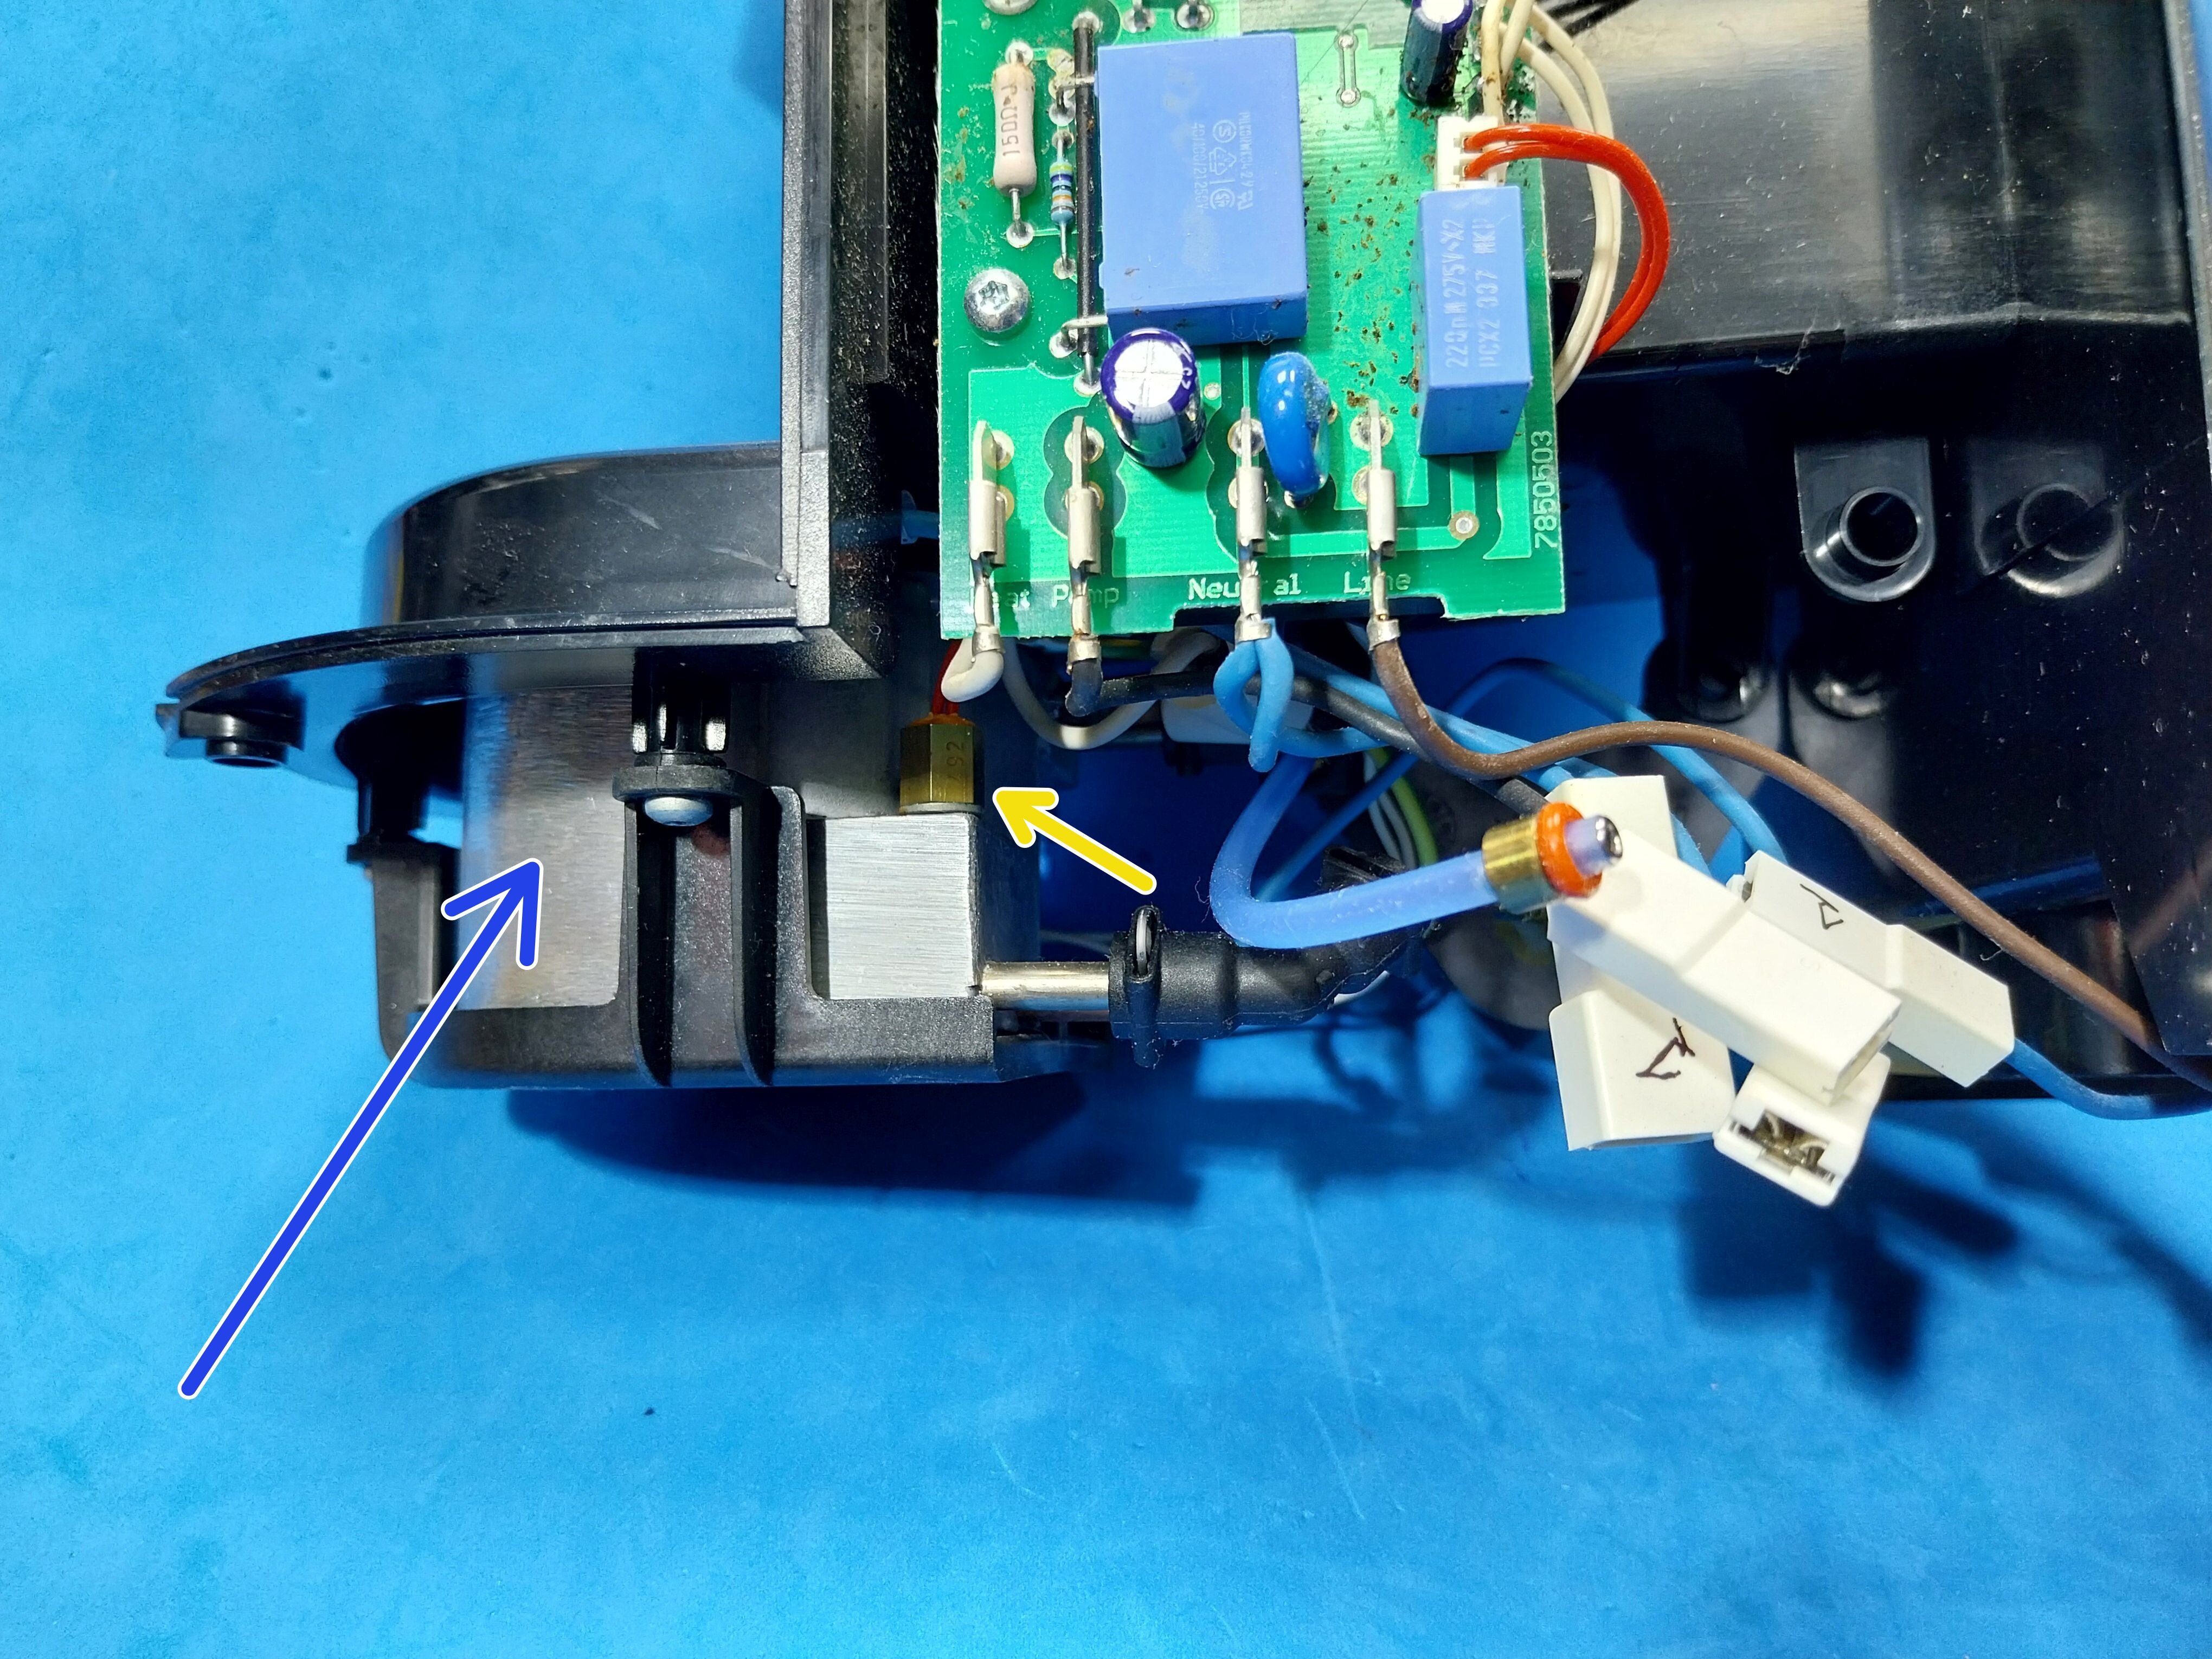
  • In the front, we see the boiler that heats the water (Blue Arrow) and the NTC probe that measures the temperature of the boiler water (Yellow Arrow).
  • The NTC probe provides a different measurement in ohms depending on the water temperature; it should never be an open circuit = no measurement in ohms.
Step 3

Repair step

  • Some of the machine screws are removed with a Torx T10 driver bit.
Step 4

Repair step

  • One of the typical places where limescale or mineral deposits tend to accumulate is in the tube that runs from the bottom of the reservoir, where it connects, to the flow meter inlet; it can be easily removed and cleaned. To replace it, we must fill it with water.
Step 5

Repair step

  • The blue power input cable is attached to the bottom of the boiler and has a thermal fuse in line; if the machine does not turn on, it is very common for this fuse to have blown. In other Nespresso models, there are 2 thermal fuses, one on each of the wires: Blue = Neutral and Brown = Live.
Step 6

Repair step

  • View of one of the thermal fuses; this machine only has 1, between the input cable and the PCB.
Step 7

Repair step

  • The PCB is secured by 2 Torx T10 screws; we can check the underside of the PCB to see if we can visually observe any issues.
  • Other guides where I show the replacement of the large rectangular blue capacitor. Cafetera Nespresso Delonghi EN 95.R