FIXONIC
SellSavedMy Fixonic
Official iFixit API visual reference

2011-2013 Scion tC Oil/Oil Filter Replacement

Oil changes are an important part of...

iFixit Library 2011-2013 Scion tC Moderate 30 minutes Guide 42182
Open the authorised source
Licensed iFixit integration

This attributed iFixit guide is displayed through Fixonic's recorded commercial API permission. iFixit remains the independent source and author of the procedure.

Guide overview

Before you begin

Oil changes are an important part of maintaining any vehicle and to ensure your Scion’s longevity. Conventional oil changes should be done every 3000-5000 miles. If using synthetic oil, you should change it closer to every 5000-7000 miles. With a couple tools and the right supplies, changing your oil on a 2011-2013 Scion tC is not difficult. It is important to be cautious when changing your oil or anytime you are under a vehicle. Make sure your car is secure on jack stands or ramps before getting underneath. Also let the engine cool off before changing your oil so that the oil is not too hot. After purchasing the supplies and gathering the tools, follow this guide to replace the oil and oil filter in your 2011-2013 Scion tC. Note: Always check with the manufacturer or the manual provided with your vehicle to determine the proper oil weight to use. Warning: Conducting maintenance or repair on your vehicle can be dangerous. Exercise extreme caution when following this guide.

Step 1

Repair step

  • Open the spare tire compartment in the trunk of the vehicle by pulling up on the black tab.
Step 2

Repair step

  • Locate the manufacturer supplied jack and jack handle in the spare tire compartment; these will be needed for the replacement.
  • This is an emergency jack, and is not safe to use for routine maintenance. Use a floor jack with a weight rating appropriate for your vehicle.
Step 3

Repair step

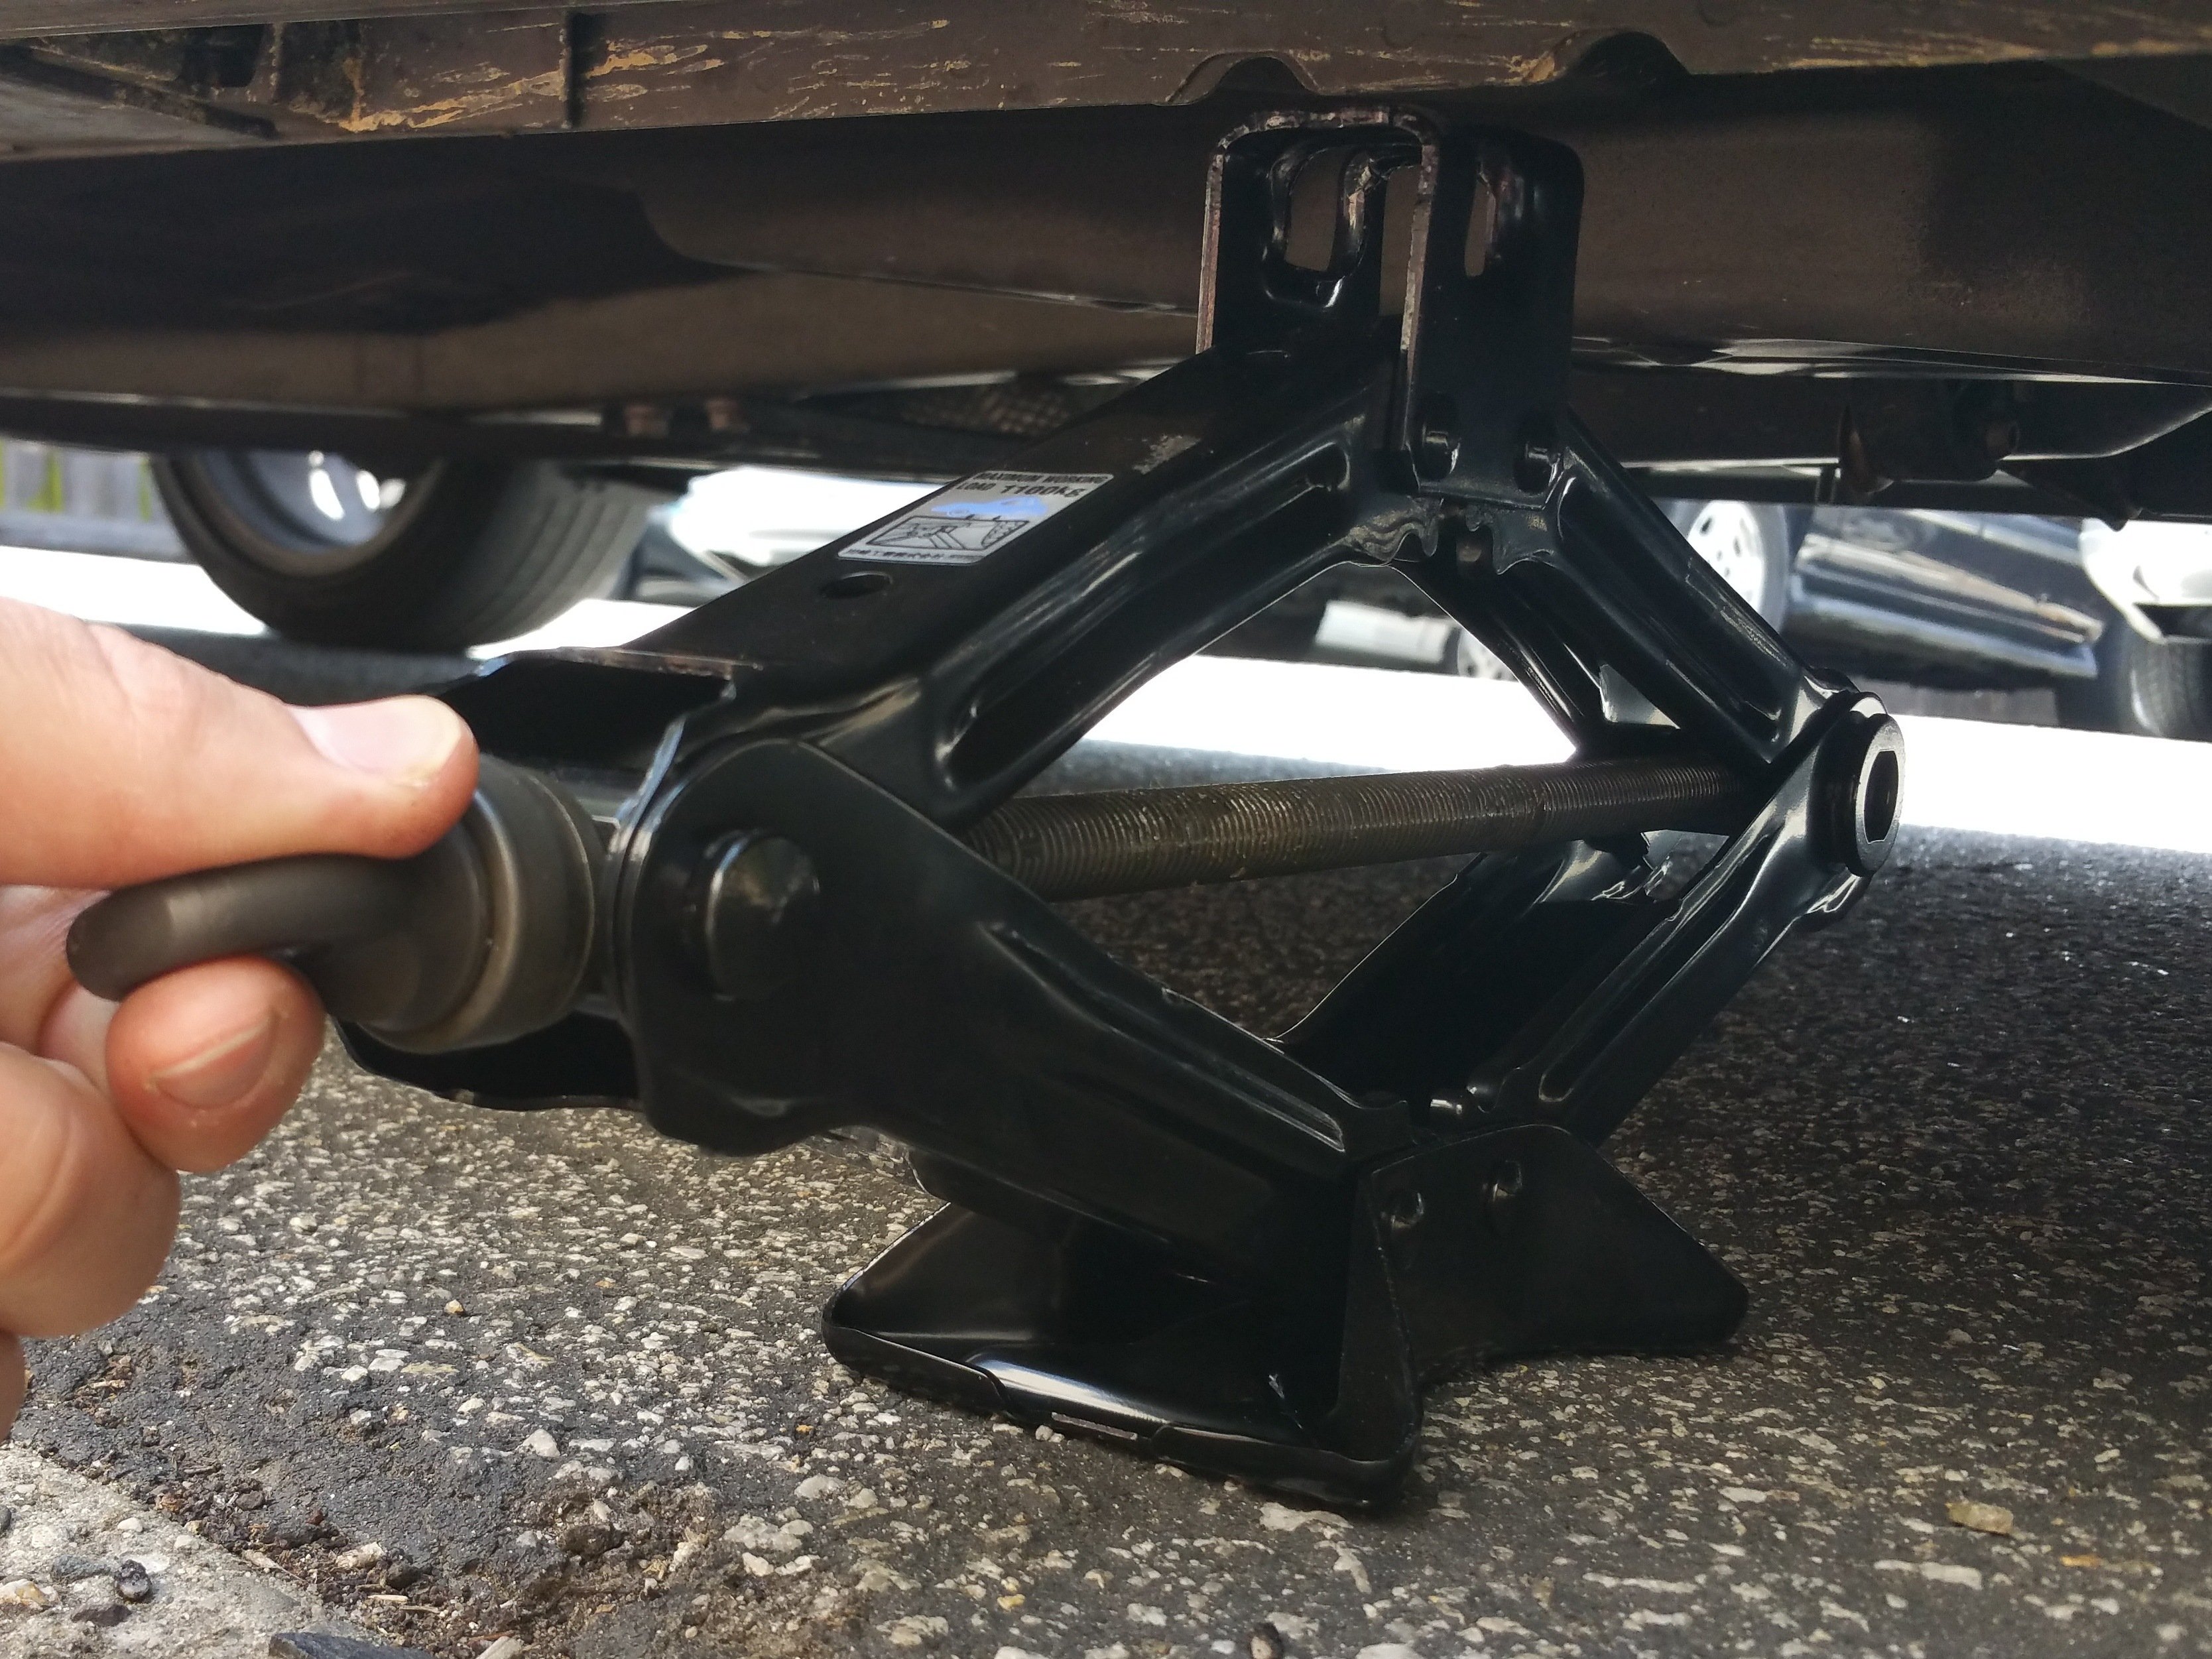
  • Place the jack approximately 2 feet behind the passenger wheel tire at the shown location. Finger tighten the jack until snug against the frame.
  • It's best to avoid using the jack included with the car. If at all possible, use at least a 2 ton floor jack.
Step 4

Repair step

  • Place the jack handle in the jack to begin lifting the car.
Step 5

Repair step

  • Using two hands, turn the jack handle clockwise and raise the car.
Step 6

Repair step

  • Raise the car until the jack stand can fit underneath the frame. Place the jack stand under the frame as close to the jack as possible.
Step 7

Repair step

  • Lower the car onto the jack stand by turning the handle counterclockwise. Remove the jack once the load is taken off.
Step 8

Repair step

  • Once the jack stand is securely in place locate the engine oil drain plug. This is most accessible by crawling on your back from the front of the car.
Step 9

Repair step

  • Using the 14mm socket wrench, loosen the drain plug by turning counterclockwise until you can turn the plug by hand.
  • Be careful not to loosen all the way to avoid spilling oil.
Step 10

Repair step

  • Once the plug is slightly loose, place the oil drain pan underneath the plug, remembering to account for the arc of the stream when placing the oil pan.
  • Continue to loosen the plug until oil begins to flow.
Step 11

Repair step

  • Allow oil to drain freely until drops of oil are slowly coming from the drain. Then re-tighten the oil drain plug using the 14mm socket wrench.
  • Do not over-tighten the drain plug. Only apply approximately 20 lbs to the end of the wrench.
Step 12

Repair step

  • Locate the oil filter. This is most accessible on your back from the front of the car. The filter should be about a foot closer to the front of the car from the oil drain plug.
Step 13

Repair step

  • Using the 3/8 inch socket wrench with extension, loosen the oil filter by putting the extension in the square hole in the filter and turning counterclockwise.
Step 14

Repair step

  • Place the oil drain pan directly under the filter. Fully loosen the filter by hand until you are able to remove it from the vehicle.
Step 15

Repair step

  • Remove the paper filter from the filter cartridge; this is disposable. Use the flathead screwdriver to pry the o-ring off the cartridge.